- Author Jason Gerald [email protected].
- Public 2023-12-16 10:50.
- Last modified 2025-01-23 12:04.
India is a big country. You must draw 29 states and seven union territories. The map of India has a large portion that can be drawn vertically and some of it is spread to the east and west. If you start by dividing the paper into numbered squares, drawing parts of the map inside, and paying attention to detail, you'll be able to draw them precisely.
Step
Part 1 of 4: Creating Guides
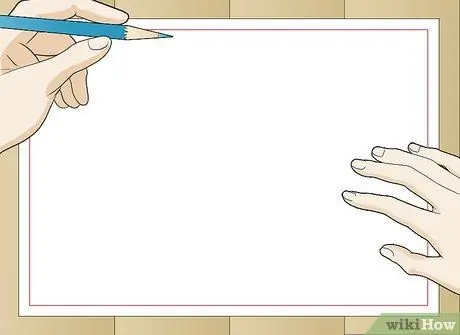
Step 1. Make a box
Draw a box the size of the map you are going to create.
- Make a mark that divides the box in half vertically and horizontally.
- Make very faint guide lines using a thin pencil so you can easily erase them when you're done drawing.
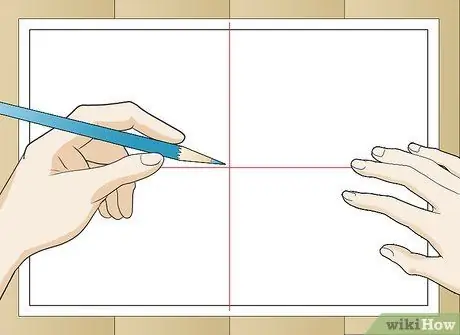
Step 2. Divide the square into four equal parts
Draw a line in the middle of the vertical and horizontal lines of the box using the scale.
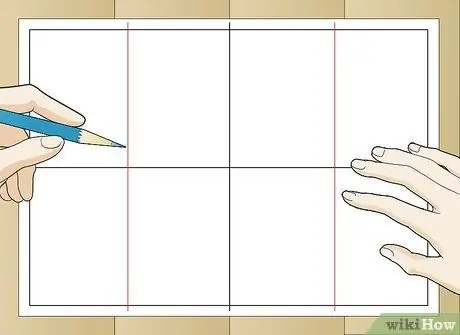
Step 3. Divide the halves vertically
Use the scale to divide the vertical halves into four equal parts.
- These four portions will help you maintain the correct proportions of the India map.
- You can delete these guide lines when you are done drawing the map.
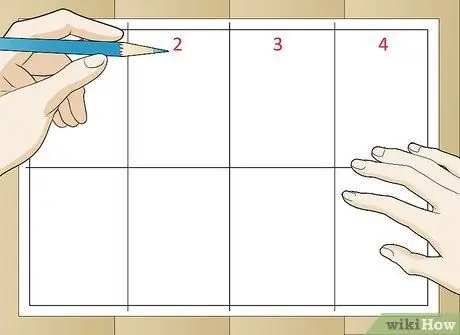
Step 4. Number the part
So that you can understand which squares to use to draw a particular part of the map, number the boxes as shown in the image above.
Part 2 of 4: Drawing India Map
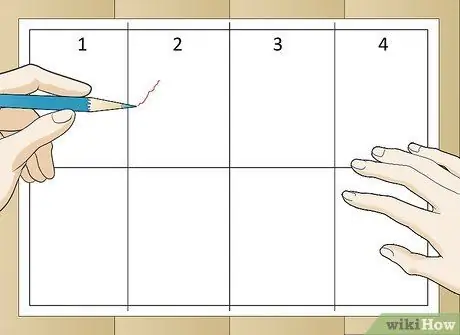
Step 1. Use wavy lines
Use curved or wavy lines when drawing maps.
Notice where the line should curve in and curve out. Some line waves are longer and some are shorter
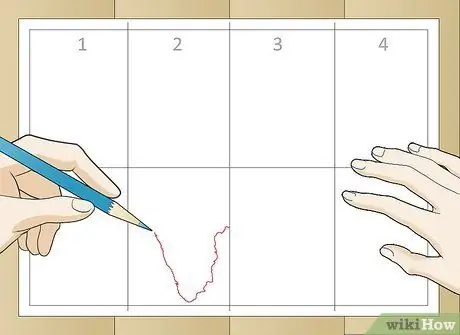
Step 2. Draw the bottom half of the map
The bottom or south India can be drawn like the side of a person's face looking to the right of the page. You can start by creating a 'v' shape.
- This bottom will be in the second box.
- Almost the entire (length) of the map of India will be adjusted in this 'second' box.
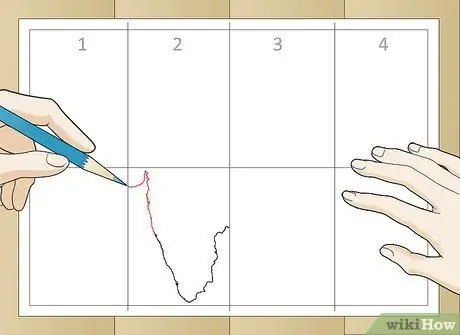
Step 3. Complete the bottom left
Make the entire bottom of south India by continuing from the previous step.
- Looking at the horizontal line you've made, draw a cup-like part on the far left of the box.
- Draw an upward slash or wavy line.
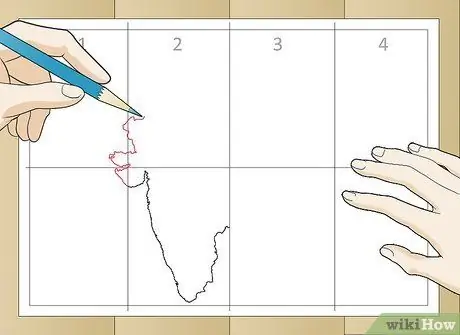
Step 4. Continue to the top of the map
Draw another cup-like part similar to the previous one, but with a smaller size.
- Make a rectangular section as you proceed.
- Make an ascending and descending section. These sections will help you maintain proportion and alignment with the other half and help create the states on the map.
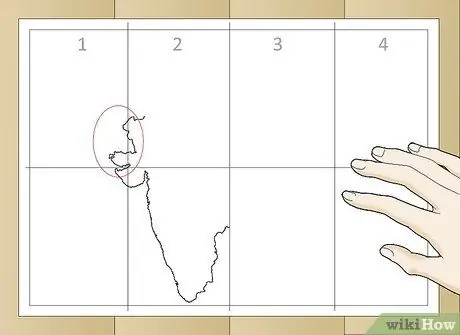
Step 5. Measure the distance
To maintain proper proportions, understand and measure the distance between two shapes using a visual approximation or using a scale.
Understand and mark the size of the background (blank white area) and the object you are drawing
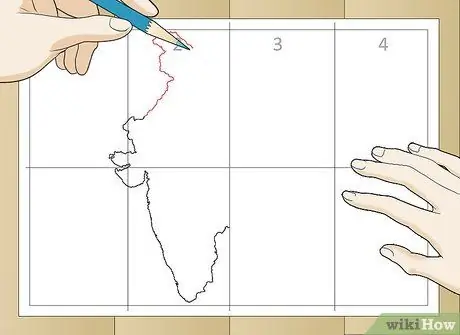
Step 6. Complete the top left
Make the top or northern India.
- First, draw a half square and on top of it, draw a half almond shape.
- Notice the square line that goes into the other box.
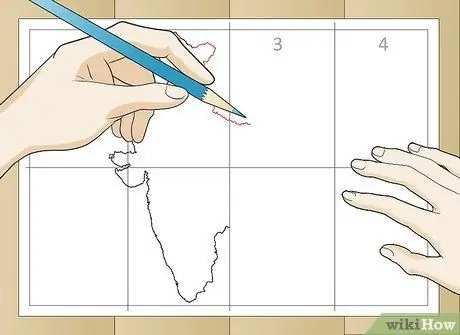
Step 7. Complete North India
Make a sloping ‘L’ shape followed by a rock-shaped area in square number 2.
- Make a shape like the letter 'm' and a small square.
- Make an inverted 'L' shape followed by one additional line so that it looks like a ladder.
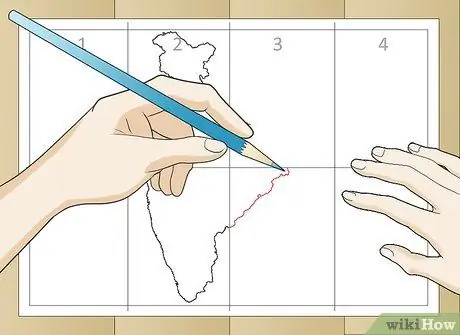
Step 8. Complete the southern part
Continue from the last point in the box you previously worked on.
Make the correct marks and indentations on the line. Keep this wavy line pattern
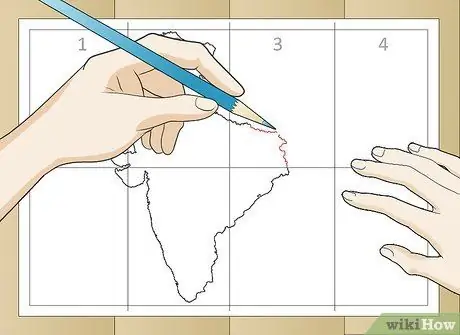
Step 9. Merge the top and bottom
Complete the top towards the east of India. Complete box number 3 with a line that brings together the bottom squares that you created earlier.
- Draw a wavy line followed by three small bumps.
- Draw a straight line and a mound followed by a cone shape.
- Create a slanted 'M' shape and a wavy line that touches the bottom.
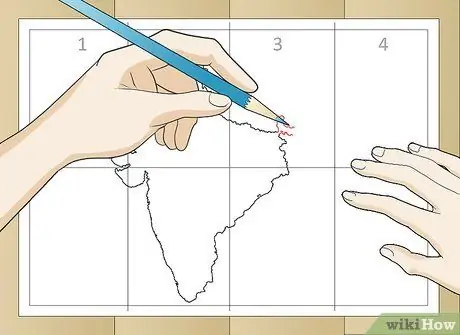
Step 10. Create a small square
Starting from the small distance or cone that has been made above, make a thin rectangle that extends vertically. Continue by making wavy lines and making a square that stretches horizontally.
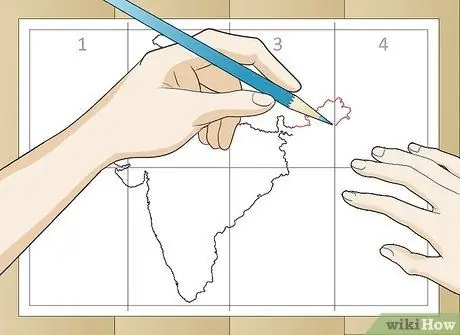
Step 11. Create a stone shape to the east
Make an asymmetrical rock shape that touches the square shape you've previously created.
Mark the rounded bumps and conical shapes as shown in the image above
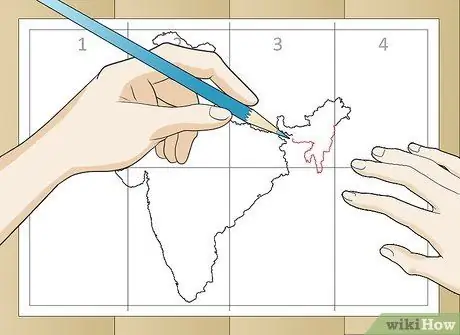
Step 12. Make the final part towards the east
Draw two long, asymmetrical rectangles next to the shape you drew earlier.
The last part of this map of India consists of a small square, some mounds, and a small 'm'
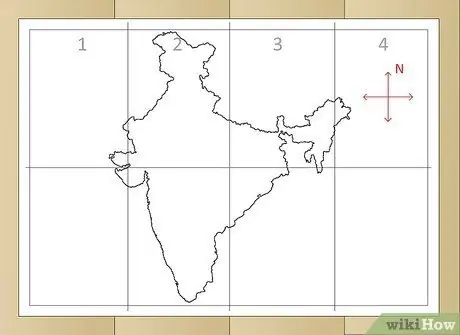
Step 13. Mark the directions
Create a '+' symbol to mark the map direction.
- Write a capital 'N' to indicate that the top of the map is the northern part of India. This sign also gives information that the opposite side or bottom of the map is south, the left is the west of India, and the right is the east of India.
- You can also make small arrows at the ends of the plus signs.
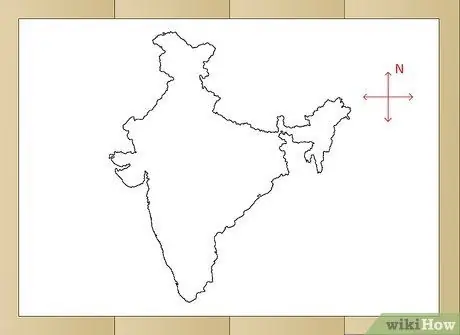
Step 14. Bold the map outline
Bold the map outlines with a black pen, sketch pen or any other tool or color you want.
Delete the line of sight you created earlier
Part 3 of 4: Marking the 29 States and 7 Union Territories and Their Capitals
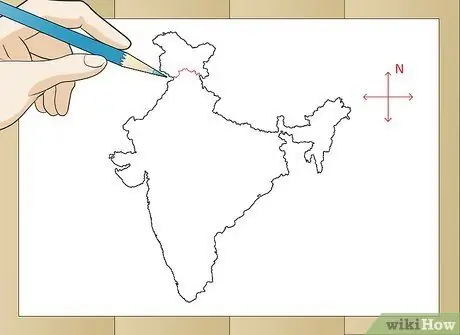
Step 1. Mark Jammu and Kashmir
Jammu and Kashmir is the topmost or northernmost state.
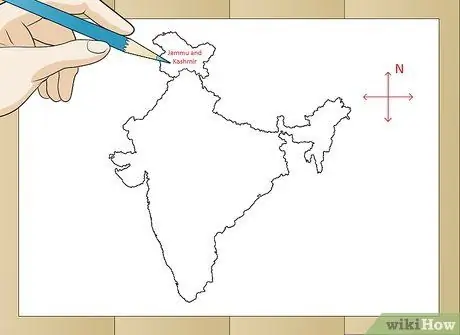
Step 2. Write down the name of the state
Use a non-slip pen or pencil to write down the inside of the map.
- Write Jammu and Kashmir using the typeface of your choice. Make sure it can or is easy to read.
- Write the name of the capital city accompanied by a symbol or circle so that there is a difference between the names of the states/Union Territories and the names of the capitals.
- Write 'Srinagar' as the capital city under the name of the state.
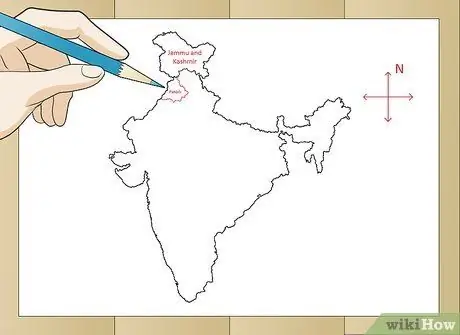
Step 3. Draw a boundary for Punjab
Write the name of the State 'Punjab' and the capital city 'Chandigarh' as you would write Jammu and Kashmir.
You can write it down with a pencil first so you can erase it if there is a misspelling and after that, you can write it down with a pen
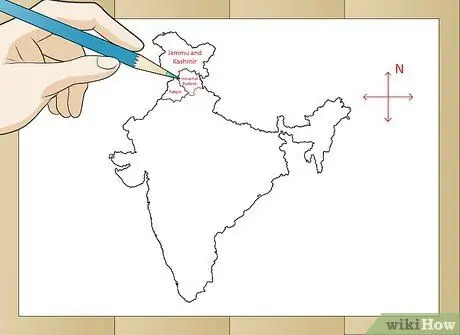
Step 4. Draw the boundary next to Punjab
Draw a boundary for Himachal Pradesh along Punjab.
Write Shimla as the capital city
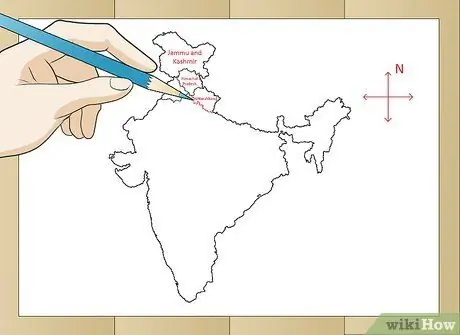
Step 5. Draw a border for Uttarakhand
Draw the borders of Uttarakhand and write the capital, 'Dehradun'.
If the name is too long to fit inside the boundary line, you can write it outside the boundary with some names on the map and some outside
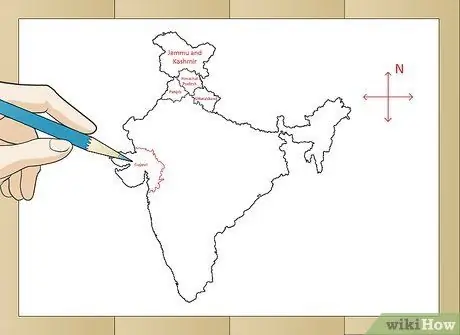
Step 6. Mark Gujarat
Mark Gujarat in the west of India.
- To maintain good proportions and prevent you from making mistakes in drawing the boundaries, shift from top to bottom or from left to right of the map.
- When you reach the center of the map, you'll notice that the proportions are well maintained and no areas are straying out of the actual area.
- Write 'Gandhinagar' as the capital.
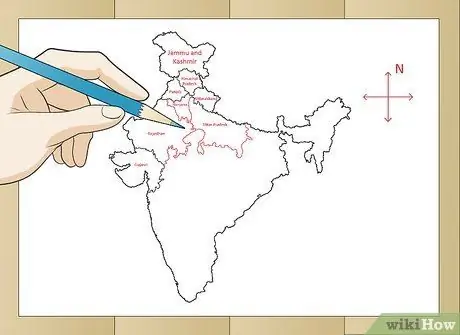
Step 7. Mark the border areas
Mark 'Rajasthan' above 'Gujarat' and write 'Jaipur' as the capital city.
- Create a regional boundary of 'Uttar Pradesh' under 'Uttarakhand' and name the capital city 'Lucknow'.
- Demarcate 'Haryana' and its capital 'Chandigarh' between Rajasthan and Uttar Pradesh.
- Try drawing the state area to scale by understanding the distance between the two states. This process will be especially useful if there are two states that are stuck parallel or sequentially.
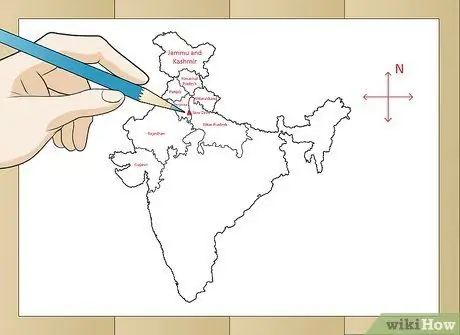
Step 8. Mark the capital city of the country
Write the capital city of India, New Delhi, with a special symbol which will be described in the legend below.
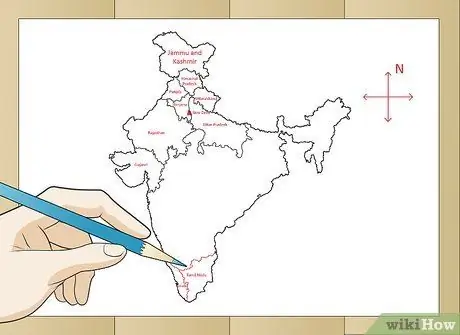
Step 9. Move south
Drawing sequentially from top to bottom may result in an error of proportion as previously mentioned. Try moving in another direction like from the south. As you move from south up, you'll get to the center of the map in just the right proportions.
- Mark the state boundaries of 'Kerala'. The name of the capital, 'Thiruvananthapuram', is too long to be written in its territory. Therefore, write on the outside of its territory along the area of Kerala state so that readers can understand that Thiruvananthapuram is the capital city of Kerala.
- Mark the state 'Tamil Nadu' next to Kerala and write the capital, 'Chennai'.
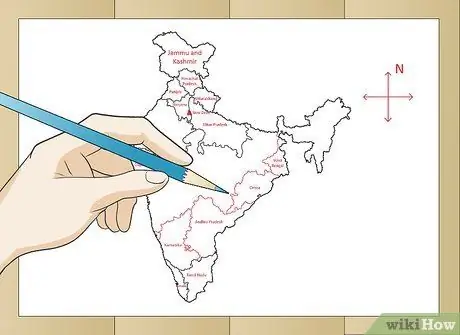
Step 10. Mark the boundaries of the states that are attached to each other
The boundary line in this area is slightly wavy. To avoid confusion and to avoid straying from the actual area, draw guidelines for the states.
- Mark 'Karnataka' over Kerala and Tamil Nadu. Mention the capital city, 'Bengaluru'.
- Mark the state boundary of 'Andhra Pradesh' next to Karnataka. Mention the capital city, 'Hyderabad'.
- Draw a small border for 'Goa' above 'Karnataka' and write the name of the capital, 'Panaji'.
- Mark the boundary of the state of 'Maharashtra' between Gujarat and Goa. Mention 'Mumbai' as the capital city of Maharashtra.
- Draw a guideline above 'Andhra Pradesh' for the state of 'Odisha' or 'Orissa'. Write part of the name of the capital, 'Bhubaneshwar', within the Odisha region and partly outside the map, but across Odisha so that 'Bhubaneshwar' appears to be part of Odisha.
- Mark the boundary of 'West Bengal' above Odisha and write the name of the capital, 'Kolkata'.
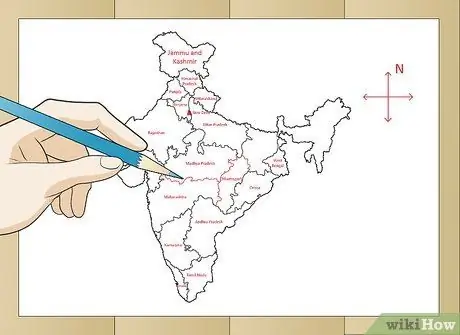
Step 11. Use guide lines to complete the boundaries of the area
Combine the marks you have made for the states according to their shape and area.
- Write the names of the states and their capitals as mentioned above.
- Draw the boundaries of the state located in the center of India, 'Madhya Pradesh'. Mention the name of the capital, 'Bhopal'.
- Draw boundaries for 'Telangana' and its capital, 'Hyderabad'. Telangana is directly adjacent to several states, such as Maharashtra, Karnataka, Andhra Pradesh, Odisha and Chhattisgarh.
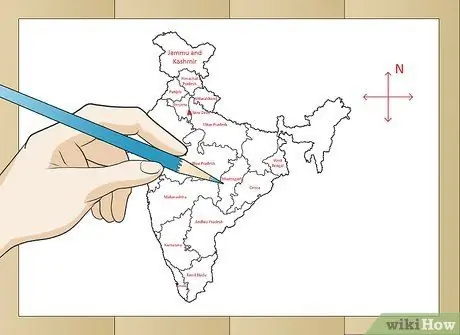
Step 12. Draw a boundary for Chhattisgarh which lies above Telangana
Write the name of the capital, 'Raipur'.
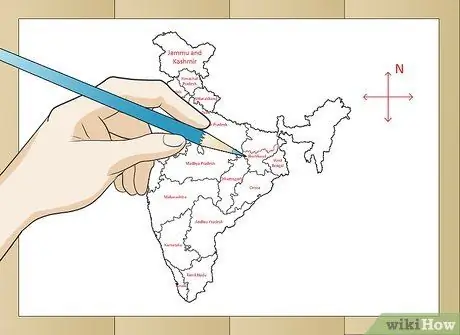
Step 13. Create the State of Jharkhand
Draw a boundary for the region of Jharkhand and its capital, 'Ranchi'.
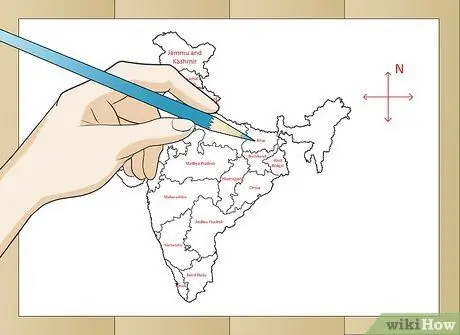
Step 14. Mark Bihar
This section is complete with Bihar which borders Uttar Pradesh, Jharkhand and West Bengal.
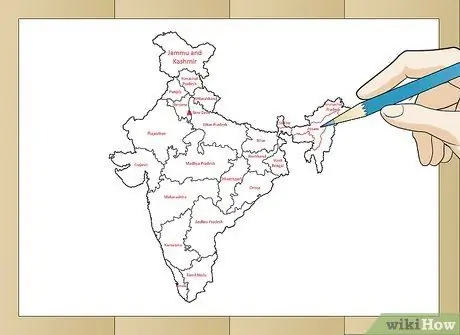
Step 15. Mark the longitudinal section in the easternmost area
This is the outermost part of the map with a relatively smaller area.
- Write the name of the state 'Sikkim' in the prominent square. Write the name of the capital city, 'Gangtok'.
- Draw boundaries for the eight states that fall within this area.
- The areas are small, while their names are long. Therefore, you should adjust the font size and write it neatly.
- Write the name of the state in the southeast of Sikkim as 'Assam' and the name of the capital, 'Dispur'.
- Mention 'Arunachal Pradesh' above Assam and 'Itanagar' as the name of the capital city.
- Make the state 'Nagaland' and the capital, 'Kohima'.
- Below that, write the state of 'Manipur' and the name of the capital, 'Imphal'.
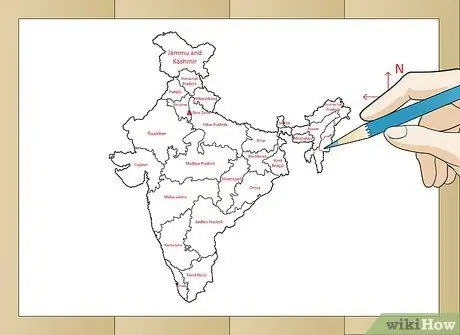
Step 16. Complete this section
Draw boundaries for the two states that are at the bottom and are connected to each other. Write 'Mizoram' and its capital, 'Aizawl' and 'Tripura' with the capital city 'Agartala'.
Mark 'Meghalaya' under 'Assam'. Say the name of the capital, 'Shillong'
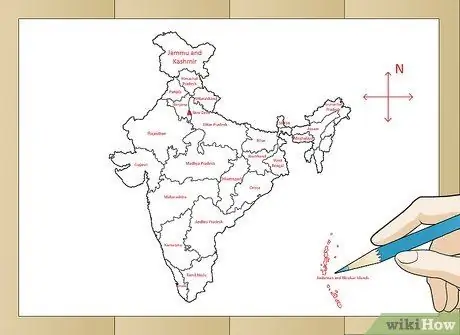
Step 17. Mark the Andaman and Nicobar Islands
Write down the name of the Union Territory - 'Andaman and Nicobar' and the capital, 'Port Blair', as shown on the outside of the map.
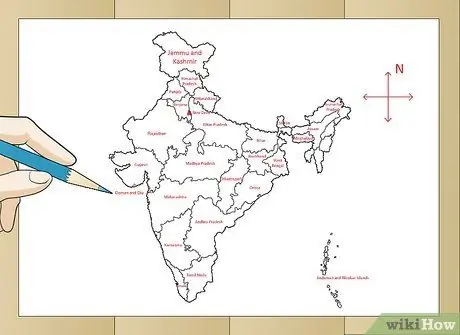
Step 18. Mark another Union Territory to the west of India
Mention 'Daman and Diu' with the capital, 'Daman' and 'Dadra and Nagar Haveli' with the capital 'Silvassa'.
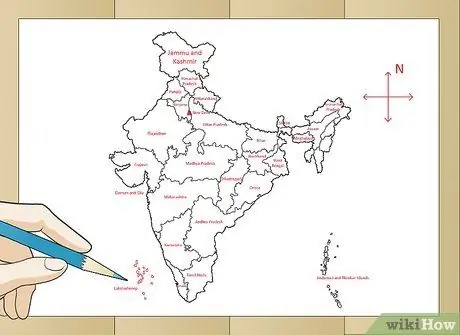
Step 19. Mark Lakshadweep in the south
Name the Union Territory 'Lakshadweep' and its capital, 'Kavaratti', under the Union Territory above.
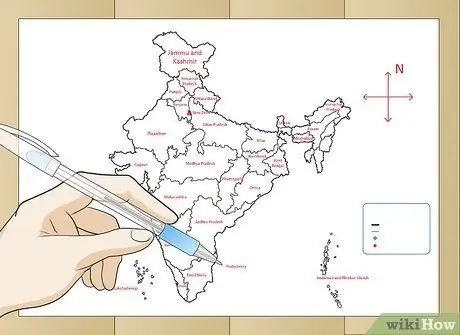
Step 20. Mark Puducherry
Mark the Union Territory 'Puducherry' in the area opposite Lakshadweep towards 'Tamil Nadu'. Mention the capital city, 'Pondicherry'.
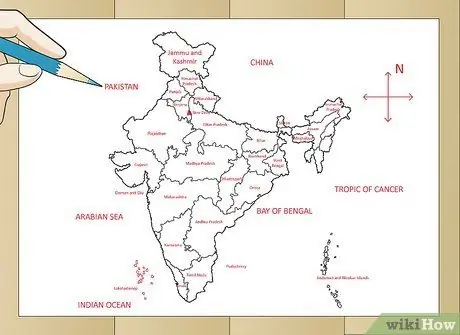
Step 21. Mark the border areas
You can mark Indian border areas.
- Write Pakistan in the upper left area.
- Arabian Sea in the blank to the left.
- Put the Indian Ocean under the Arabian Sea.
- Write the Tropic of Cancer in the center of the map to the right.
- Add Nepal just above India.
- Add China in a large area above Nepal.
- Place the Bay of Bengal at the bottom right of the page.
Part 4 of 4: Setting the Map
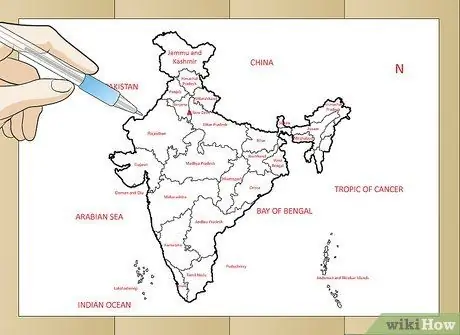
Step 1. Bold the map outline
Use a pen of a certain color or any type of writing utensil to outline the map. This process will make the map stand out and create differences between the boundaries of the country as a whole and the boundaries of the states within it.
- You can also use a ballpoint pen or a thick black pen or a sketch pen.
- You can color the states with different colors of your choice.
- You can also color the outside of the map.
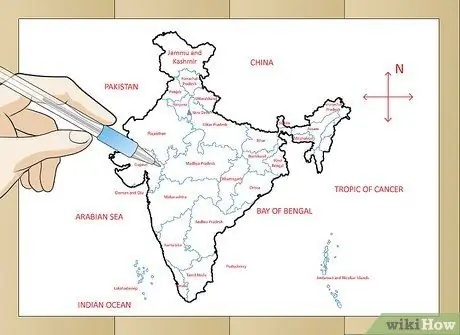
Step 2. Draw state borders with other colors
Use lines of different colors or thicknesses to create state borders.
- You can also draw borders creatively, such as using dotted lines, thick lines, thin lines, etc. Record these symbols in the 'legend'.
- You can write 'India' on the inside or outside of the map. Make the writing bold and clear so that it is clearly visible. If you're writing on a map, make sure it doesn't overlap any other posts you've made earlier.
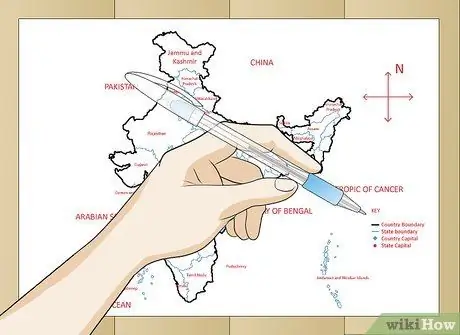
Step 3. Understand that legends are an important part of the map
The legend describes the symbols you have used to mark details such as borders, states, capital cities, etc. The legend is usually created at the bottom right of the map.
- You can create a legend box first, then fill it with details or write down the legend details first, then create a box around it. If you write the details of the legend first, you don't have to worry about whether the entire legend can be written in the box and whether you have to write in lower case.
- If you have used a thick black line to mark the boundaries of the territory, make a thick black line and write 'Boundary' next to the line. This will show how you mark country boundaries.
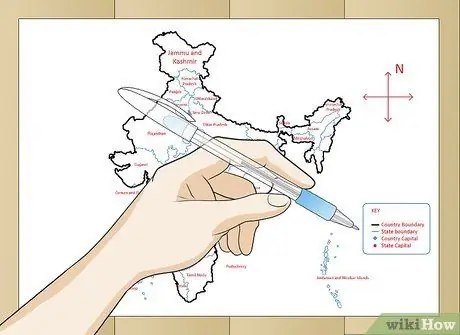
Step 4. Complete the details in the legend
Write 'Legend' as the title.
- To the left of the legend, draw the symbols that have been used to mark the nation's capital and the capitals of states or Union Territories.
- Continue by marking or coloring the lines you have made to mark the boundaries of the country as a whole, the states and the Union Territory.
- On the right, state the meaning of the symbol.
- Draw a line around the map legend to make it look neat.
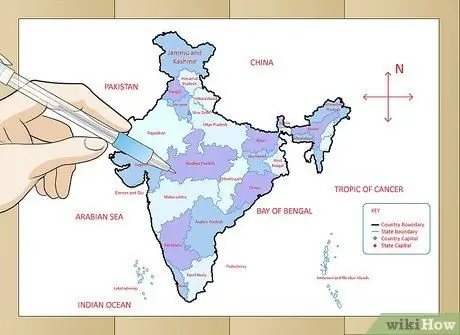
Step 5. Color the map
You can choose to color the inside of the map. Coloring with colored pencils or other tools can make your map nice and bright. You can color each state and Union Territory a different color so that each division looks different from the other.
If you use different colors, you will avoid confusion about the final and starting boundaries of the region
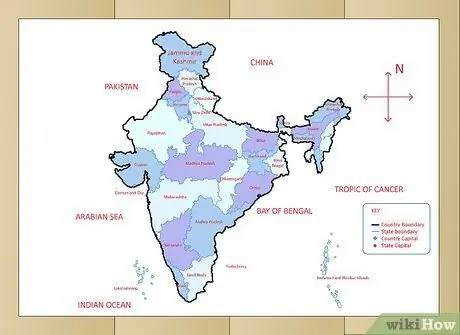
Step 6. Done
Tips
- Make the basic shape of the map first, then add bumps, curves, squares, etc.
- You can create complete guide lines with more vertical and horizontal lines so you can better judge how much you have to draw in one box.
- You can use map images. If you make a mistake, you can delete it and correct it at your discretion.
- Compare the right and left sides of each piece to make sure it's the right size and position.
Warning
Don't miss small details as this can make it difficult for you to connect parts of the map
Sources and Citation
- https://www.mapsofindia.com/maps/india/india-political-map.htm
- https://www.mapsofindia.com/maps/india/map-of-india-political.gif
- https://www.mapsofindia.com/maps/schoolchildrens/statesandcapitals.htm


