- Author Jason Gerald [email protected].
- Public 2023-12-16 10:50.
- Last modified 2025-01-23 12:04.
When you are viewing an image on an LCD (Liquid Crystal Display) monitor, it should be clear and sharp and the colors bright and vivid. Usually setting the LCD monitor colors to their default settings will result in optimal image quality. However, if the default LCD monitor settings do not provide good image quality, you can calibrate the monitor screen to improve the quality.
Step
Method 1 of 2: Setting the LCD Monitor Resolution

Step 1. Turn on the computer
Wait until the main Windows screen appears.

Step 2. Make sure no programs are running

Step 3. Move the cursor to the "Start" button (or the Microsoft Windows logo) at the bottom left of the screen
Click the button to display a menu containing various options.

Step 4. Click the "Settings" button
This button is in the shape of a gear and is to the left of the Start menu.

Step 5. Click the "System" category and select the "Display" option
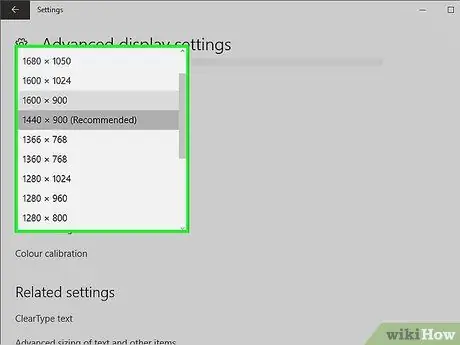
Step 6. Click the "Display resolution" box and wait for the drop-down menu to appear on the screen
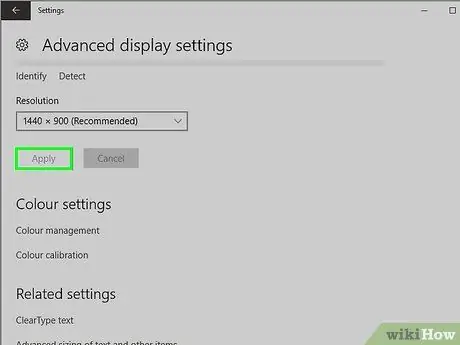
Step 7. Select the desired resolution available on the drop-down menu
After selecting the resolution you want, the monitor resolution will change automatically.
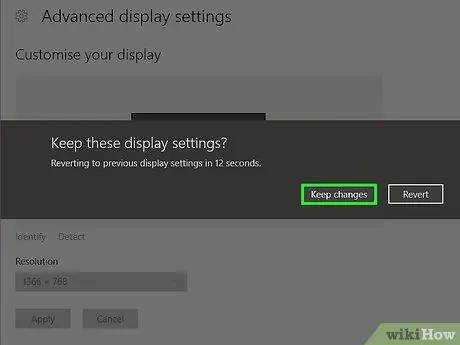
Step 8. Wait for the monitor resolution to change and a confirmation window appears on the screen
Click the " Keep Changes " button if you want that resolution. Otherwise, click the "Revert" button to cancel the resolution change.
Method 2 of 2: Performing Color Calibration on the LCD Monitor

Step 1. Move your cursor to the "Start" button (or Microsoft Windows logo) at the bottom left of the screen
Click the button to display the Start menu and click the gear-shaped "Settings" button.

Step 2. Click on System and select the Display option
After that, click the Advanced display settings link at the bottom of the page, select the “Display adapter properties for Display 1” link, click the “Color Management” tab, and click the “Color Management…” button.

Step 3. Click the "Advanced" tab in the Color Management window and click the "Calibrate display" button at the bottom of the window
After that, the "Display Color Calibration" window will appear on the screen. Click the Next button at the bottom right of the screen to start the color calibration process.
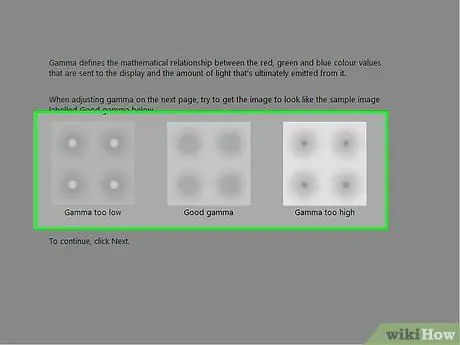
Step 4. Follow the steps written on the screen to adjust the gamma (gamma), brightness (brightness), contrast (contrast), and color balance (color balance)
After setting these settings, click the "Next" button until all steps have been completed.

Step 5. See the " You've successfully created a new calibration " page

Step 6. Click the " Previous Calibration " button to see the display screen before calibration
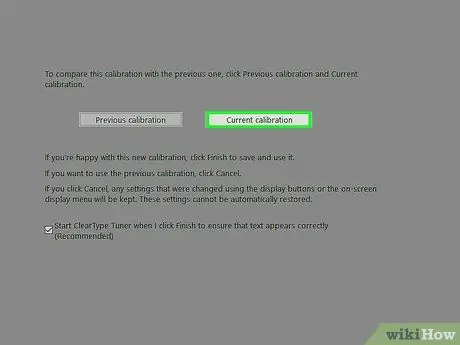
Step 7. Click the "Current Calibration" button to see the screen display after calibration

Step 8. Compare the two screens and decide which screen display you want

Step 9. Click the "Finish" option to select a new calibration

Step 10. Select the "Cancel" option to cancel the changes and return the monitor to its previous settings

Step 11. Use an LCD monitor with a new look
Tips
- Low resolution can be used on LCD monitors. However, this will cause the image to be smaller, squished to the center, drawn in all directions, or have black bars.
- Many monitors have a "Menu" button on the front of the LCD monitor. When pressed, the button will display the "Set basic color settings" menu on the screen. You can adjust the monitor color in this menu. Refer to the LCD monitor's manual to find the location of the buttons as well as the available color calibration settings.


