- Author Jason Gerald [email protected].
- Public 2023-12-16 10:50.
- Last modified 2025-01-23 12:04.
To change Safari preferences on an iOS device, you need to use the device settings menu (“Settings”), and not the Safari app itself. On Mac OS computers, you can change the settings via the browser's “Preferences” menu. Both the mobile and desktop versions of Safari have some of the same settings, but the desktop version has more options.
Step
Method 1 of 2: Safari iOS version

Step 1. Touch the device settings menu or “Settings”
You can find this icon on one of the home screens. The icon looks like a set of gears. Maybe this icon is also stored in a folder labeled " Utilities ".
This method can be followed on iPhone, iPad, and iPod Touch
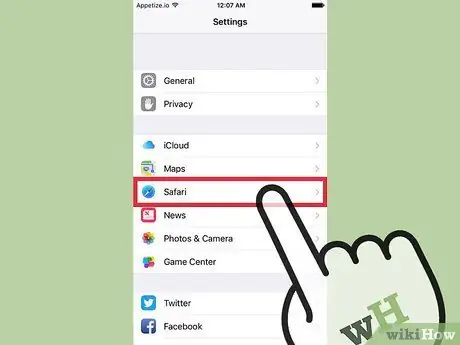
Step 2. Swipe the screen and touch “Safari“
This option is grouped together with several other Apple apps like Maps, Compass, and News.
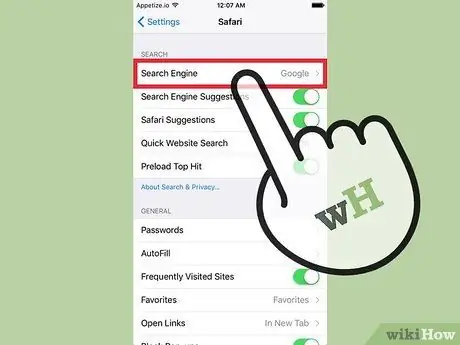
Step 3. Touch " Search Engine " to change the main search engine
You can choose Google, Yahoo, Bing, and DuckDuckGo. The selected option will be the search engine that Safari uses when you type a search keyword into the address bar.
- The " Search Engine Suggestions " feature provides search engine suggestions when you type in keywords.
- The "Safari Suggestions" feature provides search suggestions curated by Apple.
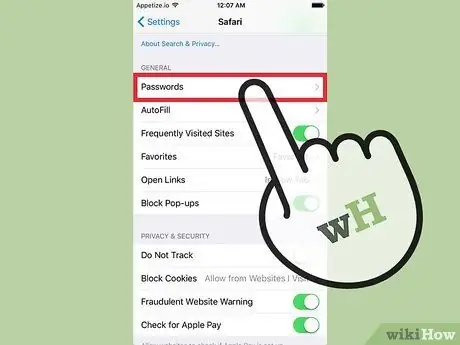
Step 4. Touch "Passwords" to view the saved passwords
You will be asked to enter your passcode before you can see the list of passwords. These entries are the passwords you save for various websites.
Touch an entry to display the saved username and password for the selected site
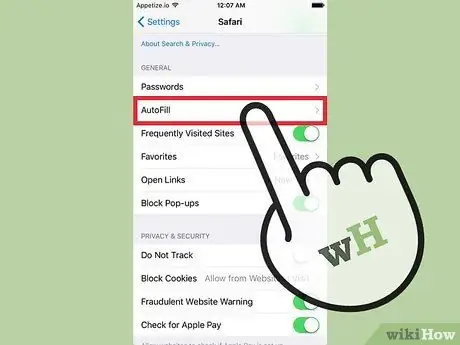
Step 5. Use the " AutoFill " menu to adjust the autofill settings (AutoFill)
AutoFill data is information that is automatically displayed in a form. This feature makes it easier for you when you need to fill in address or payment information. This menu also allows you to manage contact information, as well as manage stored credit card information.
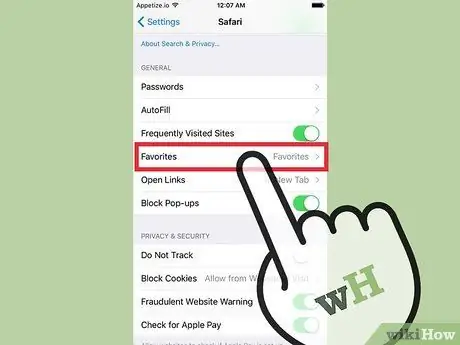
Step 6. Change the favorite sites folder via the " Favorites " option
With this option, you can choose the folder of your favorite sites that you want to use. You can have multiple folders and change them if necessary.
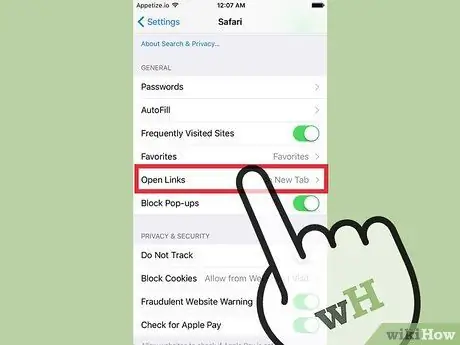
Step 7. Specify the link opening method via the “Open Links” menu
You can open links in a new tab or in the background. When you select " In Background ", the link will open in a new tab, but the browser will not take you directly to that tab.
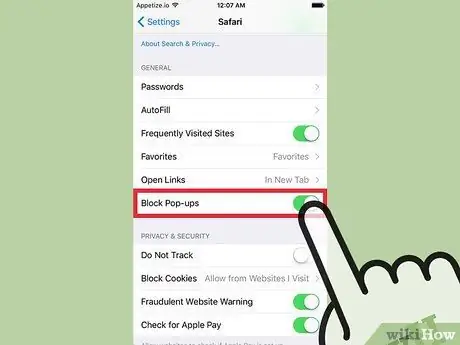
Step 8. Enable pop-up blocker to prevent pop-up windows from appearing
Touch the slider next to the "Block Pop-ups" option to allow Safari to block as many pop-up windows as possible. Thus, pop-up ads will not load. However, this option can trigger problems on sites that use or rely on pop-up windows a lot.
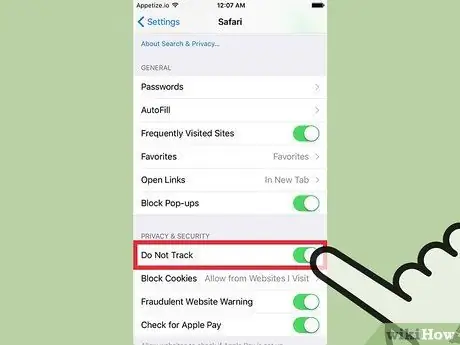
Step 9. Enable the "Do Not Track" option so that the websites you visit cannot track your browsing
When the feature is enabled, Safari will instruct every website you visit not to track your browsing activity. However, the final decision rests with the website and not all sites will stop tracking your activity.
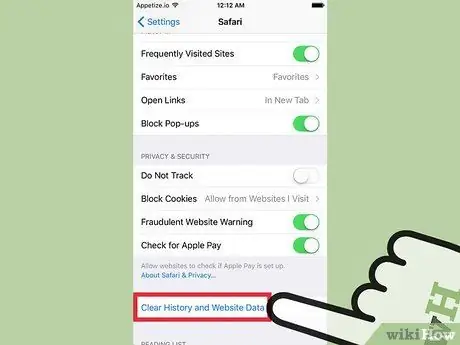
Step 10. Touch "Clear History and Website Data" to clear browsing data
With this option, all browsing history in the browser, including cookies and cache will be deleted. The browsing history on all devices connected to your Apple ID will also be deleted.
Method 2 of 2: Safari MacOS Version
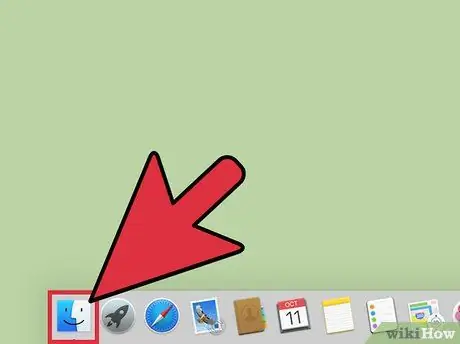
Step 1. Open the Safari browser
You can change Safari settings from the browser directly. Make sure the program is running so that the "Safari" menu appears in the upper-left corner of the screen.
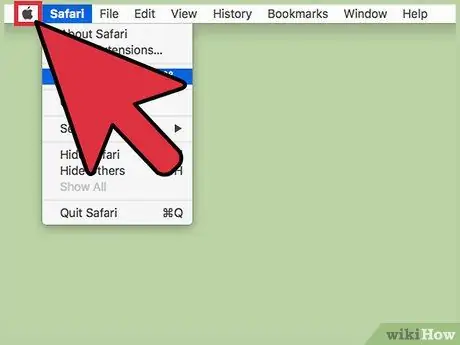
Step 2. Click the “Safari” menu and select “Preferences”
A new window with Safari preferences will open, and the " General " tab will be displayed immediately.
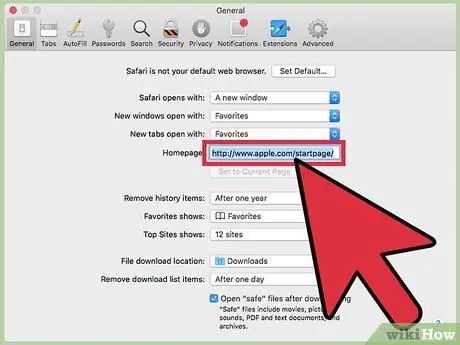
Step 3. Set the browser home page
The " Homepage " column allows you to specify a specific page to open when Safari starts. Click the " Set to Current Page " button to select the page or site that is currently being accessed as the browser's new home page.
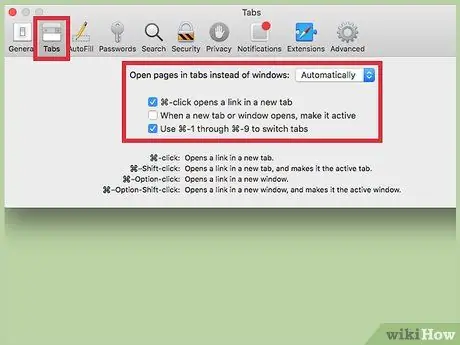
Step 4. Use the "Tabs" segment to change the behavior or attributes of the tabs
You can specify a link opening method and enable shortcuts to open tabs, as well as switch from one tab to another.
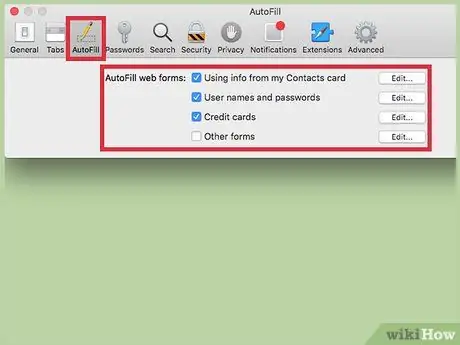
Step 5. Click the " AutoFill " tab to set the autofill information
You can specify information that can be used to automatically fill out forms and credit card fields on the purchase page. Click the " Edit " button next to each entry to select the data you want to use.
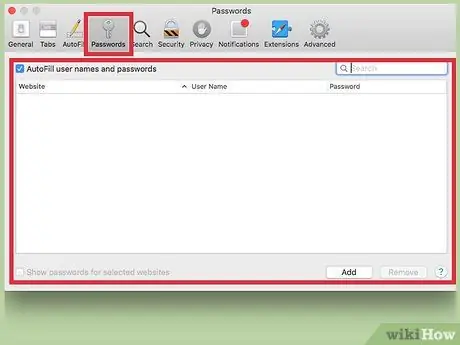
Step 6. Use the “Passwords” tab to view the saved passwords
You can view all websites with saved password entries. Double-click the password entry to view it. You'll be prompted for your Mac's user password before you can continue.
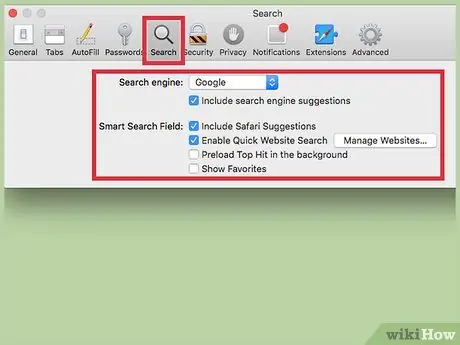
Step 7. Click the “Search” tab to set search preferences
Use the " Search engine " drop-down menu to select the search engine you want to use in Safari's address bar. You can choose Google, Bing, Yahoo, and DuckDuckGo. When typing something into the address bar, the selected search engine will be used.
You can enable or disable some search preferences in this menu, including using the “Safari Suggestions” feature
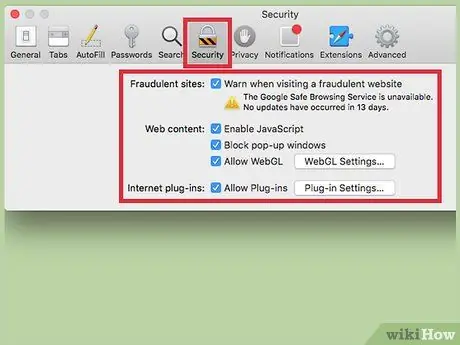
Step 8. Use the “Security” tab to enable or disable security settings
These settings include warnings for notoriously dangerous sites, JavaScript settings, and more. Usually, users can use the default settings of Safari.
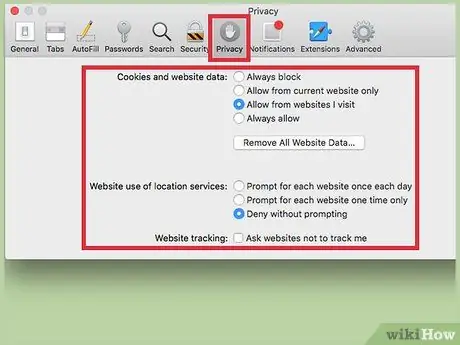
Step 9. Check the privacy settings on the “Privacy” tab
You can adjust cookie and tracking settings on this tab. Location settings are also in the tracking settings segment. You can instruct the website to check if the Apple Pay feature is enabled. Try searching and reading articles on how to use Apple Pay for more information.
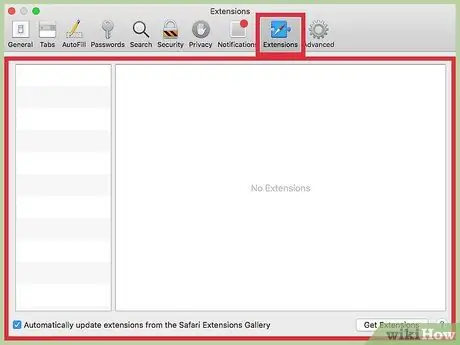
Step 10. Manage extensions on the “Extensions” tab
You can see all installed extensions on this page. Select an option to see the specific controls on the extension. You can click the "More Extensions" button in the lower corner of the window to browse through the various extension options available for Safari.
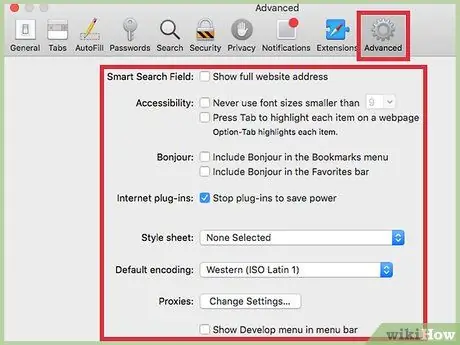
Step 11. Adjust the advanced settings on the "Advanced" tab
This tab contains a variety of other settings, as well as advanced settings that can usually be ignored. There are several useful accessibility and zoom settings on this tab, especially for users who have difficulty reading small text.


