- Author Jason Gerald [email protected].
- Public 2023-12-16 10:50.
- Last modified 2025-01-23 12:04.
If a ringtone shows up in an app like Zedge, someone else is likely already using it. The only way to have a unique ringtone is to make your own. There are several applications that "supposedly" can help you create ringtones on your iPhone, but these applications require syncing with iTunes on a computer. Well, why should you download an extra app when you can make your own ringtone from any song in your iTunes library in just a few minutes? These steps are easy to follow, either on a PC or a Mac computer.
Step
Part 1 of 3: Preparing iTunes
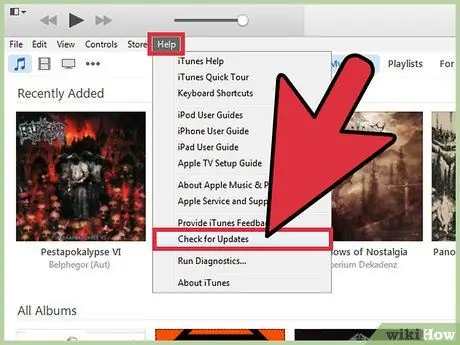
Step 1. Make sure you are using the latest version of iTunes
Open iTunes and make sure the program is up to date.
- Windows: First, if you don't see the menu bar at the top of the iTunes window, press Ctrl+B to bring it up. After that, open the “Help” menu and select “Check for updates”. Follow the on-screen prompts to update iTunes if necessary.
- Mac: Open the “iTunes” menu and click “Check for updates”. If you have an out-of-date version of iTunes, you will be prompted to update the program. Follow the prompts that appear on the screen.
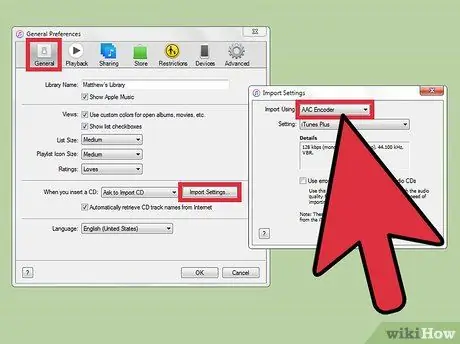
Step 2. Enable the AAC encoder if you are using a Windows computer
This step is important because to convert a song into a ringtone, iTunes must first be able to save the audio file as an.m4a file. Open the menu at the top left corner of the screen and click “Preferences”. On the “General” tab, click “Import Settings”. Click the drop-down menu next to the “Import Using” option and select the AAC encoder. Click “OK” to save the settings.
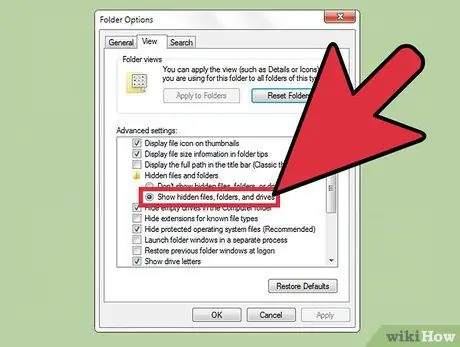
Step 3. Set the computer to display file extensions
Most people have this feature enabled, but you probably haven't set it up yet. You can change these settings again later.
- Windows Vista and 7: Click the Start button, and select the Control Panel program. Select “Appearance and personalization” and click on the “Folder” option. Go to the “View” tab and uncheck the box next to the “Hide extensions for known file types” entry. Click “OK” to save the settings.
- Windows 8 and 10: Press Win+E key to open a File Explorer window, then click the “View” tab. Check the box next to the “File name extensions” option. Close the window when finished.
- Mac: In the Finder window, select “Preferences” and click “Advanced”. After that, select “Show all filename extensions”.
Part 2 of 3: Making Ringtones
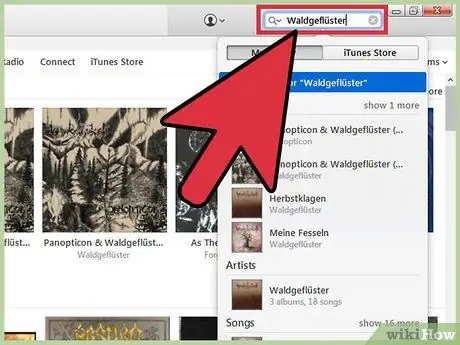
Step 1. Locate the audio file in iTunes library
Click the search bar and type in the name of the desired song. Press Enter key to display all the content in the library that matches your search.

Step 2. Select the part of the song you want to set as ringtone
Ringtones have a maximum duration of 30 seconds, so choose the part of the song that feels right to be used as a ringtone for 30 seconds. You need to note or remember the start and end times of the part that you want to make the new ringtone. To do so:
- While the song is playing, notice the slider moving in the upper-right corner of the screen. The left side of the slider shows how many seconds have passed while the song is playing. Remember (or note) the start time of the ringtone. You can move the slider with your mouse to test different periods of time on the audio file.
- From the starting point, keep listening to the song and note the time it displays when the ringtone should end. Keep in mind that the maximum duration of a ringtone is 30 seconds. If you want to start the ringtone at 1:30 (1 minute and 30 seconds) in the selected song, the end point of the ringtone must not exceed 2:00.
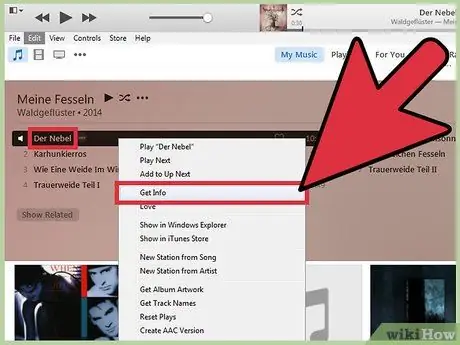
Step 3. Open the “Get Info” menu
This process is slightly different between Windows and Mac computers.
- Windows: Right-click the song and select “Get Info”.
- Mac: Hold down Ctrl key + click a song to access the “Get Info” menu.
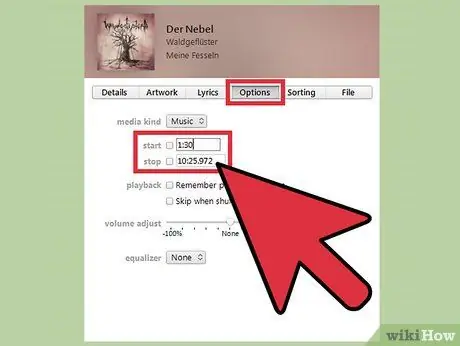
Step 4. Click the “Options” tab to set the start and end time of the ringtone
Type the start and end times (in minutes and seconds, such as 1:30) into the appropriate fields, then click “OK”.
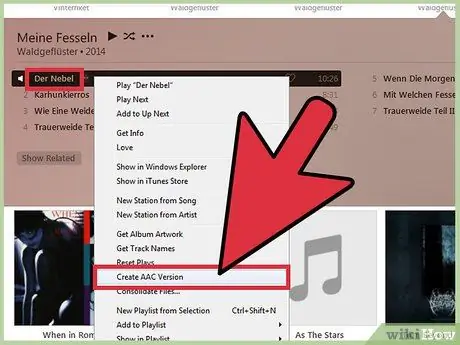
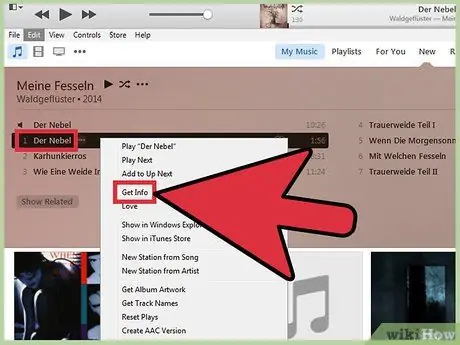
Step 5. Right click the song and select “Create AAC Version”
After that, a new file (with the extension.m4a) will be created with only the part that is between the specified start and end times. Once the conversion process is complete, a copy of the new song will be displayed below the original song. Pay attention to the length of the song next to the track title. Tracks with a shorter duration are your new ringtones.
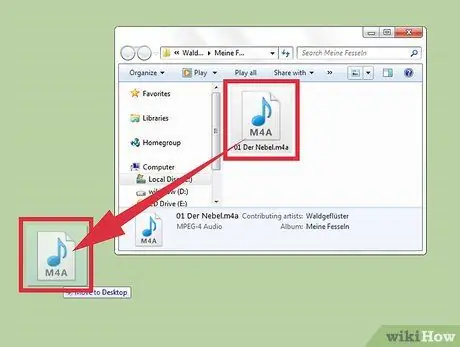
Step 6. Drag the created short audio file to the desktop
The AAC file will be copied to the desktop with the name “judullagu.m4a” (and not the “title of the song” you see in the filename).
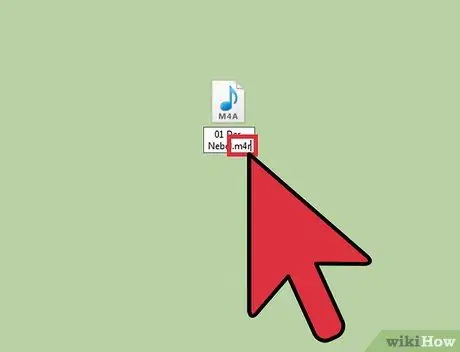
Step 7. Change the extension of the audio file that was moved to the desktop
Change extension
.m4a
the one at the end of the filename becomes
.m4r
-
Windows: Right-click the song and select “Rename”. delete
.m4a
and type
.m4r
- . Press Enter key to confirm selection. If the computer asks to confirm the extension change, click “Yes”.
-
Mac: Click the file once (don't double click it) and delete it
.m4a
from the end of the filename. Type
.m4r
- at the end of the file name and press Enter key to save the name. In the confirmation pop-up window, click “Use.m4r” to confirm the changes.
Step 8. Delete short tracks on iTunes
You don't have to worry because a copy of the track is already saved on the desktop. In the iTunes window, right-click or hold down the Ctrl key + click a short track and select “Delete”. iTunes will ask if you want to move the file to the Trash or the Recycle Bin, depending on your computer's operating system. Click "Yes".
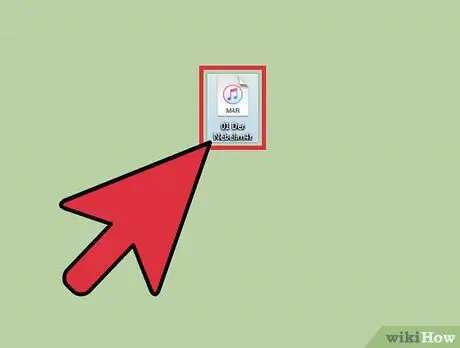
Step 9. Double-click the ringtone file on the desktop
The file will be added back to iTunes, but as a ringtone. The ringtone content will be stored in the “Tones” library in iTunes which can be accessed by clicking the three dots (…) button in the upper left corner of the iTunes window and selecting “Tones”. Click the musical note icon to return to the music library and move on to the next step.
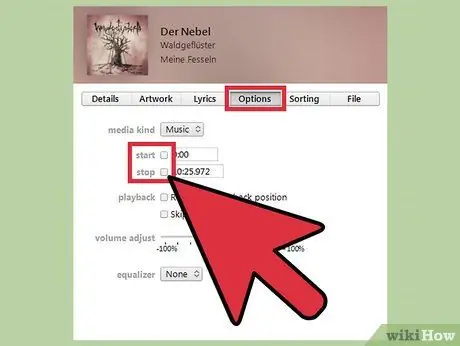
Step 10. Right click the original song and select “Get Info”
Now, you need to remove the ringtone start and end times in the original song information by unchecking the boxes next to the “Stop” and “Start” options. Click “OK” to save changes.
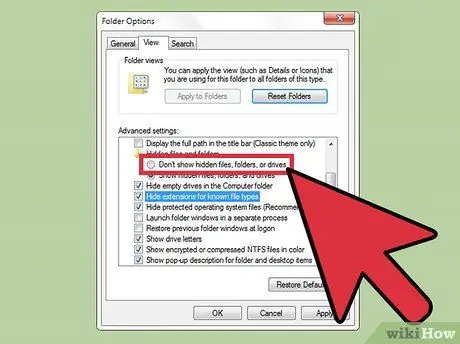
Step 11. Change the file extension settings again
If you don't want to see the file extension at the end of the file name (i.e. you'd rather see the filename
song title
and not
song title.m4r
), return to the file extension settings menu and delete the previously changed settings.
Part 3 of 3: Sending Ringtones to iPhone
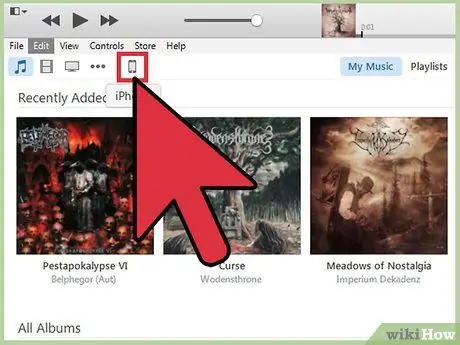
Step 1. Connect iPhone to computer using sync cable
If iPhone is set to sync to a library when it's connected to a computer, wait for the sync process to complete before continuing. However, it doesn't matter if the iPhone is already connected to the computer.
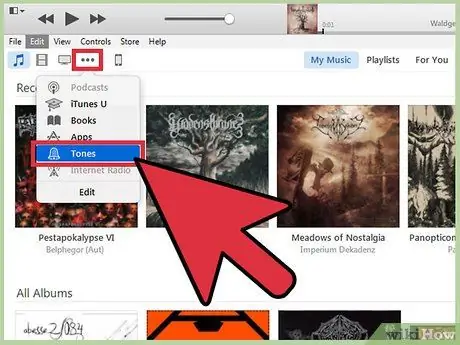
Step 2. Click the three-dot icon (…) in the upper-left corner of the iTunes window and select “Tones”
After that, the “Tones” library containing your new ringtone will be displayed.
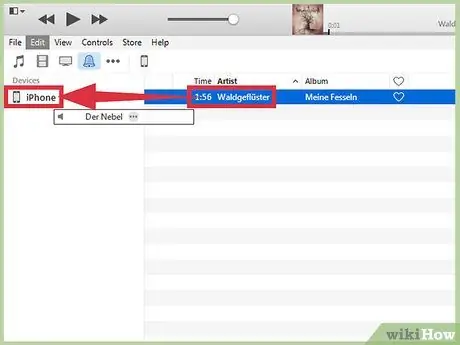
Step 3. Drag the ringtone onto the iPhone icon
Drag and drop the file/entry right onto the iPhone icon on the left side of the screen. iTunes will sync the ringtone to your phone.
Step 4. Change the iPhone ringtone to the ringtone you just created
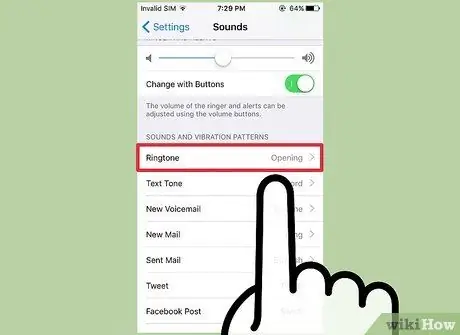
On iPhone, open the settings menu (“Settings”). Touch “Sounds”, then select “Ringtone” to see a list of all ringtones stored on the phone. The most recent ringtone will appear at the top of the list. Touch the ringtone name to set it as the main ringtone.
- You can also create ringtones to replace other sounds on iPhone. The process is the same, but you don't access the “Ringtone” option from the “Sounds” menu. You need to access the options “Text Tone”, “New Voicemail”, etc., then select the desired ringtone after that.
- To assign a ringtone to a specific contact, open the Contacts application and select the desired contact. Touch “Edit” and select “Ringtone”. After that, select the ringtone you want to assign to the contact. Now, if the contact calls you, the phone will play a new ringtone.
Tips
- If you create ringtones for other notifications, such as new notifications from Facebook or text messages, you may need to limit the duration of the ringtone to no more than a few seconds.
- It may be more important for you to set your phone in silent mode at certain times if you use a custom ringtone. The snippet of “Lagi Syantik” might make a cool ringtone, but it's certainly not the kind of music for children to listen to.


