- Author Jason Gerald gerald@how-what-advice.com.
- Public 2023-12-16 10:50.
- Last modified 2025-01-23 12:04.
Do you want to show off your computer game skills to the world, or record user guides for your favorite programs? Bandicam is a screen recorder program that allows you to record full-screen gameplay or any part of your desktop easily and without burdening the system. You can use Bandicam to show off your playing skills or help others learn a difficult program. Read step 1 below to find out how to set up, set up and record screen with Bandicam.
Step
Method 1 of 6: Installing Bandicam
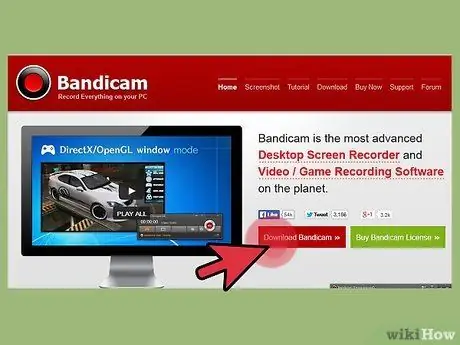
Step 1. Download the Bandicam installation program
Bandicam can be downloaded for free from the Bandicam website. This program is only available for Windows. The free version of Bandicam can only be used for 10 minutes of recording, and all recordings will have the Bandicam logo on them. You can purchase the full version of Bandicam to remove this limitation.
When downloading Bandicam, use the link from Bandisoft. The download link from Softonics includes "spyware" in your Bandicam installation program
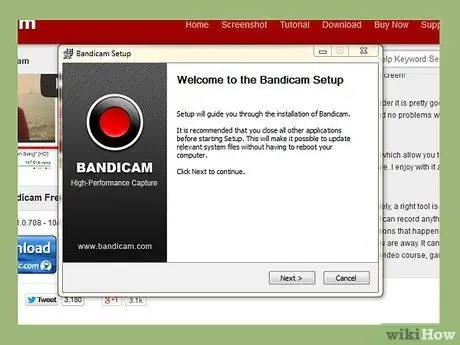
Step 2. Install Bandicam
Bandicam's installation process is fairly straightforward, and you don't need to make any changes to its default settings. You can choose where the Bandicam icon will appear (desktop, "Quick Launch" bar, and Start menu).
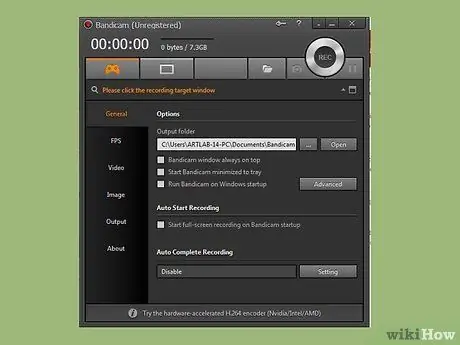
Step 3. Start Bandicam
Once Bandicam is installed, you can start the program to start setting up the recording. You may need to enter an administrator password if you are not using an administrator user account.
Method 2 of 6: Adjusting the Sound
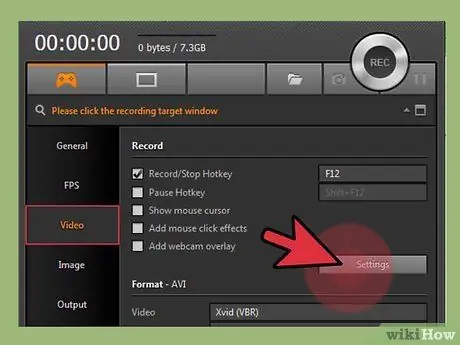
Step 1. Open the "Record Settings" window by selecting the Video tab in the Bandicam window, then clicking the "Settings" button in the "Record" section
Make sure the Sound tab is selected in the "Recording settings" menu.
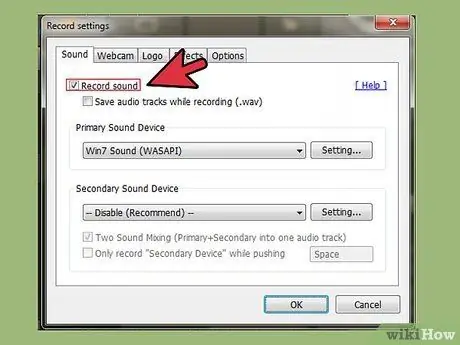
Step 2. Decide if you want to record sound
Bandicam can record all the sound of the program you are recording, as well as input from the microphone. This function is very useful if you are creating a manual for using a computer program, or want to comment on a game you are playing.
Check the "Record sound" box to enable the sound recording option. Your final file will be larger if you want to record sound
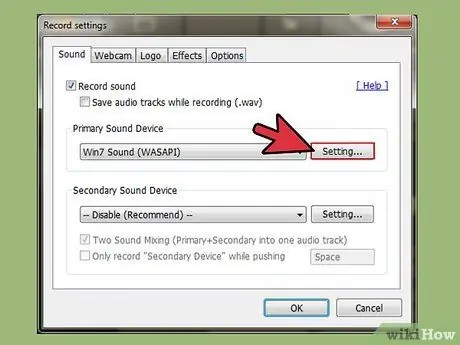
Step 3. Choose your primary sound device
If you want to record sound from the program you are recording, make sure "Win8/Win7/Vista Sound (WASAPI)" is selected in the "Primary Sound Device" menu.
Click Settings… to open Windows sound device settings
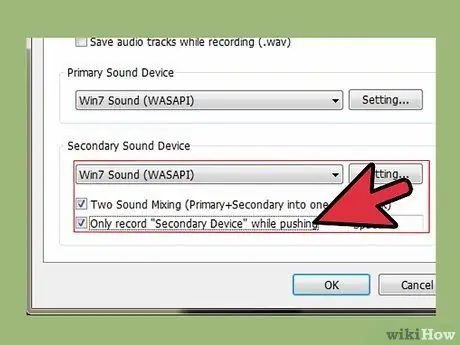
Step 4. Select your additional sound device
If you want to use the microphone while recording video, select the microphone from the "Secondary Sound Device" menu.
- Check the "Two Sound Mixing" checkbox to mix both audio inputs into one track and reduce the video size.
- You can set a lock button ("hotkey") for the microphone if you only want to record sound at certain times. Make sure you set a lock button on a button that you don't use when you use a program you record.
Method 3 of 6: Setting Video Options
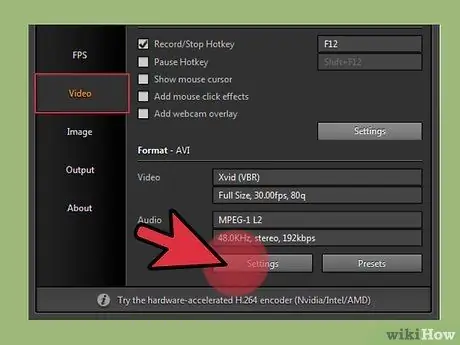
Step 1. Open the Video Format settings menu
You can change the video recording settings to get the best results for your computer. Click the Video tab in Bandicam's main window, then click "Settings" in the "Format" section.
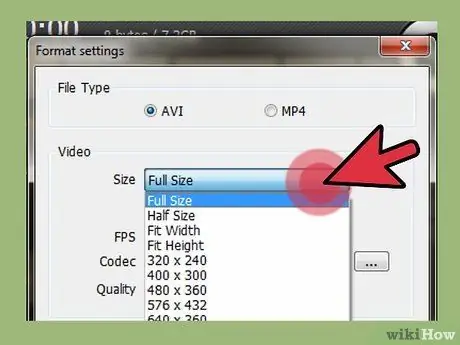
Step 2. Choose a resolution
By default, the resolution will be set to "Full Size", which means that the final video size will have the same resolution as the original recording. If you record full screen, the final resolution will be the same as the program resolution. If you record a window, the final resolution will be equal to the size of the window you are recording.
If you want, you can change the resolution to a specific size. This option is useful if you're moving your video to a device that only supports a certain resolution, but your video may be cracked or warped if your selected aspect ratio doesn't match the recording's aspect ratio
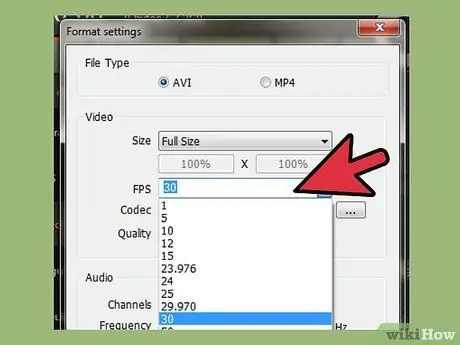
Step 3. Set the number of frames per second (FPS)
FPS is the number of frames recorded per second. By default, this setting is set at 30fps, which is the highest number allowed on YouTube. If you want to get higher quality footage, you can increase the FPS.
A higher FPS will result in a larger file size and a heavier load on your system while recording. You may experience more severe performance issues if your computer is not fast enough to record at a higher FPS
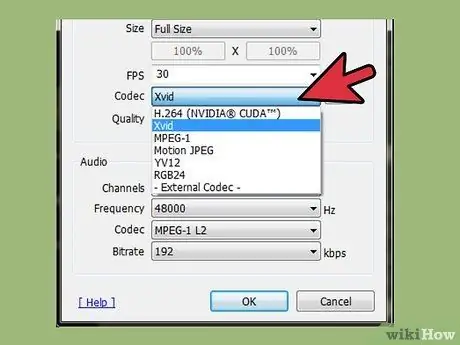
Step 4. Choose your codec
Codecs are software that processes video as it is recorded. Generally, the codec used is Xvid, because Xvid is supported by most systems and devices. You can choose another codec if your video card supports it.
- If you have an nVidia video card, you can choose the "H.264 (NVENC)" codec for the best recording quality. If your nVidia graphics card is a low end card, select "H.264 (CUDA)". If you are using an ATI graphics card, select "H.264 (AMP APP)", and if your graphics card is an Intel integrated graphics card, you can select "H.264 (Intel Quick Sync)".
- If you have more than one video card (eg nVidia and Intel), choose the option that uses an active video card. If your monitor is connected to a motherboard (the "mainboard"), you may want to choose an Intel codec, and if your monitor is connected to an nVidia or AMD graphics card, choose the codec that matches your graphics card.
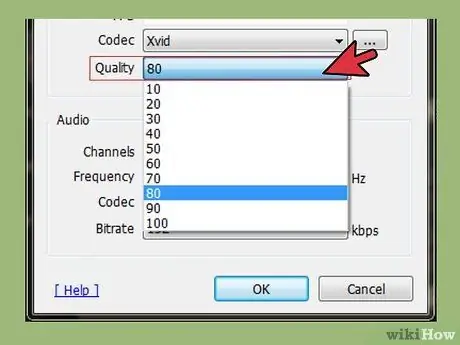
Step 5. Choose the video quality
The "Quality" menu lets you set the general quality of your recording. Quality is reflected in numbers -- the bigger the number, the better the quality of your recording. Better-quality videos are larger, but if your video is too low-quality, you'll lose a lot of detail and clarity.
Method 4 of 6: Recording Part of the Screen
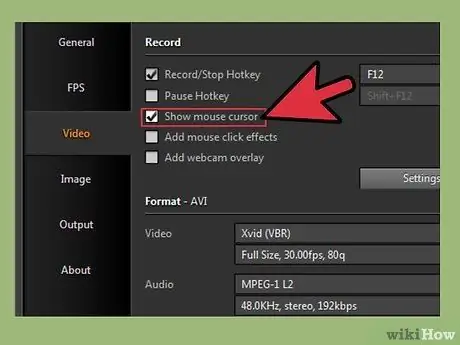
Step 1. Add a bold effect to the cursor
If you're recording a program user guide, bolding your cursor will help viewers know what you're doing. Click the "Settings" button in the "Record" section of Bandicam's main interface. Click the Effects tab.
- You can activate a click effect that appears each time the left or right mouse button is clicked. Click the blank button next to each option to set the color.
- You can add a thickening effect to the cursor so viewers can always see the cursor. Click the blank button to set the color. Yellow is the color for thickening the cursor that is commonly used, because it is still pleasing to the eye but still clear.
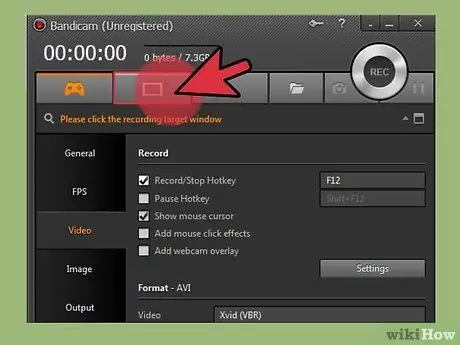
Step 2. Click the square button on the screen
It's above Bandicam's main interface, next to the game controller-shaped button. An outline of the recording window will appear on the screen after you click the button.
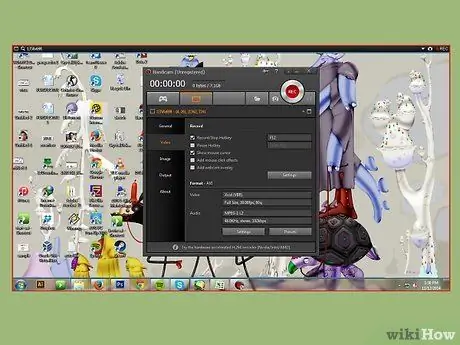
Step 3. Set the recording area
The recording area must include the window you want to record. You can click and drag on the edges to resize the window, or you can click on the dimensions in the box at the top to choose some of the default settings. All activity within the blue frame on the screen will be recorded.
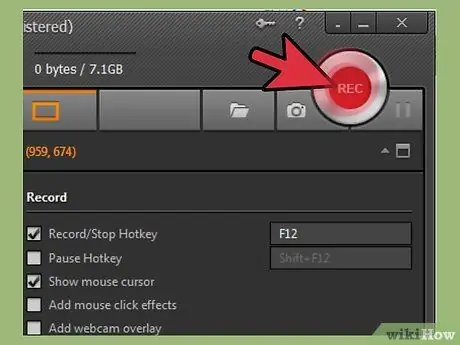
Step 4. Click the REC button to start the recording process
You can click the REC button in the upper right corner of the recording window, or you can click the REC button in the main Bandicam window. When the recording starts, the blue frame in the window will turn red, and the timer will start.
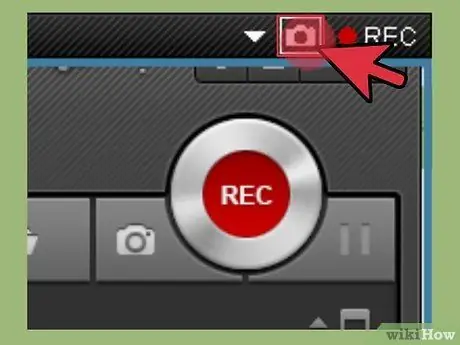
Step 5. Take a screenshot
If you want to take a screenshot of your recording while recording, click the camera icon at the top of the recording window. A screenshot of what is in the recording window will also be taken.
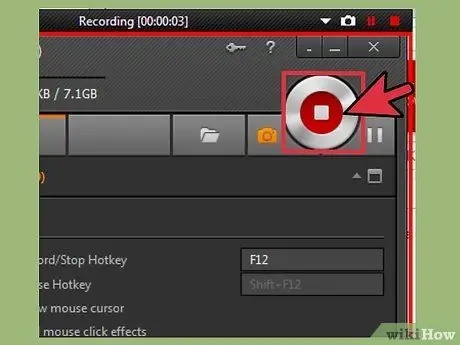
Step 6. Finish your recording
Click the Stop button in the recording window or the Bandicam main window to end the recording. You can view your new video by clicking the folder icon in Bandicam. The icon will open the Output folder, and you can open your new video in your favorite media player.
Method 5 of 6: Recording the Game
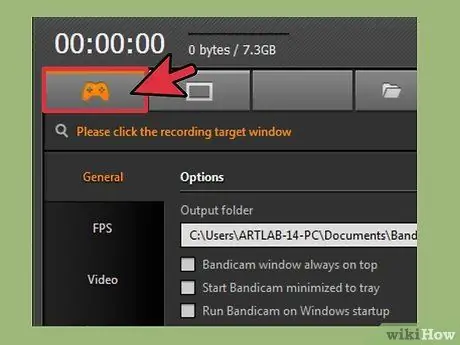
Step 1. Click the button with the controller icon
Clicking this button will change the recording mode to full screen mode, which is designed for recording games and other full screen programs.
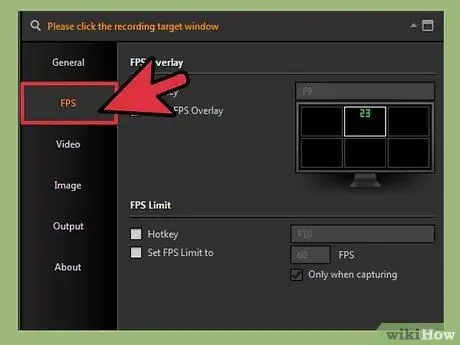
Step 2. Enable the FPS counter
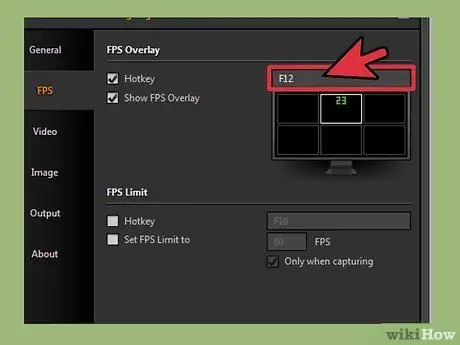
Bandicam offers an FPS counter that lets you know the fps of your game. This counter can be used as a guide to determine how much influence Bandicam has on game performance. Click the FPS menu in the main Bandicam window, and make sure the "Show FPS Overlay" box is checked. You can choose where the FPS counter will appear.
Enabling the fps counter can be very useful, as the fps counter will change color to indicate whether you're recording or not
Step 3. Set the lock button to start recording
In the Video section of the Bandicam interface, you can set buttons to start and stop recording. Generally, the key used is F12. You can change it to any button you like, but make sure it's not being used while you're playing.
F12 is the default key for screen capture in Steam. That is, every time you press the button to start and stop recording, Steam will create a screenshot as well. If you're recording a game from Steam, you may want to change the lock button
Step 4. Start the game you want to record as usual
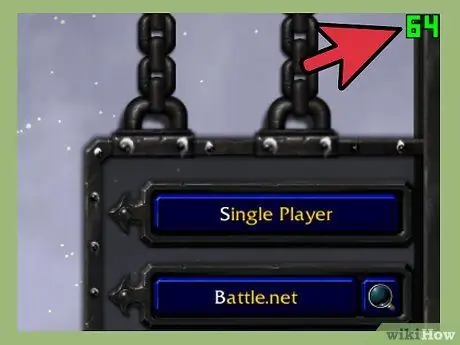
You should see the FPS counter if you enable that option.
Step 5. Start recording
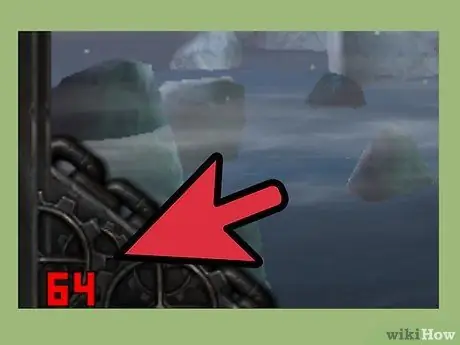
Once you are ready to record, press the lock button to start recording. The FPS counter will change from green to red to indicate that you are recording. Your entire screen will be recorded, so make sure you don't record any usernames or login information.
Step 6. Finish your recording
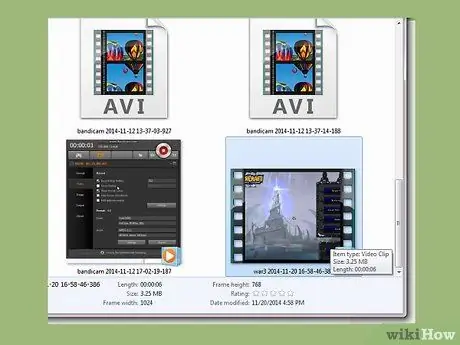
After you finish recording, press the lock button to stop recording. Your video will be created and placed in Bandicam's "output" folder. This folder can be accessed by clicking the folder icon at the top of the Bandicam window.
Method 6 of 6: Finishing the Video
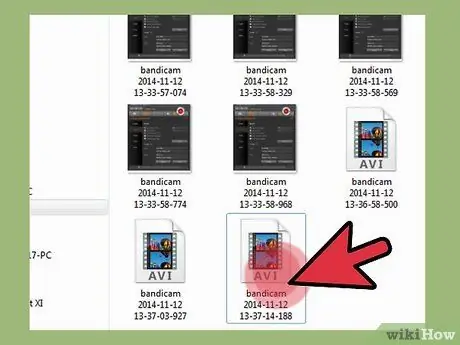
Step 1. Preview the video
Open the "output" folder and watch the video you just created. Make sure your video contains everything you want to create, and that there is no unnecessary/wanted footage. This folder can be accessed by clicking the folder icon at the top of the Bandicam window.
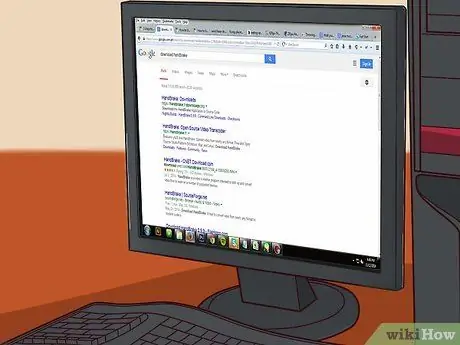
Step 2. Perform the "encode" process to reduce your video
Your video game may be quite large, especially if you're recording for a long time. You can reduce the size of a video by "encoding" it using a program like Handbrake or Avidemux. The "encode" process will degrade the video quality, but will greatly reduce the video size.
This process can also speed up uploading to YouTube. If you want to burn the video to a DVD or save it on your computer, you can leave the video alone
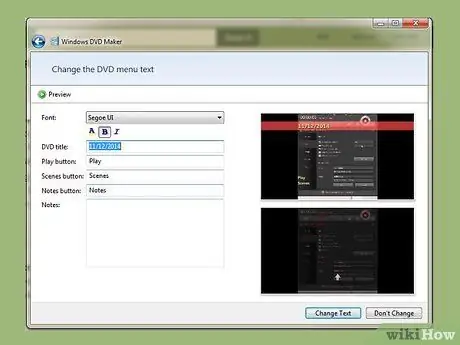
Step 3. Add effects with video editing software
Bandicam doesn't have video effects options, so you can use other programs like Windows Movie Maker or Sony Vegas to add effects and transitions to your videos. You can add text cards between scenes, combine multiple recordings, add transitions, credits, etc.
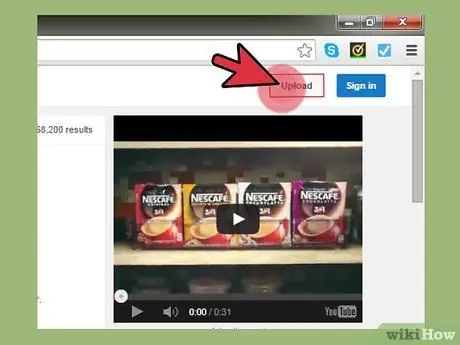
Step 4. Upload the video to YouTube
YouTube is one of the best places to share game videos and tutorials. You can even make money from the video if your video is popular!
- Keep in mind that some companies don't allow you to make money with videos of their products. These restrictions vary by development company, so make sure you know the rules for the game you want to upload videos for.
- Read the guide to uploading videos to YouTube.
- Read our guide to making money from your videos.
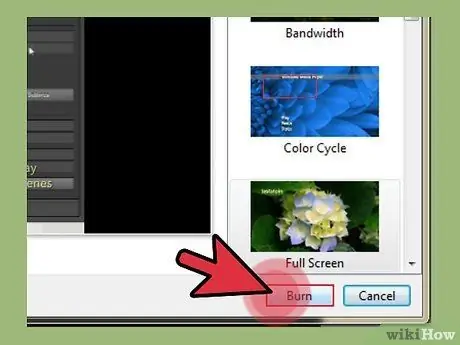
Step 5. Burn the video to DVD
If you want to burn videos to DVD so you can save them, watch them later, or give them to friends and family, you can do that easily with most DVD burning programs. By burning videos to DVD, you can delete videos from your storage media and save storage space, so this option is good for very large videos. Read the guide for how to burn a DVD with videos.


