- Author Jason Gerald gerald@how-what-advice.com.
- Public 2023-12-16 10:50.
- Last modified 2025-01-23 12:04.
Orchids are exotic plants that produce beautiful flowers. The Phalaenopsis orchid, also known as the moth orchid, is the most popular variety. However, there are many different species of orchids. If you care for them properly, most orchids will flower at least once a year. Each species of orchid requires slightly different care in order to thrive and produce flowers, but the factors that influence it, such as light, temperature, water, growing medium, and humidity, are more or less the same. If you adjust the environment to a particular orchid species and provide seasonal stimulation, your favorite orchid will flower diligently.
Step
Method 1 of 3: Creating the Right Growth Environment
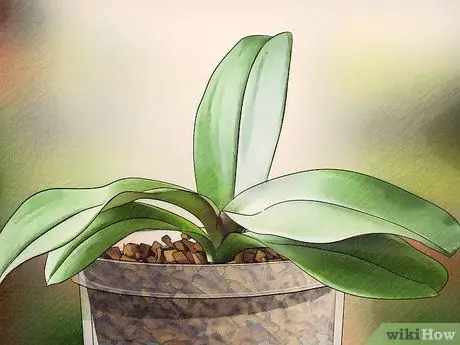
Step 1. Make sure the light intensity is appropriate for your pet orchid species
There are many species of orchids, but the moth orchid (Phalaenopsis) is among the most popular and easiest to grow. This type of orchid is mostly sold in stores and in nurseries. You can simply place it on a sunny windowsill and the orchid will grow well. Orchids like bright light, but not direct sunlight.
- Some of the lesser known varieties of orchids require different light exposures. For example, slide orchids (Paphiopedilums) and Miltonia do not like direct sunlight. A window facing north can be the right choice for both types of orchids.
- In contrast, Cattleya, Dendrobium, Oncidium and Cymbidium, need lots of sun exposure to thrive. Therefore, placing this species on a windowsill facing south or west can be a good choice.

Step 2. Do watering with the right amount of water
Phalaenopsis orchids need to be watered once a week during periods of dormancy (when not growing or flowering) and twice weekly during periods of active growth. Outside of a watering schedule, Phalaenopsis orchids prefer dry conditions. That means the orchid should be watered when the growing medium (usually a well-draining mixture of pine bark) looks dry, or the orchid will die. If the media looks wet, it means it is still too early to water.
- Make sure there are drainage holes at the bottom of the flower pot. Orchids cannot grow well if they are flooded.
- Do watering in the morning.
-
Most orchids kept indoors should be watered every 5-12 days, depending on the species and season:
- Vanda and Ascocenda require the same frequency of watering as Phalaenopsis.
- The varieties Paphiopedilum, Miltonia, Cymbidium and Odontoglossum should be kept moist at all times.
- Meanwhile, the varieties Cattleya, Oncidium, Brassia and Dendrobium should be kept moist during the period of active growth. In other periods, this type of orchid likes dry conditions.
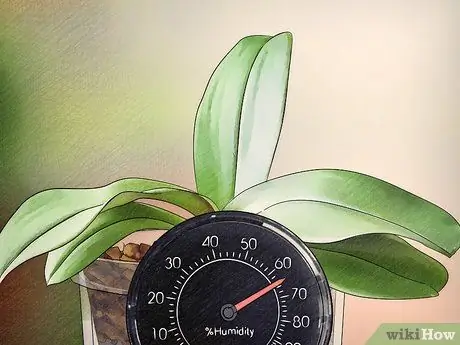
Step 3. Keep the environment moist
Most orchids are tropical plants and like high humidity levels. Indonesia is a country with high humidity levels. Jakarta, for example, generally has a humidity level between 70%-80%. Phalaenopsis orchids like humidity levels between 40%-70%. Most orchid species require between 60%-80% humidity. By adjusting the humidity level, all orchid species can grow better. You can increase the humidity in the area where you keep your orchids by spraying water mist frequently.
- Consider buying a humidifier if you live in a cold area. You can also purchase special trays at the nursery to help increase the humidity around the orchids.
- However, do not put orchids in the bathroom because it is too humid. Make sure you place the orchid on a windowsill to get plenty of light, but not direct sunlight.
Method 2 of 3: Stimulate Flower Growth

Step 1. Consider using a full spectrum lamp
If an orchid fails to flower, it's often because it's not getting enough light. If your home's conditions don't allow your orchid to get the natural light it needs, consider installing a full spectrum light indoors. These lamps can be purchased at nurseries or online.
- Full spectrum lamps are sold in a variety of shapes and sizes. You can adapt it to the needs of each room.
- You can also adjust the lighting to suit the needs of your various orchids.

Step 2. Use a fertilizer made specifically for orchids
The right fertilizer can stimulate faster growth and earlier flowering. Look for fertilizer products that contain nitrogen (N), phosphorus (P) and potassium (K), plus some trace elements such as iron. Make it a habit to read and follow the instructions on the packaging carefully. Do not forget to water the orchid well before fertilizing.
- Some types of fertilizers are granular or dry. In this case, you must dissolve it in water before use.
- Dry fertilizer is very concentrated. Never use it directly on plants. After the fertilizer granules are dissolved in water, pour it directly on the plants.
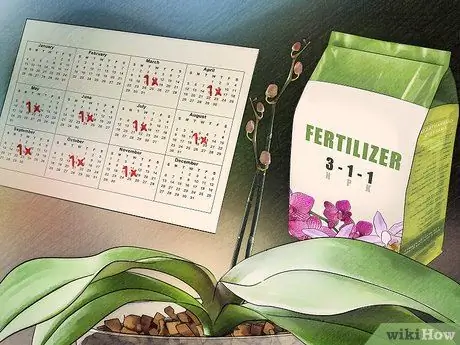
Step 3. Fertilize once a month during the period of active growth
Overall, the period of active growth lasts from March to November. Do not fertilize between mid-December to mid-February. If you don't apply enough fertilizer, orchid growth will be stunted and flowers won't appear. On the other hand, too much fertilizer will likely scorch the roots and leaves of the orchid. Scorched roots due to fertilizer will also hinder flower growth.
- Read the instructions on the packaging carefully because there may be slight differences from one product to another.
- You should fertilize after the flowers wither to stimulate the emergence of new flowers. Fertilize again when young leaves or shoots appear and begin to grow.

Step 4. Lower the room temperature by about 10 degrees at night
Moth orchid (Phalaenopsis) is sensitive to temperature. In the wild, orchids appear together with autumn and the drop in temperature at night. If the orchid does not go through a period of decreasing temperature at night, even if it is indoors, the plant will not produce young shoots or flowers. If you put an orchid on a windowsill, the plant may experience a period of natural temperature drop coming from outside to some extent. However, these conditions may not be sufficient to stimulate the emergence of flowers. To work around this, lower the room temperature by 10 degrees before going to bed each night.
- After experiencing a nightly period of 1-2 weeks of decreasing temperature, orchids usually begin to produce flowers, as long as they match their growth cycle.
- For temperature sensitive Phalaenopsis orchids, keep the night temperature around 16 °C and the daytime temperature around 25 °C.

Step 5. Make sure the room where you put the orchid is well ventilated
Stuffy and dry air will inhibit the emergence of flowers. Orchids thrive in an environment that allows fresh, moist air to circulate freely. While humidity is important for orchids, it can be very bad if the room is not properly ventilated. Ensure fresh air circulates around the orchid by opening a window or turning on a fan (if the ceiling is low).
Method 3 of 3: Diagnosing Orchids
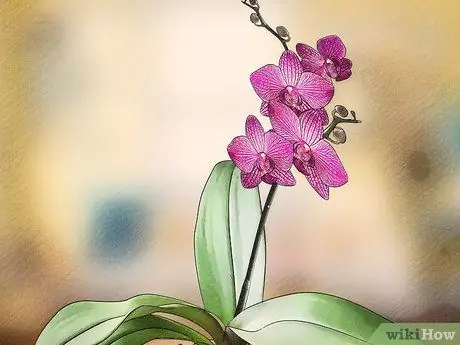
Step 1. Pay attention to the seasons
Each species of orchid has its own growing season or period of the year when the plant blooms naturally. If it has not entered the growing season, the orchid will not flower. Most orchids, including Phalaenopsis, will produce new leaves during June-September. Spikes and flower buds will appear around November and not long after that they will bloom. Flowers will continue to bloom until March. Flowering season usually ends in mid-February.
- Phalaenopsis orchids usually bloom once a year and the flowers can last for several months.
- When the flowers fall, several more flowers may emerge from the same spike, but this is not always the case.
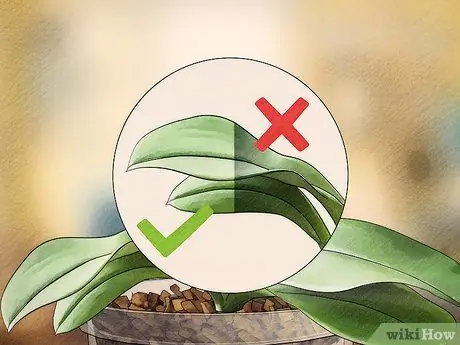
Step 2. Check the color of the leaves
If the orchid doesn't flower, the reason is almost always because it's not getting enough light. One of the best ways to determine if an orchid is receiving enough light is to check the color of the leaves. A healthy orchid with sufficient light exposure will have bright green leaves. If the leaves are dark green, it means the orchid is not getting enough light. Move the orchid to a brighter spot, such as a south-facing window. If the leaves are reddish green, it means the orchid is getting too much light. Move it to a less bright place, such as a window facing east or north.
If you place Plalaenopsis on a south-facing windowsill, you may need to filter the light by installing blinds or blinds. Moth orchids like lots of light, but not direct sunlight
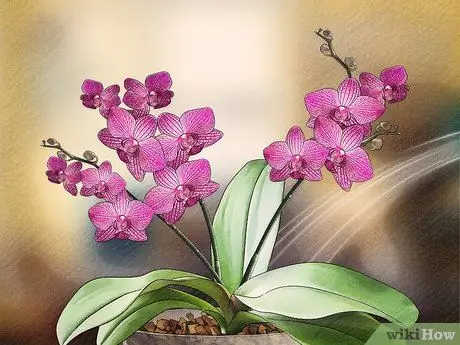
Step 3. Check the stems and leaves for signs of dehydration
If the stems and leaves look wilted or shriveled, it's clear that the orchid needs more water. You should water more often when the orchid is actively flowering. During the dormant period (when it doesn't produce flowers), water it once a week. During the period of active flowering, water twice a week.
- Increase the frequency of watering as new shoots and roots appear on the orchid.
- Too much water can kill an orchid quickly. Don't let water pool in the pot.

Step 4. Evaluate the planting medium
Most orchids (including Phalaenopsis), cannot grow in ordinary soil media. Orchids need a growing medium that ensures fast drainage and good air circulation. Growing media in the form of a mixture of pine bark (sometimes called pine bark nuggets) with good drainage is the most popular medium for moth orchids. If you can't figure out what medium to use for your orchid plant, create a new planting medium with pine woodworker.
- If the growing medium does not have good drainage and adequate air circulation, the orchid will run out of oxygen and die.
- Most orchids can also grow in peat moss, dry fern roots, sphagnum moss, rockwool, perlite, chunks of cork, rock, coconut fiber, lava rock or a mixture of these materials.


