- Author Jason Gerald gerald@how-what-advice.com.
- Public 2023-12-16 10:50.
- Last modified 2025-01-23 12:04.
Are you taking a group photo and want to highlight someone from the group? Or maybe you think you've taken the perfect photo, but find that something is distracting in the background? Try one of the methods described in this article to blur the background of an image using a photo editing application like Adobe Photoshop, Paint Shop Pro, or GIMP.
Step
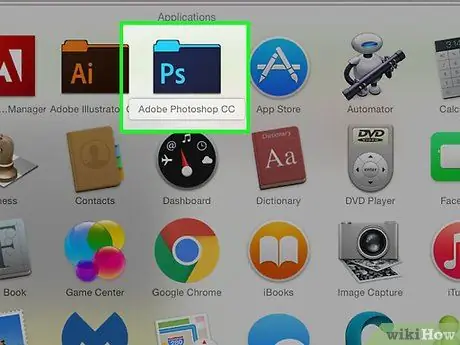
Step 1. Use a graphic editing application such as Photoshop, Paint Shop Pro, or GIMP
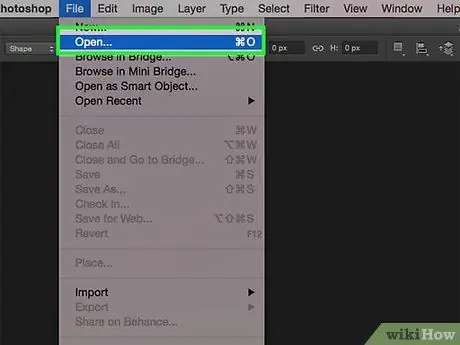
Step 2. Open the image file through a graphics editing application
To blur the background of the image, choose a high resolution image.
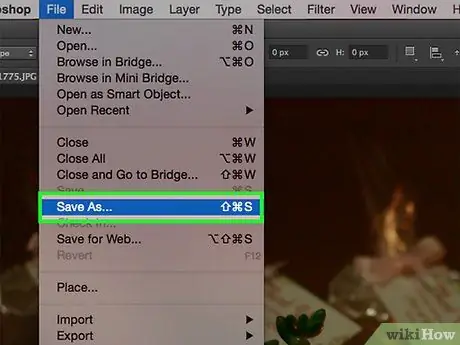
Step 3. Make a copy of the image using the “Save As” option on the “File” menu
Never modify the original image.
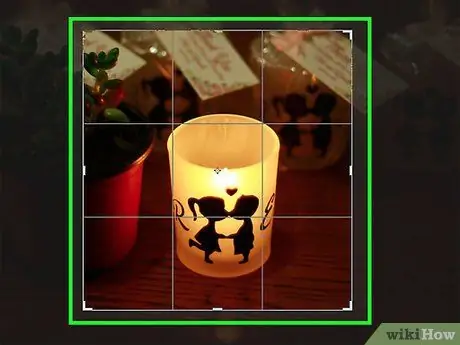
Step 4. Determine the part you want to focus on (foreground) and the part you want to blur (background) in the image
Adjust the zoom to see the entire image on the screen. This way, you can get an image of the selection of the area you want to focus on or blur
Method 1 of 6: Using Photoshop: The Quick Method
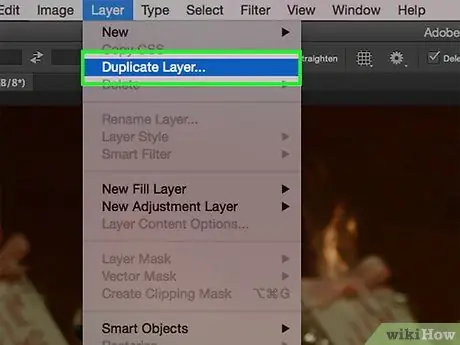
Step 1. Choose “Layers” > “Duplicate Layer”
This option allows you to overwrite the original image with a layer or a second image that is identical to the original image.
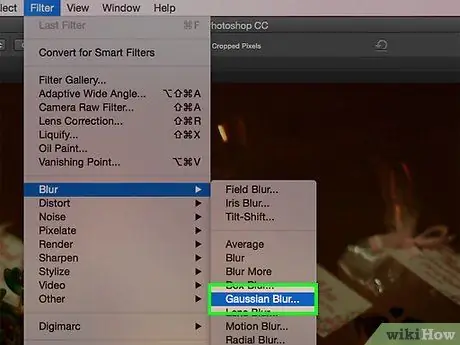
Step 2. Choose “Filter” > “Blur” > “Gaussian Blur”
This option will blur the entire image. At this stage, the blurring process will take place in reverse.
- Try experimenting with the radius of the blur filter to create the desired effect on the background. The larger the radius, the more blurred the image will appear, so for a light blur effect, use a smaller radius. For example, if you want the background of the image to appear very smooth (but still recognizable), use a blur with a radius of 10. If you want the background to be less blurry, use a radius of 0, 5 or 0, 1.
- Make sure you apply the blur to the top layer.
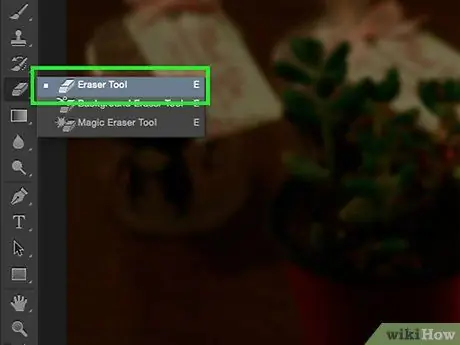
Step 3. Delete the object you want to focus on on the top layer (new layer) to sharpen it
Since the original image is still directly below the new layer you created, deleting the object you want to focus on on the new layer will display the object in the original image which is not blurred so that the object becomes more focused and sharp.
- Select the eraser (eraser tool) from the toolbar on the left of the screen.
- Adjust the size of the eraser. For large areas, use a large eraser. For small parts (eg details or small corners), use a small eraser with greater precision.
- Adjust the strength level or thickness of the eraser (opacity). For large parts, use an eraser with a high strength or thickness (high opacity) so that the parts can be erased neatly. For small corners, reduce the power of the eraser to create a smoother, neater effect. Multiple low-strength erasures on the same part will have a cumulative effect so (if possible) use a low-strength setting on the eraser being used.
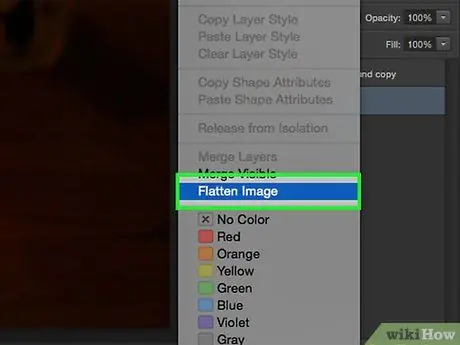
Step 4. Once you are satisfied with the removal result, choose “Layer” > “Flatten Image”
This option allows you to combine various existing layers into a single image.
Method 2 of 6: Using Photoshop: Detailed Method 1
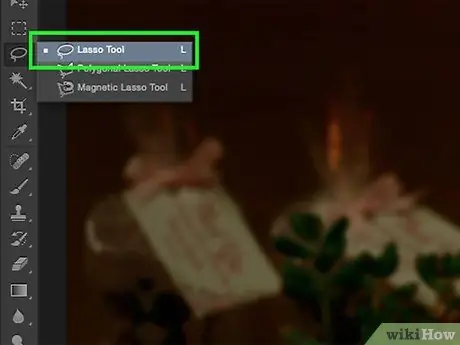
Step 1. Use the lasso tool from the Adobe Photoshop tool palette
You will use it to select the object or part of the photo that you want to separate from the background which will later be blurred. Choose the type of lasso tool that best suits your object. As an example:
- If the object or part you want to highlight has straight edges or outlines, right-click the lasso tool to change the selector type to polygonal. This type of selector allows you to create a straight line between one point and another that you create by clicking on it where you want it.
- If there are sharp and clear angles or outlines between the object you want to highlight and the background, change the lasso tool to a magnetic selector type. This type of selector can automatically find the corners or outlines of the object.
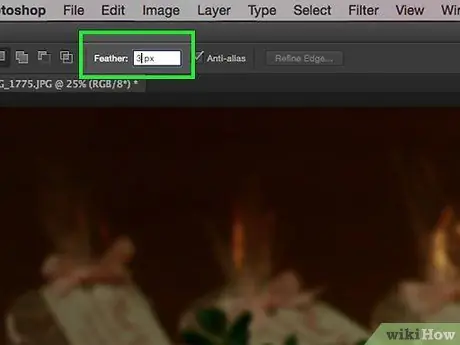
Step 2. Increase the smoothness of the outline of the object (feather) to 1 to 3 pixels
By smoothing the outline, the boundary between the object and the background will become smoother (and of course the difference between the main object and the blurred background will be much neater).
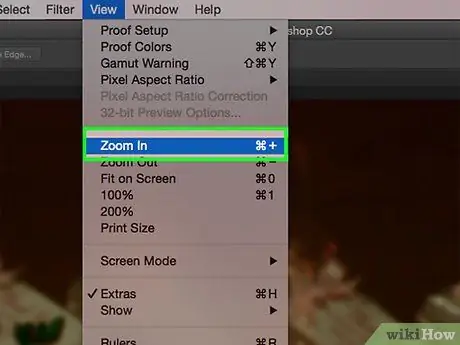
Step 3. Enlarge the image and focus on the object you want to highlight so you can see the sides more clearly
In this way, the selection can be done more accurately.
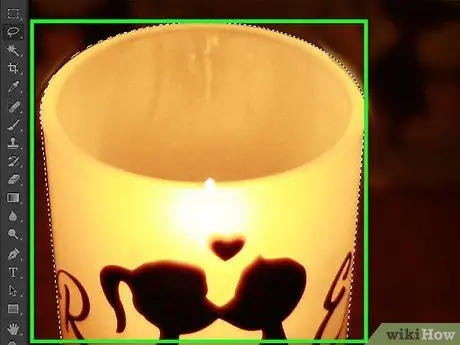
Step 4. Click and drag the lasso tool along the side or outline of the object
Make sure you end the selection by reaching back to the starting point of the selection and clicking on it. The selection is complete when there is a line (made up of 'glitter' dots) surrounding the outline of the object.
- When using the lasso tool, make sure you select the new layer you created earlier.
- To add to the section you want to select, press and hold the “Shift” key as you continue to select. In this way, you can modify the selection that has already been made or continuously select another section that is different and separate from the first section.
- To remove a certain part from the selected part, press and hold the “Alt” key, then select the part that you want to remove from the selection.
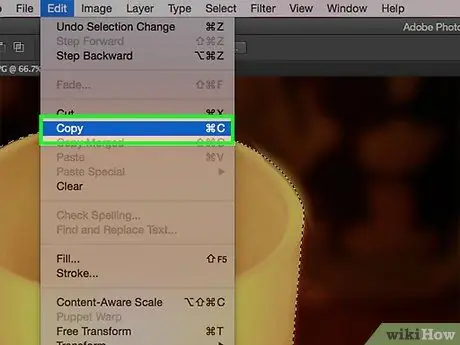
Step 5. Copy the selected main or foreground object by pressing the “Ctrl” + “C” key combination
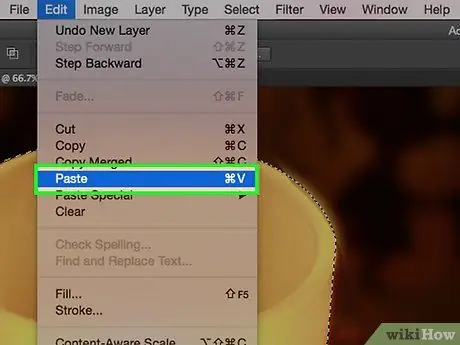
Step 6. Paste the copied object or foreground on top of the original image layer
After that, a new layer containing only the object or foreground will be displayed above the original image layer.
- Usually, the object will be pasted just above the original image layer, in the same position so it's as if no changes have been seen. Look at the layers tab (usually located in the lower-right corner of the screen) to see if a new layer containing only the focus object has appeared.
- If the “Layers” tab does not appear, open the “Window” menu and select “Layers” in the drop-down menu provided.
- If necessary, use the move tool (symbolized by an arrow cursor) to move the newly pasted object or foreground to match the position of the original image.
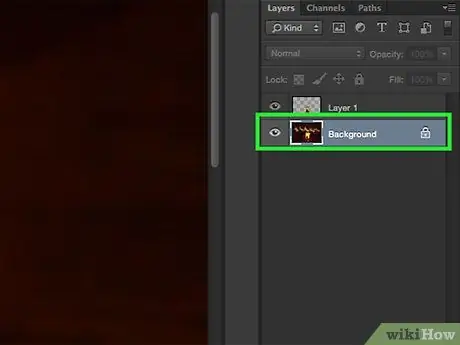
Step 7. Select the layer containing the original image
You can find this layer in the " Layers " tab.
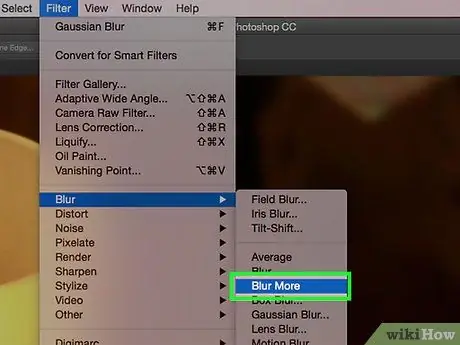
Step 8. Click the “Filter” menu > “Blur” > “Blur More”
This option will blur the background, but not blur the previously copied object.
- Repeat the selection until you get the desired effect. In Photoshop, use the "Ctrl" + "F" key combination to repeat the last filter command used.
- Alternatively, use the “Gaussian Blur” filter and experiment with different filter radii to achieve the desired background effect. The larger the radius, the blurry the background of the image will be. Therefore, for a very subtle, yet still vivid effect, use a radius of 10. If you want the background of the image to be less blurry, use a radius of 0, 5 or 0, 1.
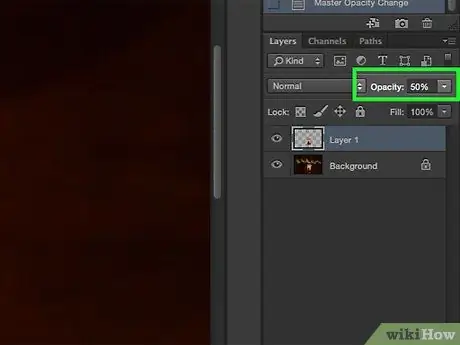
Step 9. Make sure the object or foreground doesn't look too sharp
The easiest way to set it up is to check the “History” tab and undo some of the “Blur More” filter commands. Alternatively, you can change the existing layer combinations for a neater effect. Follow the steps below to do this:
- Change the level of transparency (opacity) on the layer containing the main object or foreground. You can find these settings on the “Layers” tab. For starters, it is recommended that you set the transparency level to 50%. After that, increase the percentage until you find the right mix.
- Change the type of combination of the top layer and other layers by changing their characteristics (you can also find characteristic settings on the “Layers” tab). For example, to get an artistic sketch effect, change the layer characteristics from “Normal” to “Darken”.
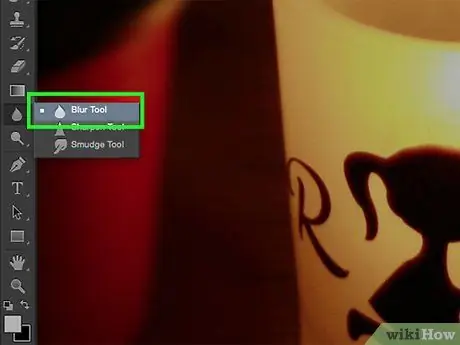
Step 10. Use the blur tool to smooth out the sides or outlines of the main object that you want to highlight
This feature can be found on the same toolbar as the lasso tool.
- Set the blur tool strength to around 33%.
- Set the brush size to an appropriate level, such as a radius of 5 to 15 pixels. If you can't see the brush size options in the Photoshop window, select “Brushes” from the “Window” menu at the top of the screen.
- Use the blur tool to smooth out the sides or outlines of your main object, especially the parts that look pixelated. This will create a transition between the main object or the foreground with a neater background.
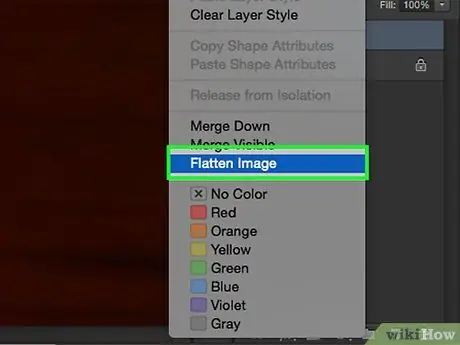
Step 11. Once you are satisfied with the final result, use the “Flatten Image” feature in the “Layer” menu
This feature will combine various existing layers into one image.
Method 3 of 6: Using Photoshop: Detailed Method 2
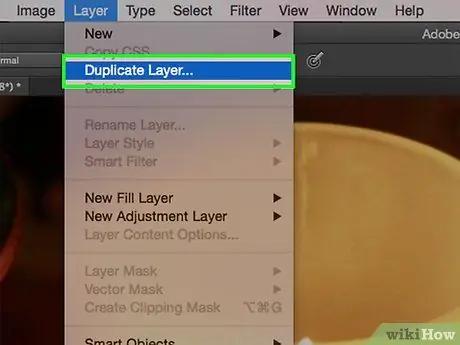
Step 1. Choose “Layers” > “Duplicate Layer”
This option allows you to create a new layer identical to the layer containing the original image, and stack it on top of that layer.
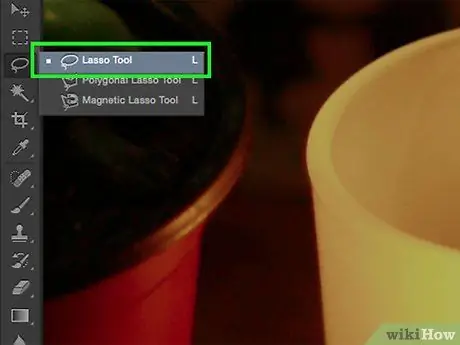
Step 2. Use the lasso tool from the tools palette
You will use it to select the part of the image that you want to separate from the background to be blurred. Choose the type of selector that best fits the object or part you want to highlight. As an example:
- If the object or part you want to highlight has straight edges or outlines, right-click the lasso tool to change the selector type to polygonal. This type of selector allows you to create a straight line between one point and another that you create by clicking on it where you want it.
- If there are sharp and clear angles or outlines between the object you want to highlight and the background, change the lasso tool to a magnetic selector type. This type of selector can automatically find the corners or outlines of the object.
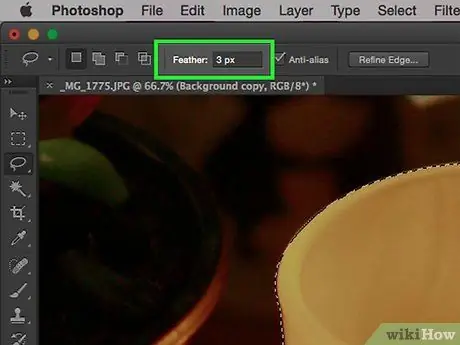
Step 3. Increase the smoothness of the outline of the object (feather) to 1 to 3 pixels
By smoothing the outline, the boundary between the object and the background will become smoother (and of course the difference between the main object and the blurred background will be much neater).
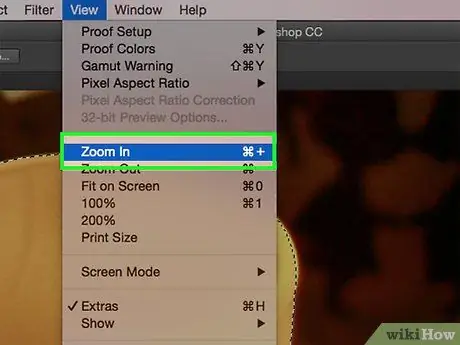
Step 4. Enlarge the image and focus on the object you want to highlight so you can see the sides more clearly
In this way, the selection can be done more accurately.
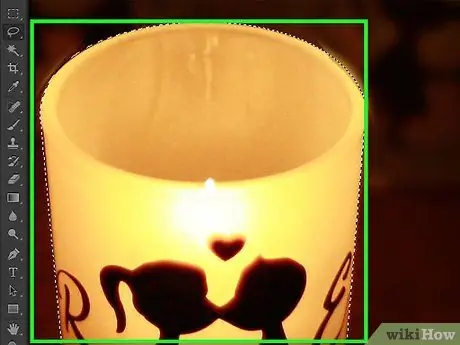
Step 5. Click and drag the lasso tool along the side or outline of the object
Make sure you end the selection by reaching back to the starting point of the selection and clicking on it. The selection is complete when there is a line (made up of 'glitter' dots) surrounding the outline of the object.
- When using the lasso tool, make sure you select the top layer (the new layer you created earlier).
- To add to the section you want to select, press and hold the “Shift” key as you continue to select. In this way, you can modify the selection that has already been made or continuously select another section that is different and separate from the first section.
- To remove a certain part from the selected part, press and hold the “Alt” key, then select the part that you want to remove from the selection.
- Don't worry if your initial selection isn't perfect; You can still readjust it later.
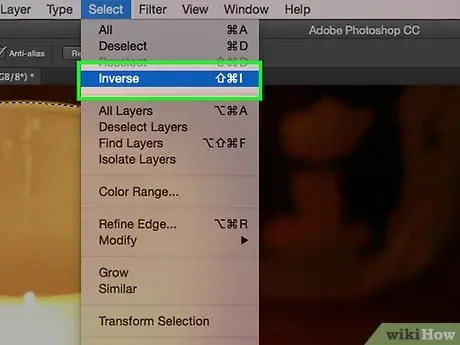
Step 6. Choose “Select” > “Inverse”
This option will automatically invert the selected area so that the selected area becomes the background only, not the object you previously selected.
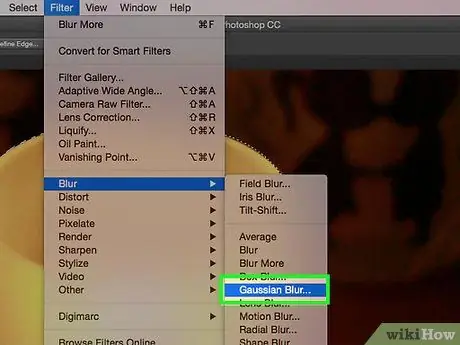
Step 7. Use the “Gaussian Blur” filter in the “Filter” > “Blur” menu
This filter will blur the selected background.
Try experimenting with the radius of the blur filter to create the desired effect on the background. The larger the radius, the more blurred the image will appear so to get a light blur effect, use a small radius. For example, if you want the background of the image to appear very smooth (but still recognizable), use a blur with a radius of 10. If you want the background to be less blurry, use a radius of 0, 5 or 0, 1
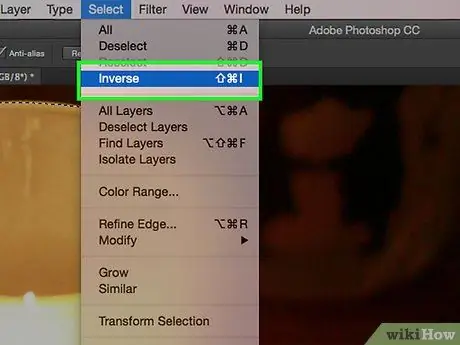
Step 8. Reuse the “Select” > “Inverse” option
Now, your main object will go back into the selection and the background will no longer be included in the selection.
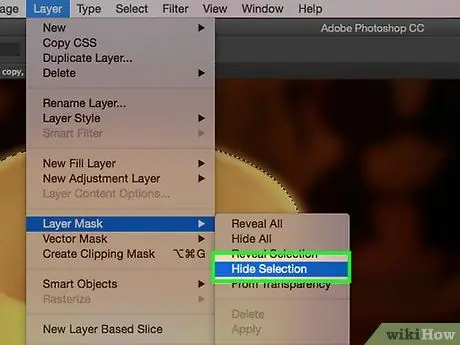
Step 9. Use the “Hide Selection” feature in the “Layer” menu > “Add Layer Mask”
After use, the main object of the photo will be removed from the top layer (the new layer you created) so that the original image below that layer will be visible.
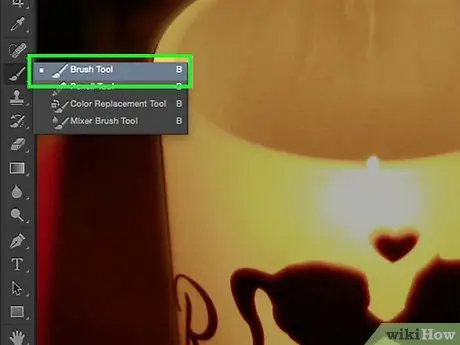
Step 10. Use the brush tool to modify the selection
While it may seem odd that you will be 'painting' over the finished image, in fact at this stage you will be modifying the size and shape of the 'opening' between the top layer and the layer containing the original image. In other words, it's a way to refine the lasso tool selection you've done before.
- Use black to further hide the top layer. For example, if the Gaussian blur feature overlaps the main object, use a black brush to hide the unwanted blur on the top layer.
- Use white to show more of the top layer. For example, if the blur is not close to the sides or outlines of the main object, fill in the blanks using a white brush.
- Make sure you use gray colors. It is important that you make the transition between the background and the main object look smooth and neat, especially on the sides or outlines of the object. In this way, errors that may exist will be difficult to see.
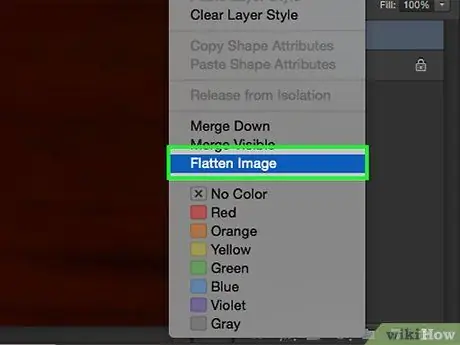
Step 11. Once you are satisfied with the final result, use the “Flatten Image” feature in the “Layer” menu
This feature will combine various existing layers into one image.
Method 4 of 6: Using Paint Shop Pro: Quick Method
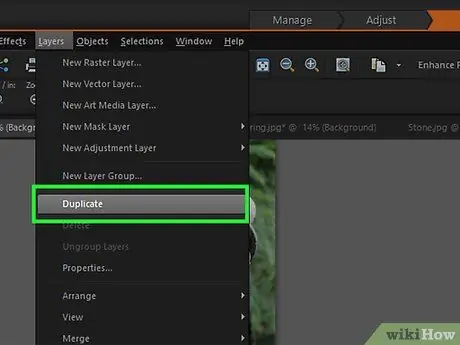
Step 1. Choose “Layers” > “Duplicate Layer”
This option allows you to create a new layer identical to the layer containing the original image, and stack it on top of that layer.
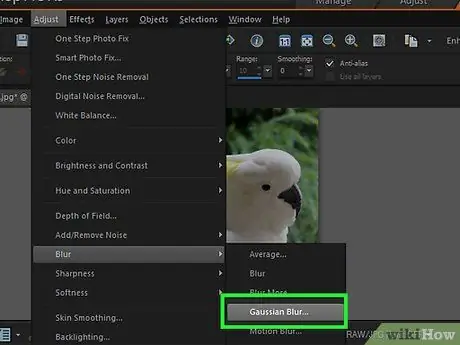
Step 2. Choose “Filter” > “Blur” > “Gaussian Blur”
This option will blur the entire image. At this stage, the blurring process will take place in reverse.
- Try experimenting with the radius of the blur filter to create the desired effect on the background. The larger the radius, the more blurred the image will appear so to get a light blur effect, use a small radius. For example, if you want the background of the image to appear very smooth (but still recognizable), use a blur with a radius of 10. If you want the background to be less blurry, use a radius of 0, 5 or 0, 1.
- Make sure you apply the blur to the top layer.
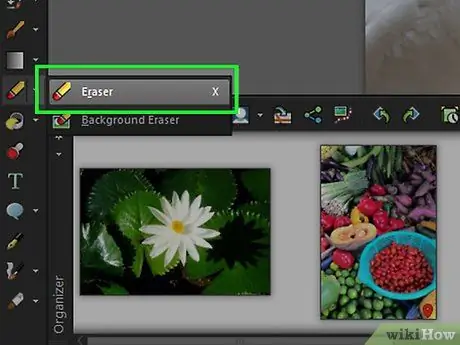
Step 3. Delete the object you want to focus on on the top layer (new layer) to sharpen it
Since the original image is still directly below the new layer you created, deleting the object you want to focus on on the new layer will display the object in the original image which is not blurred so that the object becomes more focused and sharp.
- Select the eraser (eraser tool) from the toolbar on the left of the screen.
- Adjust the size of the eraser. For large areas, use a large eraser. For small parts (eg details or small corners), use a small eraser with greater precision.
- Adjust the level of strength or thickness of the eraser (opacity). For large parts, use an eraser with a high strength or thickness (high opacity) so that the parts can be erased neatly. For small corners, reduce the power of the eraser to create a smoother, neater effect. Multiple low-strength erasures on the same part will have a cumulative effect so (if possible) use a low-strength setting on the eraser being used.
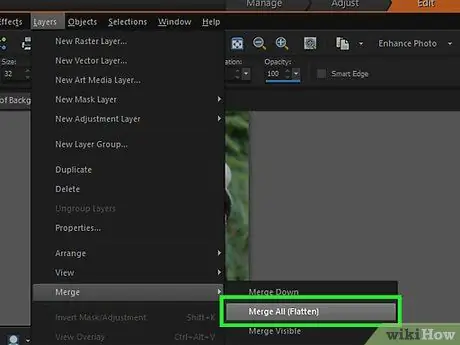
Step 4. Once you are satisfied with the final result, choose “Layers” > “Merge” > “Merge All”
This option will merge all the existing layers into one complete image.
Method 5 of 6: Using Paint Shop Pro: Detailed Method
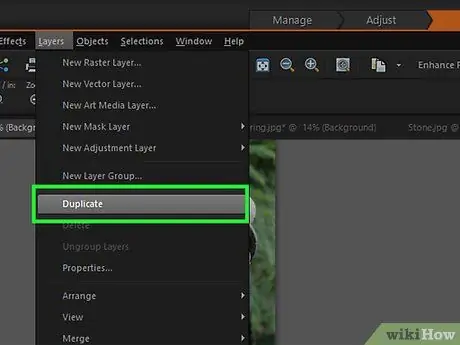
Step 1. Choose “Layers” > “Duplicate Layer”
This option allows you to create a new layer identical to the layer containing the original image, and stack it on top of that layer.
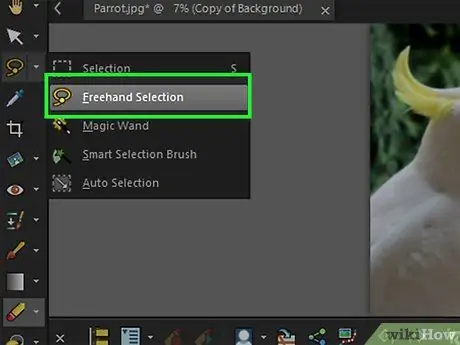
Step 2. Use the freehand selection tool (similar to the lasso tool icon) from the tool palette in the Paint Shop Pro window
You will use it to select the part of the image that you want to separate from the background to be blurred. Choose the type of selector that best fits the object or part you want to highlight. As an example:
- If the object or part you want to highlight has straight edges or outlines, right-click the freehand selection tool to change the selector type to point-to-point. This type of selector allows you to create a straight line between one point and another that you create by clicking on it where you want it.
- If there are sharp and clear corners or outlines between the object you want to highlight and the background, change the freehand selection tool to a smart edge selector type. This type of selector can automatically find the corners or outlines of the object.
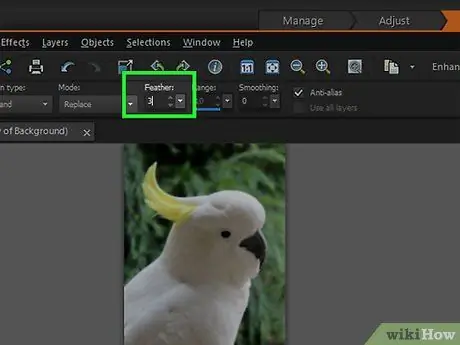
Step 3. Increase the smoothness of the outline of the object (feather) to 1 to 3 pixels
By smoothing the outline, the boundary between the object and the background will become smoother (and of course the difference between the main object and the blurred background will be much neater).
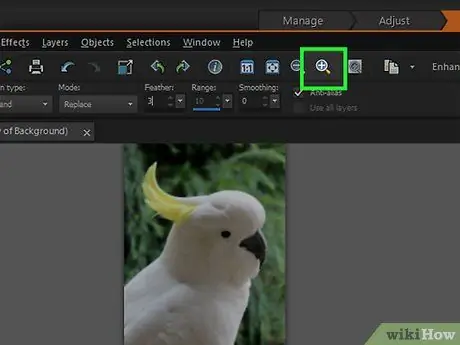
Step 4. Enlarge the image and focus on the object you want to highlight so you can see the sides more clearly
In this way, the selection can be done more accurately.
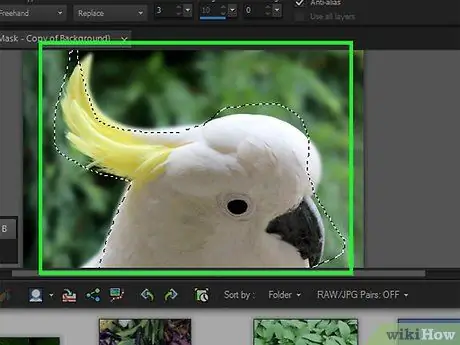
Step 5. Click and drag the freehand-select tool along the side or outline of the object
Make sure you end the selection by reaching back to the starting point of the selection and clicking on it. The selection is complete when there is a line (made up of 'glitter' dots) surrounding the outline of the object.
- When using the lasso tool, make sure you select the top layer (the new layer you created earlier).
- To add to the section you want to select, press and hold the “Shift” key as you continue to select. In this way, you can modify the selection that has already been made or continuously select another section that is different and separate from the first section.
- To remove a certain part of the selected part, press and hold the “Ctrl” key, then select the part that you want to remove from the selection.
- Don't worry if your initial selection isn't perfect; You can still readjust it later.
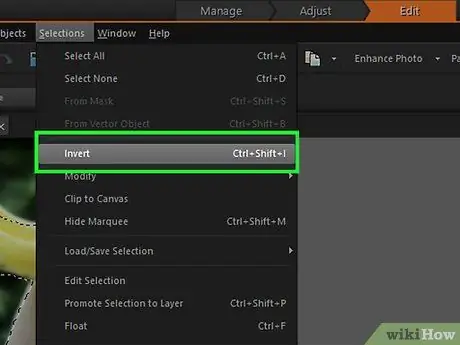
Step 6. Choose “Select” > “Inverse”
This option will automatically invert the selected area so that the selected area becomes the background only, not the object you previously selected.
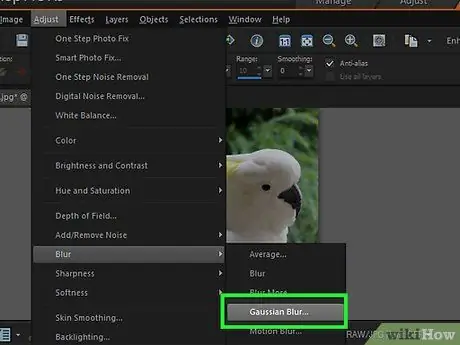
Step 7. Use the “Gaussian Blur” filter in the “Image” > “Blur” menu
This filter will blur the background of your image.
Try experimenting with the radius of the blur filter to create the desired effect on the background. The larger the radius, the more blurred the image will appear so to get a light blur effect, use a small radius. For example, if you want the background of the image to appear very smooth (but still recognizable), use a blur with a radius of 10. If you want the background to be less blurry, use a radius of 0, 5 or 0, 1
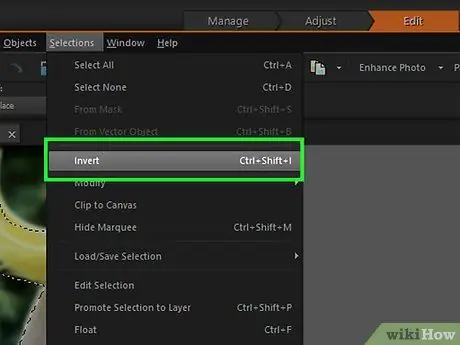
Step 8. Reuse the “Select” > “Inverse” option
Now, your main object will go back into the selection and the background will no longer be included in the selection.
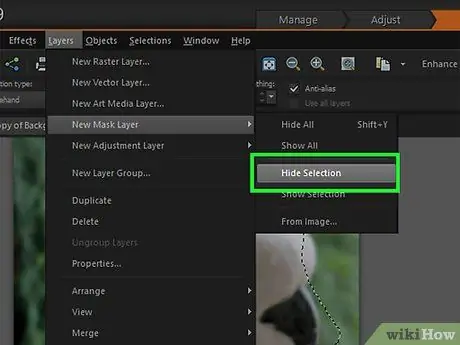
Step 9. Use the “Hide Selection” feature in the “Masks” > “New” menu
Now, the main object or foreground that you want to highlight is removed from the top layer, so that the original image below it can be seen.
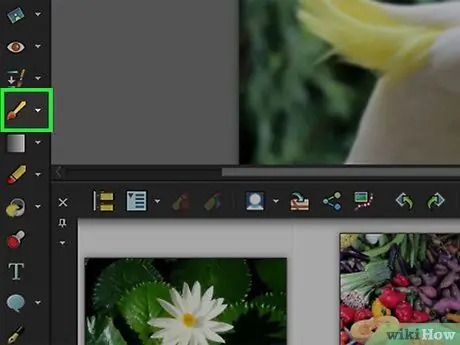
Step 10. Use the paintbrush tool to modify the selection
As is the case with editing using Adobe Photoshop, although it may seem odd because you will be 'painting' over the finished image, in fact at this stage you will be modifying the size and shape of the 'opening' between the top layer and the layer containing the original image. In other words, it's a way to refine the selection you've already made.
- Use black to further hide the top layer. For example, if the Gaussian blur feature overlaps the main object, use a black brush to hide the unwanted blur on the top layer.
- Use white to show more of the top layer. For example, if the blur is not close to the sides or outlines of the main object, fill in the blanks using a white brush.
- Make sure you use gray colors. It is important that you make the transition between the background and the main object look smooth and neat, especially on the sides or outlines of the object. In this way, errors that may exist will be difficult to see.
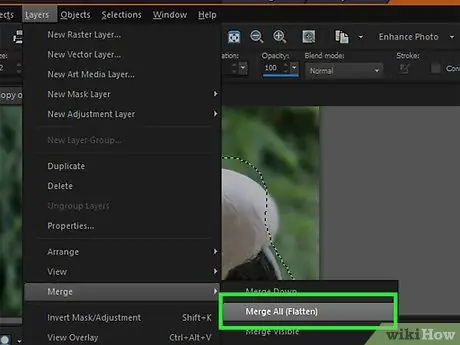
Step 11. Once you are satisfied with the final image, select “Merge All” on the “Layers” > “Merge” menu
This option will merge all the existing layers into one complete image.
Method 6 of 6: Using GIMP: The Quick Method
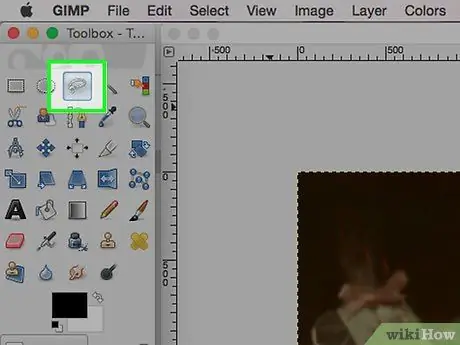
Step 1. Use the free select tool (similar to the lasso tool icon) from the tools palette in the GIMP window
You will use it to select the part of the image that you want to separate from the background to be blurred.
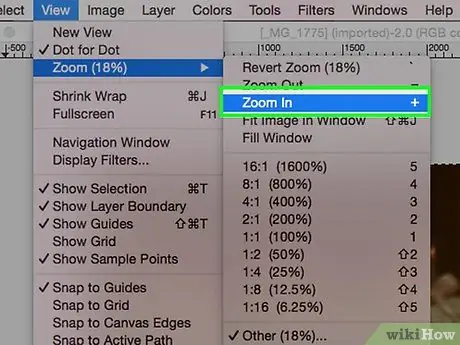
Step 2. Enlarge the image and focus on the object you want to highlight so you can see the sides more clearly
In this way, the selection can be done more accurately.
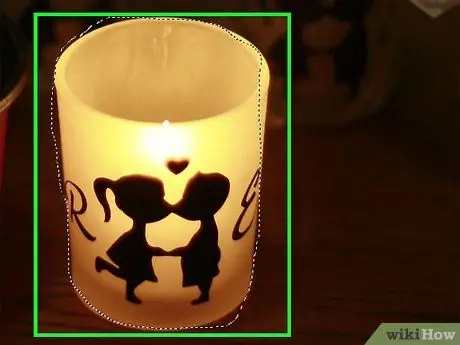
Step 3. Click and drag the freehand-select tool along the side or outline of the object
Make sure you end the selection by reaching back to the starting point of the selection and clicking on it. The selection is complete when there is a line (made up of 'glitter' dots) surrounding the outline of the object.
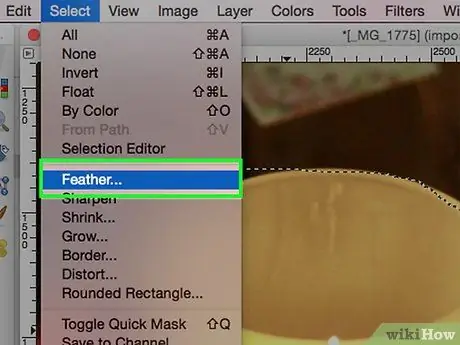
Step 4. Increase the smoothness of the outline of the object (feather) to 1 to 3 pixels
By smoothing the outline, the boundary between the object and the background will become smoother.
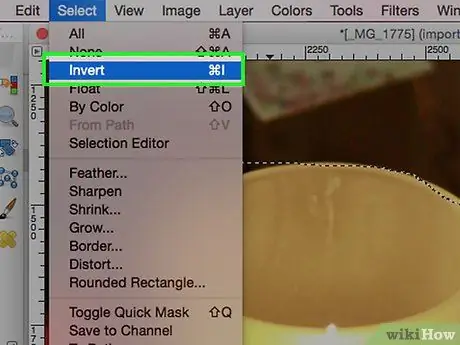
Step 5. Choose “Select” > “Invert”
This option will automatically invert the selected area so that the selected area becomes the background only, not the object you previously selected.
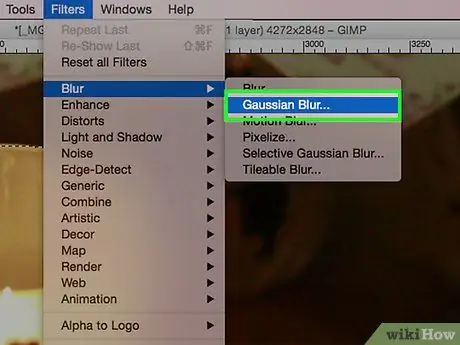
Step 6. Use the “Gaussian Blur” filter in the “Filters” > “Blur” menu
This filter will blur the background of your image.
Try experimenting with the radius of the blur filter to create the desired effect on the background. The larger the radius, the more blurred the image will appear so to get a light blur effect, use a small radius. For example, if you want the background of the image to appear very smooth (but still recognizable), use a blur with a radius of 10. If you want the background to be less blurry, use a radius of 0, 5 or 0, 1
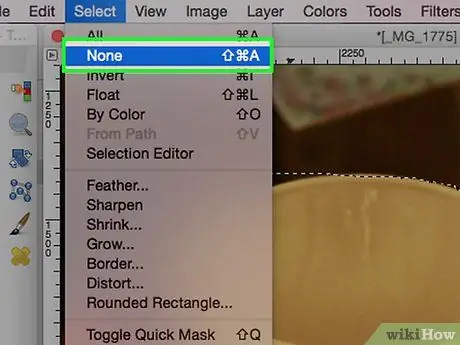
Step 7. Choose “Select” > “None” to complete the selection
Tips
- The greater the megapixel number on the camera used, the better (higher) resolution the resulting image will be. It will be difficult for you to fix images with low resolution.
- Make the selection of the outline of the object very accurately so that the object does not look cut or rough.
- Digital editing to blur the background does not necessarily produce a real depth of field in the image because the blur will be applied to any objects in the background, not individual objects such as blurring of objects based on camera lens distance. If you are using Adobe Photshop, you can use the smart blur option in the “Blur” filter menu. This filter pays attention to depth and perspective of space, applies blur to areas perceived to be far behind, and gives sharpness to objects perceived as in focus in the image. This filter can also be readjusted so it's a good idea to use it gradually until you get the effect you want.
- This technique produces an artificial image effect (not the original from the camera lens capture). To get a more original appearance of the image, blend the blur so that the blur is only applied to objects in the background. In the example presented in this article, if the grass in front of the child is still sharpened, the image will show the depth of the narrow space more accurately. This way, the image will appear more natural.
- Some digital editing programs have a feature known as zoom blur. This feature allows you to specify a focal point to serve as the blur benchmark (the part that is subject to the focus point will be the main object).
- Before making changes to an image, make a copy of the image file, then convert the image to the 16 million color format if the image doesn't already have that format. All of the algorithms embedded in the digital 'darkroom' programs mentioned in this article work more efficiently on the 16 million color format or mode than any other color format or mode.
Warning
- Make sure you save your work often! If the computer suddenly can not work (freezing) during the editing process, all progress that has been made will be lost.
- Make sure you don't overwrite the edited file on the original image file. If the existing image file is the only original file you have, the original will be lost when your edited file is overwritten on it.


