- Author Jason Gerald [email protected].
- Public 2023-12-16 10:50.
- Last modified 2025-01-23 12:04.
Formatting your hard disk will allow you to use it on your computer to save files and install programs. The format you choose will determine the compatibility of the drive. Formatting a hard drive will erase all data on it, so make sure you have backed up your data beforehand. You can format your second (or third, or fourth, etc.) hard disk from within the operating system, or you can format your primary hard disk with your operating system's installation CD. If you need to securely erase your data, there are also free tools that allow you to securely erase your data until it can no longer be recovered.
Step
Method 1 of 5: Formatting Second Hard Disk in Windows
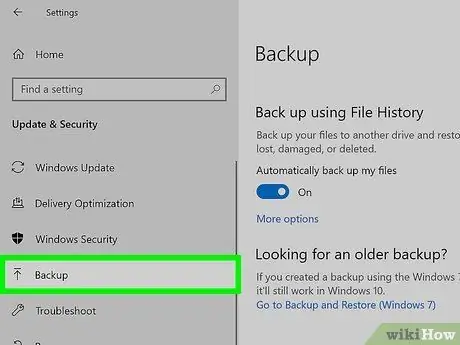
Step 1. Back up the data you want to save
Formatting the hard disk will erase all stored data, so make sure you have saved all the data you need to save to a safe location. You can back up your data to a new hard disk later.
- You cannot back up programs that are already installed. The program must be reinstalled on your new hard disk. However, you can usually back up your settings and preference files.
- Read this guide for details on how to back up data.
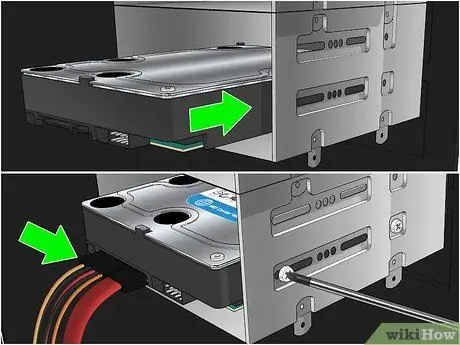
Step 2. Install the hard disk
If you are formatting a new hard disk, it must be attached to your computer. Read the guide for installing the internal hard disk. If your hard disk is an external hard disk, connect it via USB.
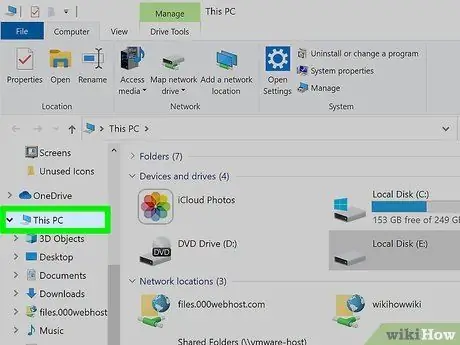
Step 3. Open the Computer/My Computer/This PC window via the Start menu or by pressing Win+E
This window will display all the storage media on your computer.
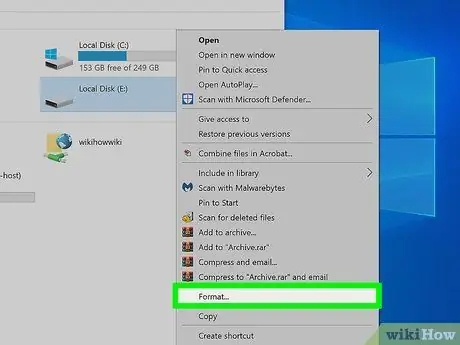
Step 4. Right-click the hard disk you want to format, then click "Format"
The Windows Formatter window will open.
Make sure you select the correct hard disk. All data will be deleted when the hard disk is formatted
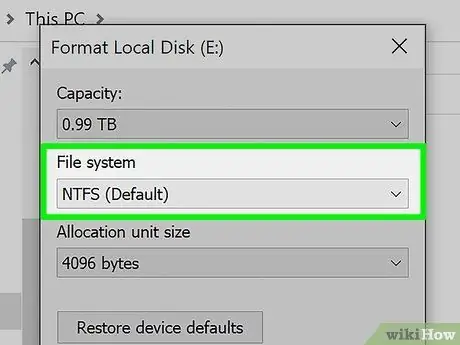
Step 5. Select the file system
The file system is the way the hard disk organizes and categorizes files, and determines the compatibility of the hard disk. If your hard disk is an internal hard disk and you will only use it on a Windows computer, choose NTFS. If you are using an external hard disk, choose FAT32 or exFAT.
- FAT32 and exFAT are writable by fairly new operating systems. FAT32 is an older file system and does not support files larger than 4GB, but it can be read by almost all operating systems. exFAT has no file size limit, but is not readable by older operating systems like Windows 95.
- In general, exFAT is the best option for external hard drives, as it is compatible with most operating systems and can store large files.
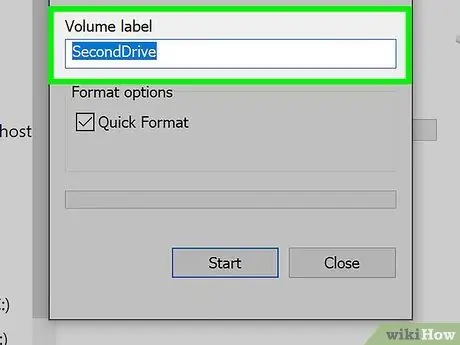
Step 6. Give the hard disk a name
If you use your hard disk for only one purpose, giving the hard disk a name will help you identify its contents. For example, if your second hard disk contains music, movies, and pictures, using the name "Media" will quickly tell you what the hard disk contains.
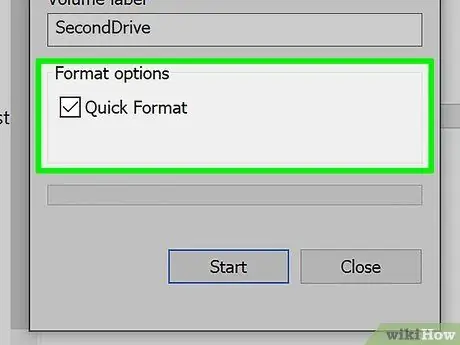
Step 7. Decide whether you will use Quick Format
Quick Format will format the hard disk faster than the standard format process, and is good enough for most users. Perform a standard format only if you suspect your hard disk has a problem. A standard format will probably fix the problem.
The Quick Format option does not guarantee that data will be securely deleted. If you need to securely erase data, read the last part of this guide
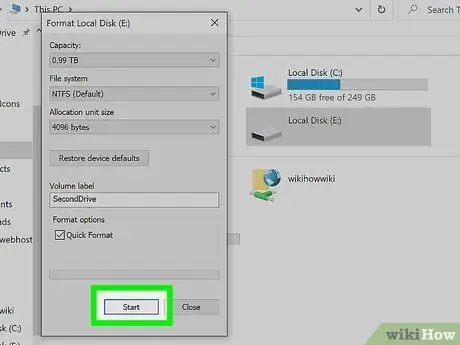
Step 8. Begin the format process by clicking Start, then clicking OK to confirm that you understand that the entire contents of the hard disk will be erased
If you select Quick Format, the formatting process will only take a few seconds.
Method 2 of 5: Formatting Second Hard Disk in Windows
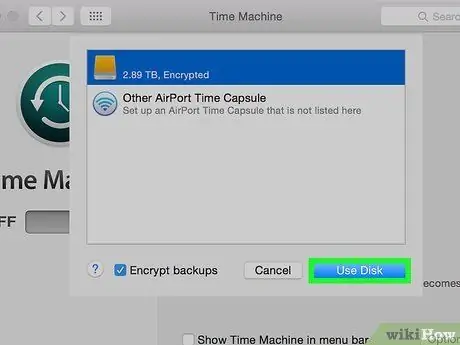
Step 1. Back up the data you want to save
Formatting the hard disk will erase all stored data, so make sure you have saved all the data you need to save to a safe location. You can back up your data to a new hard disk later.
- You cannot back up programs that are already installed. The program must be reinstalled on your new hard disk. However, you can usually back up your settings and preference files.
- Read the guide for details on how to back up data.
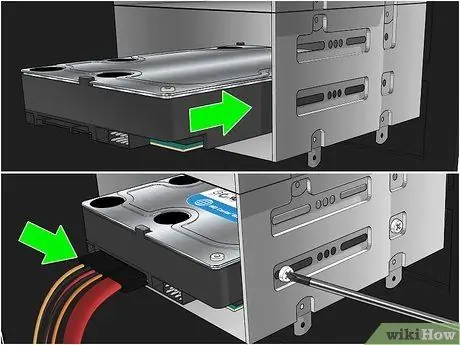
Step 2. Install the hard disk
If you are formatting a new hard disk, it must be attached to your computer. Read the guide for installing the internal hard disk. If your drive is an external drive, connect it via USB, FireWire, or Thunderbolt.
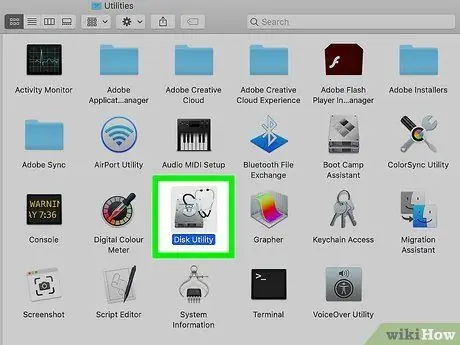
Step 3. Open Disk Utility by clicking "Go" and selecting "Utilities"
If you don't see the Utilities option, select "Application" and double-click the "Utilities" folder, then open the "Disk Utility" program.
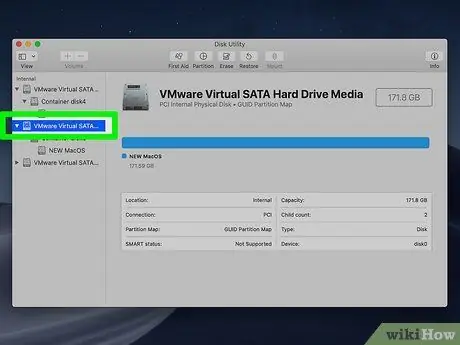
Step 4. Select the hard disk from the list on the left
All storage media connected to your computer will be listed on the left side of the Disk Utility window. Make sure you choose the right hard disk.
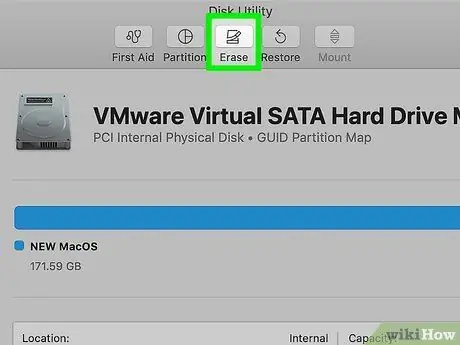
Step 5. Click the "Erase" tab to open the format options for your hard disk
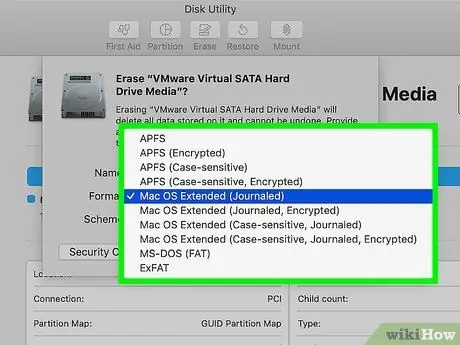
Step 6. Select the file system
The file system is the way a hard disk organizes and categorizes files, and determines hard disk compatibility. Use the Volume Format menu to select a file system. If your hard drive is an internal hard drive and you're only going to use it on a Mac computer, select Mac OS X Extended (Journaled). If you're using an external hard drive, choose exFAT.
- FAT32 and exFAT are writable by fairly new operating systems. FAT32 is an older file system and does not support files larger than 4GB, but it can be read by almost all operating systems. exFAT has no file size limit, but is not readable by older operating systems like Windows 95.
- In general, exFAT is the best option for external hard drives, as it is compatible with most operating systems and can store large files.
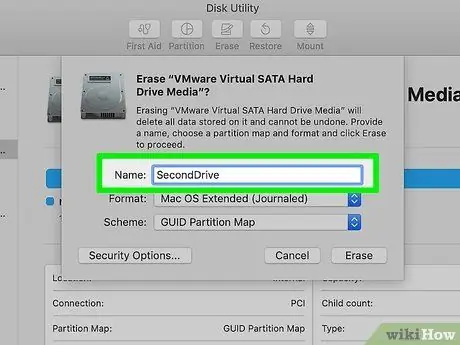
Step 7. Give the hard disk a name
If you use your hard disk for only one purpose, giving the hard disk a name will help you identify its contents. For example, if your second hard disk contains music, movies, and pictures, using the name "Media" will quickly tell you the contents of the hard disk.
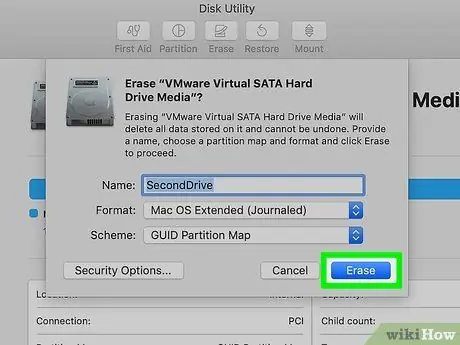
Step 8. Begin the formatting process by clicking Erase
This process will only take a few seconds.
Formatting the hard disk in this way will not securely erase the data. To make sure your data is safely erased, read the last part of this guide
Method 3 of 5: Formatting Primary Hard Disk in Windows
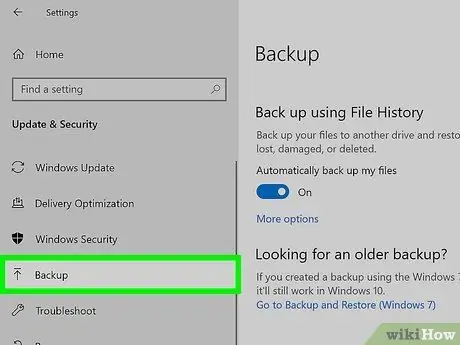
Step 1. Back up the data you want to save
Formatting the primary hard disk will erase your operating system and all the files stored on it, so you will have to reinstall the operating system. Having a backup of your data will make the transition easier.
Read the guide for details on how to back up data
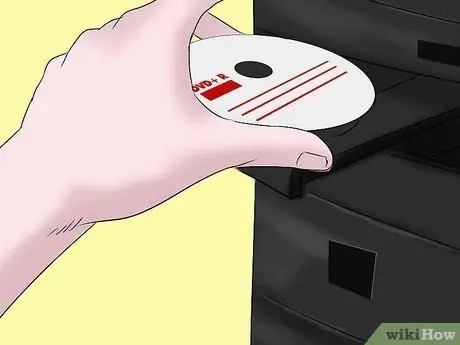
Step 2. Insert the Windows installation CD
You can also use a Boot Disk or LiveCD. This CD allows you to start the computer instead of via the hard disk, so that your hard disk can be formatted,
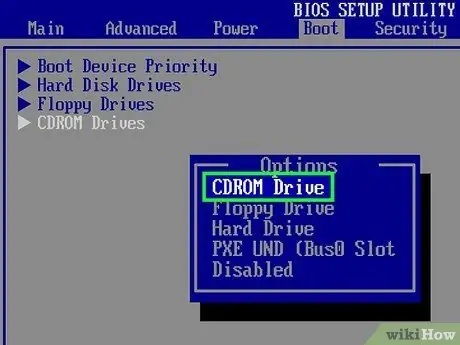
Step 3. Set your computer to start from the CD
You will need to set your computer's boot order in order to boot from the CD. Read the guide to changing the boot order.
To access your BIOS, shut down and restart the computer. Press the setup button, which is usually the F2, F10, or Del key
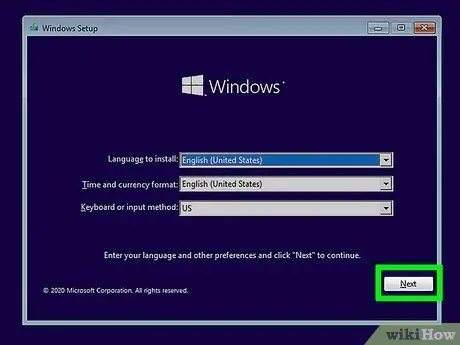
Step 4. Browse to the installation screen
You will have to start the installation program and browse through the initial few pages before you can see a list of your hard disks. Do "Custom Installation".
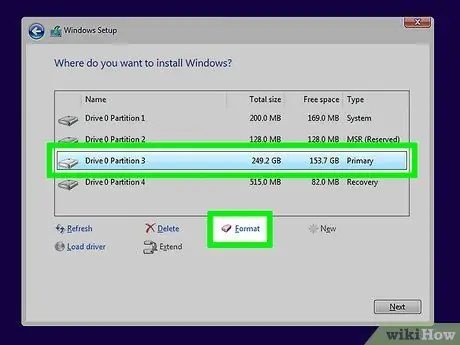
Step 5. Select the hard disk you want to format
Now, you will see all your hard disks and partitions. Select the hard disk you want to format, and click the "Format" button at the bottom of the list. The hard disk will be formatted as an NTFS hard disk.
You can only format your primary hard disk with the NTFS system
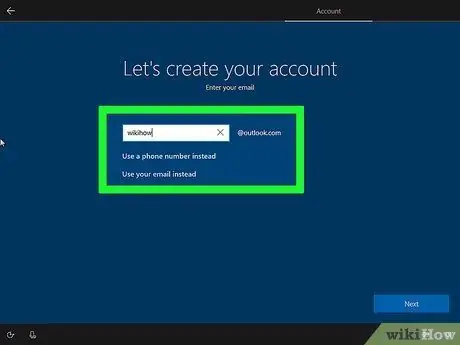
Step 6. Reinstall Windows
Once your primary hard disk is formatted, you can reinstall Windows, or install Linux on the hard disk. You need to have an operating system installed in order to use the computer.
Method 4 of 5: Formatting Primary Hard Disk in OS X
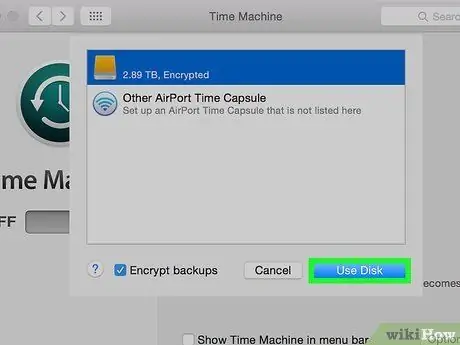
Step 1. Back up the data you want to save
Formatting the primary hard disk will erase your operating system and all the files stored on it, so you will have to reinstall the operating system. Having a backup of your data will make the transition easier.
- You cannot back up programs that are already installed. The program must be reinstalled on your new hard disk. However, you can usually back up your settings and preference files.
- Read the guide for details on how to back up data.
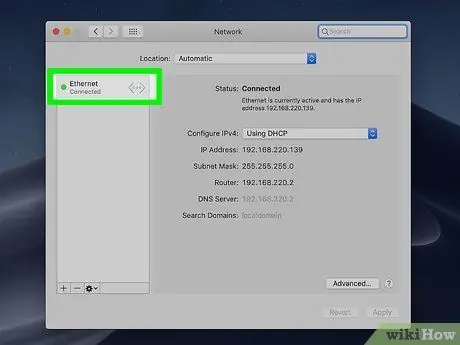
Step 2. Make sure your computer is connected to the internet
You will need an internet connection to reinstall your operating system at the end of this process. Read the guide to find out how to connect your Mac to the internet.
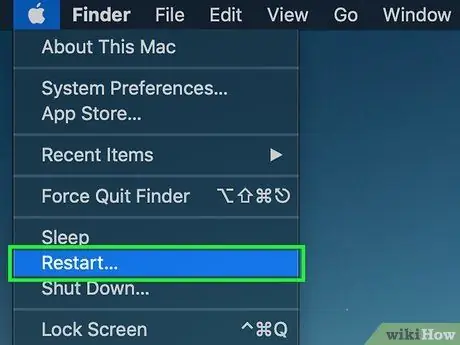
Step 3. Restart the computer by hitting the Apple menu and selecting Restart
When the computer restarts, hold down Command+R to open the boot menu.
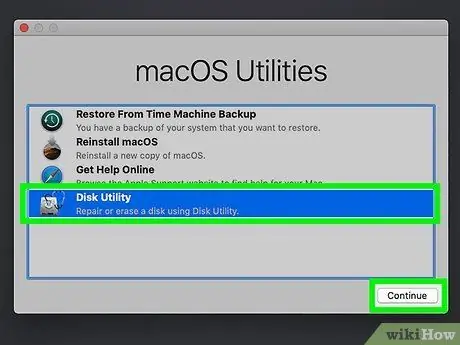
Step 4. Select "Disk Utility" from the boot menu to open the Disk Utility program in boot mode
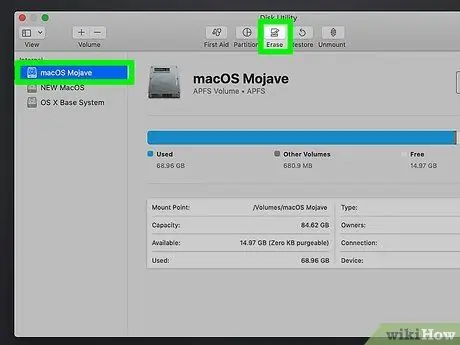
Step 5. Select the hard disk from the list on the left
Your entire hard disk will appear on the left. Choose the right hard disk because your data will be lost when formatted.
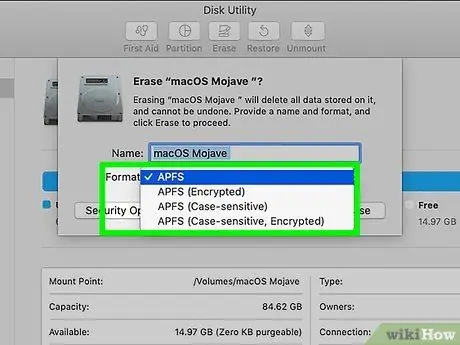
Step 6. Select the file system
The file system is the way the hard disk organizes and categorizes files, and determines the compatibility of the hard disk. Since this drive is the primary drive, select "Mac OS X (Journaled)".
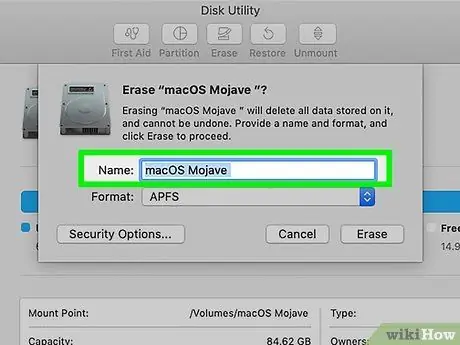
Step 7. Give your hard disk a name
For example, if you are reinstalling your operating system, name your hard disk "OS X" or something similar.
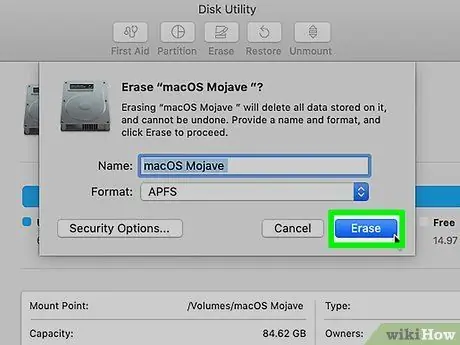
Step 8. Start formatting your hard disk by clicking Erase
This process only takes a few seconds.
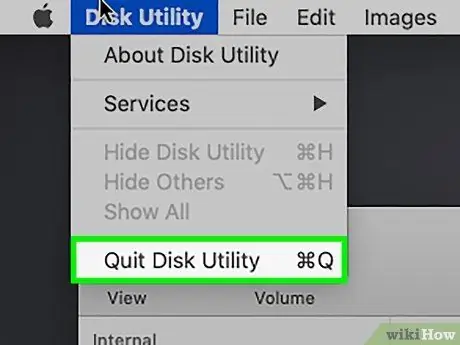
Step 9. Close Disk Utility to return to the Boot menu
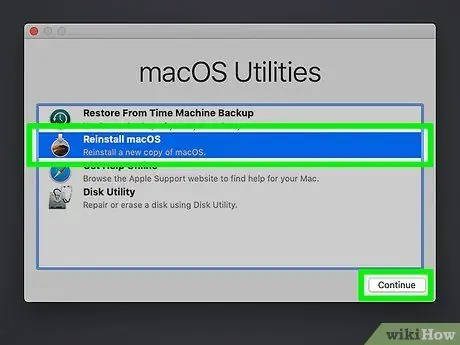
Step 10. Reinstall OS X
Click "Reinstall OS X" to start installing your operating system.
Method 5 of 5: Securely Formatting Hard Disk
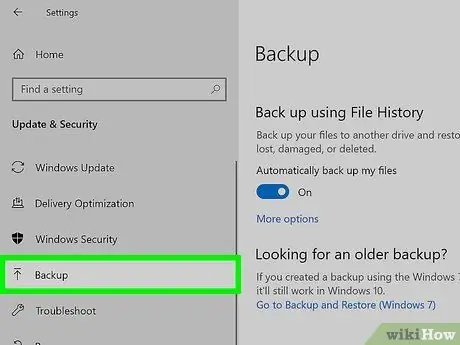
Step 1. Back up the data you want to save
Once a hard disk is securely formatted, you can never recover its contents, because restoring its contents can take days even if done on a government-owned supercomputer. Therefore, make sure you have backed up the data you need.
Read the guide for details on how to back up data
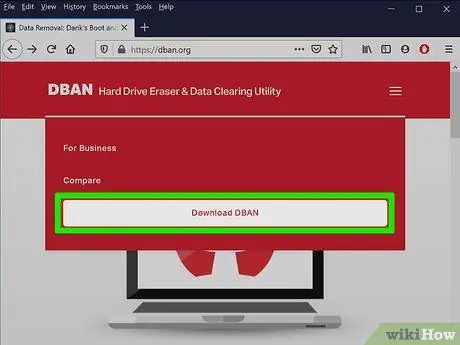
Step 2. Download DBAN
DBAN is a hard disk formatting program designed to securely erase data by overwriting the data so that it cannot be restored.
DBAN cannot be used on SSD type hard disks. You will need to use another program, such as Blancco
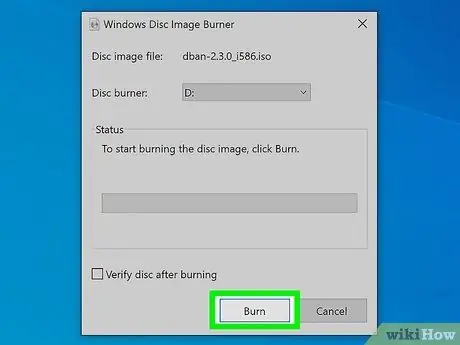
Step 3. Burn DBAN to DVD
DBAN is available as an ISO image. Burning this ISO to a DVD will allow you to start right off the DBAN interface.
Read the guide for details on how to burn ISO to DVD
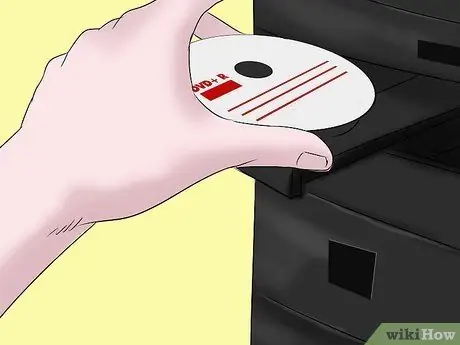
Step 4. Start the computer from the DBAN DVD
Insert the DVD into your computer and restart the computer. Select the DVD drive as the primary boot device.
- Windows: You need to set your optical drive as the drive to boot from the BIOS menu. Read the guide to find out how to set it up.
- OS X: Press and hold C while the computer restarts. After a while DBAN will start.
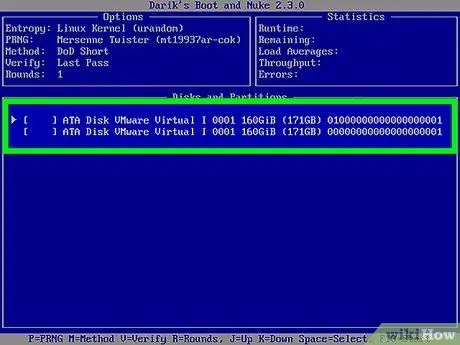
Step 5. Select your hard disk
Press Enter on the main DBAN screen, then select the hard disk with the arrow keys. Make sure you select the right drive if you have multiple drives.
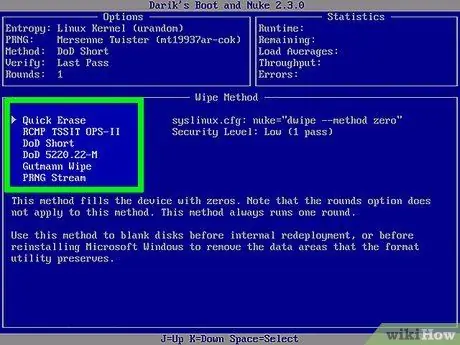
Step 6. Determine the deletion method
"DoD" will securely erase your data, and is quite recommended for most users. If you have very sensitive information, select "8-Pass PRNG Stream" to overwrite the data on the hard disk with random numbers eight times and destroy your data.
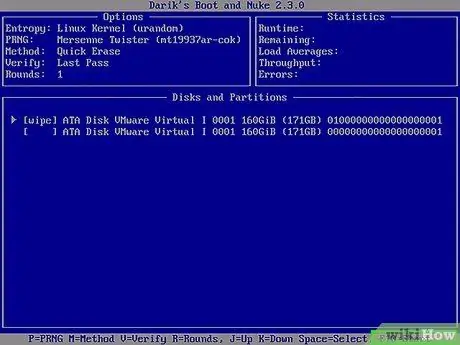
Step 7. Begin the formatting process
Once you have selected a formatting method, the formatting process will begin. Deleting data with DBAN can take several hours to days, depending on the type of method and the size of your hard disk.


