- Author Jason Gerald gerald@how-what-advice.com.
- Public 2023-12-16 10:50.
- Last modified 2025-01-23 12:04.
Have you recently moved to a new house and want to make it your new home right away? Why don't you try hanging some frames (framed pictures/paintings/photos)? The following are the steps you can follow to hang the frame neatly and safely.
Step
Method 1 of 3: Determining the Correct Location of the Frame

Step 1. Hold firmly on the frame (picture/painting/photo frame) that you have chosen and will attach it to the wall
Take sufficient time to consider the position of the frame. Adjust to the presence of furniture in the room, the surrounding environment and also the lighting. The ideal height of the frame is usually based on the position of the observer's eye line, which is about a quarter of the top of the frame. However, it all comes back to your taste.
- If you have family members or friends nearby, ask them to help you hold the frame while you look at it from a distance to make sure it fits.
- If there's no one to turn to for help, grab the frame yourself and press it firmly against the wall. Then use a pencil to mark the walls at each corner of the frame. After that, lower the frame and take a few steps back to see the marks you have made that mark the position of the frame. Make several adjustments, if necessary repeatedly, until the frame is positioned where you want it. Don't forget to erase the pencil nicks you made, if later you've hung the frame in question.

Step 2. Use a pencil to mark on the wall the position of the center of the frame
If you're having trouble determining the center just by looking, you can use a tape measure and make sure you mark the center position of the frame at the top. You don't need to draw a line along the top of the frame, just mark it right in the middle.

Step 3. Place the frame on a flat place in an inverted position
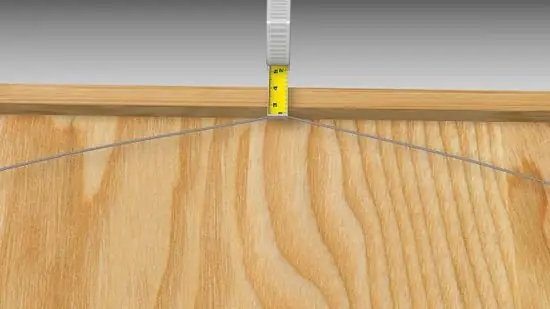
Hold the hanging rope that is behind the frame. Pull the rope towards the top of the frame so that it is tense. Measure the distance from the top of the frame to the end of the drawstring.
If your frame has bars instead of hanging strings, measure the distance from the bars to the top of the frame

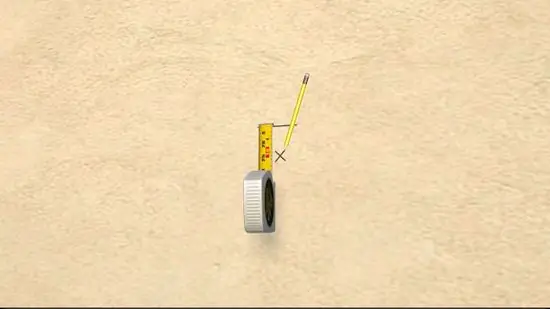
Step 4. Use this measurement (the distance from the end of the hanging rope to the top of the frame) to determine the point where you should attach the nail or screw
Measure from the mark you made on the wall downwards. Mark the point where the nail will be installed. When taking measurements, try to make the line as straight as possible.
Method 2 of 3: Selecting Hanger Device

Step 1. Decide what hanger you want to select:
nails, screws, or traditional frame hooks. These three options are ideal if you want to hang a frame that weighs 9 kilograms or less.
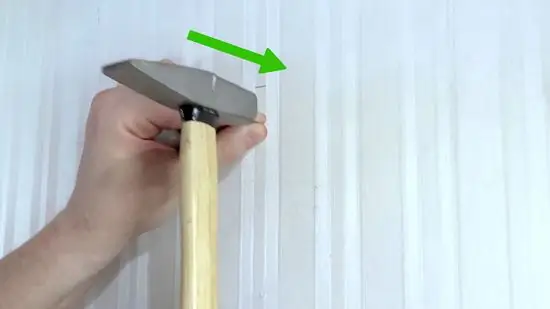
- If you are using a nail and hammer: Choose a 4 cm or 5 cm nail. Position the nail on the pencil notch you made in the previous step. Position the nail at a 45-degree angle against the wall and then hit it with a hammer. Nails with a slope of 45 degrees will be stronger than when installed in an upright position.
- If you are using a drill and screws: Drill the pencil marks you made in the previous step. Insert the screw in the hole and tighten it.
- If you are using a traditional frame hook: Insert a nail through the hole in the hook. Hold the hook and press it against the wall at the desired height (it will automatically hold the nail at a 45 degree angle). If it's right, hit the nail carefully so you don't hit the hook because it can damage the wall.

Step 2. Decide on the hanging device you will choose to hang frames weighing more than 9 kilograms
Heavier frames require more durable hangers. Choose a spiral anchor or toggle bolt. Spiral anchors are bolts with an anchor/hook-shaped head and a spiral-shaped rod. While the toggle bolt is a bolt with a wing-shaped spring fastener that can move flexibly along the stem.
- If you are using spiral anchors: Using spiral anchors is the easiest way to hang heavy frames. You just need to embed the spiral anchor on the wall. Several types of spiral anchors have also been equipped with hooks that function as hangers.
- If you use a toggle bolt: There are various models of toggle bolts sold in the market with their respective specifications and installation instructions are usually included in the package. One of the toggle bolts is made of a combination of plastic and metal. Here's how to set it up! First drill the wall to make a hole about 1-2 cm in diameter. Align the metal wing of the toggle bolt and insert it into the hole. Grasp the ends of the straps with your thumb and forefinger and pull them toward you until the metal flange is pulled in and flat against the back of the wall. Slide the cover along the rope and press it against the wall, then break the rope. Then insert the metal bolt in the hole and tighten it with the help of a screwdriver.
Method 3 of 3: Hanging and Straightening the Position of the Frame

Step 1. Position the artwork (painting, photo, etc
) carefully on the hanging device you choose. Make sure that the frame is firmly hanging on the hanger before you remove it. Frames that are not strong enough to hang may fall and risk breaking if they are covered with glass.
If you are using screws or nails, position the frame so that later the screws or nails are behind the frame and completely out of sight from the front

Step 2. If necessary, use a level/flat level to check whether the frame is hanging in a horizontal/straight position
Place the spirit level on the top of the frame. If the water bubble in the spirit level is right in the middle, it means that your frame is hanging straight. On the other hand, if the water bubble is on one side, you must immediately correct the position of the still tilted frame.
Tips
- If you want to hang more than one piece of art at different heights, it's a good idea to try installing one frame halfway up the other. In this way you have reduced the total height of the entire frame. When you want to add a few more frames you can set them half higher. Thus you will get different highs.
- The use of two hooks will make it easier for you to hang the frame in a horizontal position, even if the frame is light. After hanging it, you can check the flatness using a level level on the top or bottom of the frame. If it turns out that it is still tilted, you only need to move the frame to the left or right until you get the expected flat position.
- You can also use the existing ready-made image hanging system. If you happen to be using the rail system in your drawing, you will be free to move the attached image to a different point or add an image without having to nail or drill into the wall.
- In museums, works of art are usually hung at a height of about 142-148 cm from the floor. The hanging position is right in the middle.
Warning
- Be careful when drilling or hammering nails into the wall. There could be a network of electrical wiring or piping in the wall. Otherwise, in addition to damaging the structure, it also has the potential to cause injury or death.
- Remove any artwork that will be installed while you are measuring or drilling. You certainly don't want an accident that will ruin the work of art.
- Make sure that the wall you choose is able to accept the weight of the artwork that will be hung.
- In principle, these instructions can be applied to hanging various sizes and weights of frames (art objects, etc.)


