- Author Jason Gerald gerald@how-what-advice.com.
- Public 2023-12-16 10:50.
- Last modified 2025-01-23 12:04.
The most frustrating thing on the internet is waiting for a page to finish refreshing or loading. This page load delay is known as latency, which is a measure of the time it takes for a data packet to travel from the source (web server) to the destination (your computer). The steps below are useful for identifying the location of communication delays using web-based tools and utilities on a computer.
Step
Method 1 of 3: Using a Web-based Testing Tool

Step 1. Select a site to test the connection
There are many sites that provide internet testing services, your internet service provider (ISP) also has a similar tool on their web portal. Two test websites that are popularly used are Speakeasy and DSLReports. These steps use a test kit from DSLReports which provides diagnostic tools.
- Visit www.dslreports.com.
- choose Tools from the menu on the top bar.
Step 2. Remove other users from your network
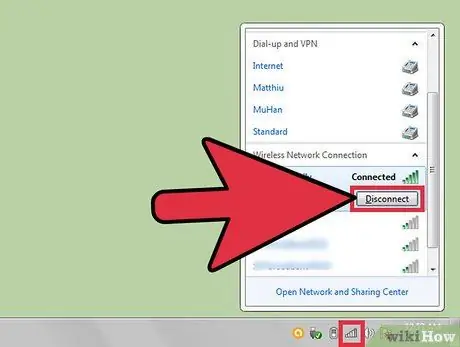
If there are many users in a network, it will affect the speed test report.
- Pass this request on to other users. Ask them to leave the network until you are done testing for network connection issues.
- If there is a problem with the network connection, you should connect your computer directly to the internet modem with an ethernet cable instead of a wireless network. This is useful for isolating the problem more deeply.
Step 3. Run a speed test
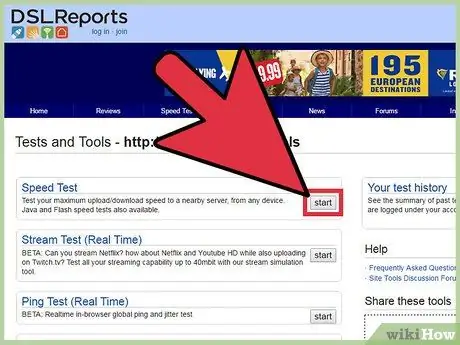
The speed test will tell you the upload and download speed of the connection between your computer and the test site. This result can be compared to the internet speed stated on your ISP agreement.
- Knob start will start a speed test. This button is on the right side of the box Speed Test. Click this button.
- choose connection type. On the test page, select your connection type from the list: Gigabit/Fiber, Cable, DSL, Satellite, WISP, or other.
- Run a connection test. The test will start running and test the download speed and upload speed, then report network latency.

Step 4. Run a ping test
The ping test is useful for checking the time it takes for a data packet to go from your computer to a remote server and then back to your computer. This test will test multiple servers simultaneously and report back on their overall performance score. Normal latency varies depending on the connection type: 5-40 ms for cable modem, 10-70 ms for DSL, 100-220 ms for dial-up, and 200-600 ms for cellular. Distance to remote servers also affects latency and there is an estimated 1ms latency for every 100km of data travel.
- Run a ping test. From the tools page, select Start from the Ping Test (Real Time) box. You will be taken to a page indicating that all registered servers will be pinged twice per second. Every thirty (30) seconds, a report of your connection from point A to point F will appear.
- Click Start. A radar plot will appear along with a graph containing various server locations, the IP addresses of those locations, as well as real-time statistics on connection latency.
- View connection test report results. After the test is complete, the connection value will appear in the left column with a new value appearing every 30 seconds. When the test is complete, you can re-test the connection or share the results of your completed test.
Step 5. Find your IP address
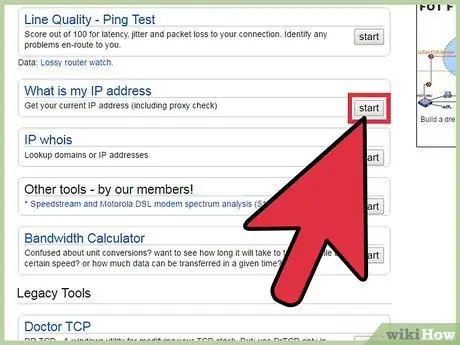
Although this does not include tests, tools What is my IP address provides a report on your computer's public IP address. This is not the actual IP address of your computer but the IP address provided by your router service. The tool also lists the public IP addresses of network components, which is helpful if you have to use Windows utilities to help locate the source of network or internet latency.
- Run What is my IP address. Click start on the box What is my IP address. You will be taken to a page that displays your IP address along with any other addresses relevant to your computer.
- Take note of your IP address. If you plan to run additional diagnostic tests for the connection/internet network, write down the IP address that appears as well as one of the public IP addresses from the list below.
Method 2 of 3: Using Command Prompt in Windows

Step 1. Open Command Line Prompt
You can enter commands to test network and internet latency directly from the command line.
- Click Start, choose Run.
- Type cmd, then press OK. This command will launch the command line window into which you type the test command. You can also search for the "cmd.exe" file from Windows search.
Step 2. Run ping loopback
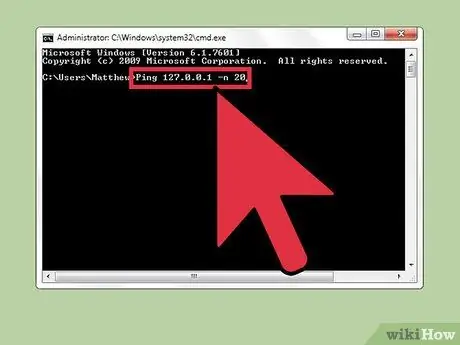
The loopback ping test will test your computer's connection to ensure that it's not your local hardware that is causing network or internet latency issues.
- Type in “Ping 127.0.0.1 -n 20'”. This IP address is used on almost every network connection. The suffix “-n 20” means sending 20 data packets before the end of the test. If you forget to type “-n 20”, stop the test by pressing Ctrl+C.
- View statistics. The time it takes for a data packet to travel locally must be less than 5 ms and no packets should be lost.
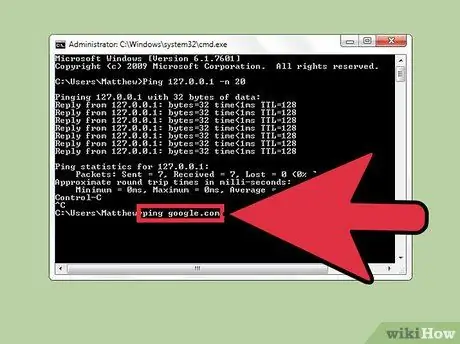
Step 3. Ping the remote server
Once you know that there are no problems on the local port, test the latency by pinging the remote server. Again, normal latency varies depending on the type of connection: 5-40 ms for cable modems, 10-70 ms for DSL, 100-220 ms for dial-up, and 200-600 ms for cellular. Distance to remote servers also affects latency and it is estimated that there is 1ms of latency for every 100km of data travel.
- Type “Ping” followed by the URL or IP address of the site you want to ping, then press the Enter key. Enter the URL of your internet service provider first, then proceed to other sites that you visit frequently.
- See test report. After the remote address is pinged, the test will report back the results; the final number after “time=" is the time it takes the packet (in milliseconds) to go to the remote site and return to your computer. Note: additional “-n 20” must be used for this command. If you forgot, press Ctrl+C to undo it.
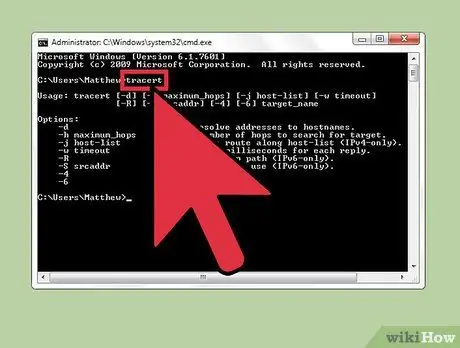
Step 4. Run a traceroute test
The traceroute test will show the path of the data as it goes from your computer to the remote server along with any delays if any. This step can help determine the source of the delay on the network or internet.
- Type “tracert” followed by the URL or IP address of the site you want to route to, then press the Enter key.
- View test results. After the test traces the path of the data movement, each address the data passed through is displayed along with the time it took, as well as an acknowledgment of acceptance for each hop along the way. The more hops or other devices a data packet has to route, the greater the delay you will experience.
Method 3 of 3: Using the Tester on Mac
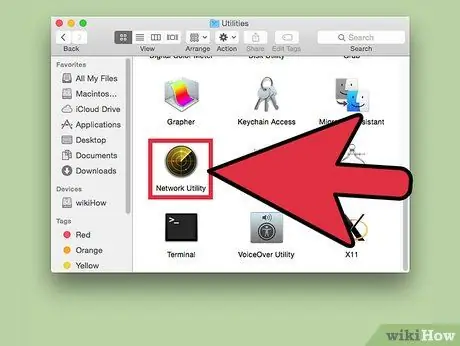
Step 1. Open Network Utility
The program you need to test network and internet latency is in Network Utility on Mac OSX.
- open Finder and Applications.
- Open folder Utilities.
- Look for Network Utility then click on that app icon to open the app.
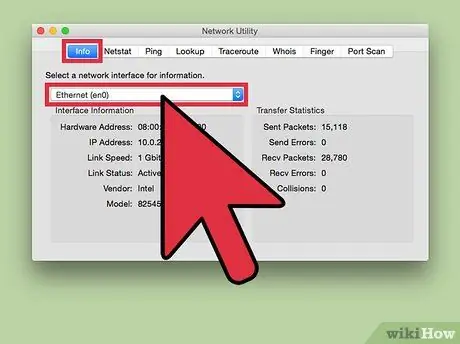
Step 2. Select a network connection
Network Utility is capable of testing connectivity across Ethernet (wireless) connections, Airport (wireless) connections, Firewalls, or Bluetooth.
- On the Info tab, select your connection from the network interface drop-down menu.
- Make sure the connection you choose is active. An active connection displays information in the hardware address, IP address, and Link Speed fields. In addition, the Link Status column will read "Active". Inactive connections only have hardware address information, while the Link Status column will say “Inactive”.)
Step 3. Run a ping test
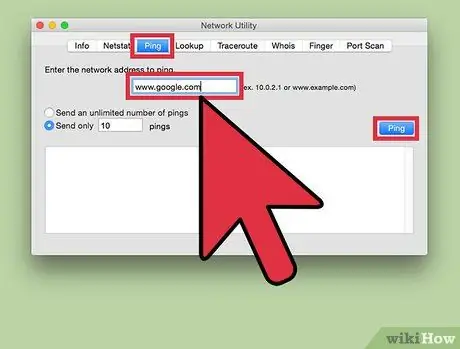
The Network Utility ping test will ask you to enter the address of the destination site and the ping frequency. Normal latency varies depending on the type of connection: 5-40 ms for cable modems, 10-70 ms for DSL, 100-220 ms for dial-up, and 200-600 for cellular. Distance to remote servers also affects latency and there is an estimated 1ms latency for every 100km of data travel.
- Select the Ping tab from the Network Utility menu.
- Enter the IP address or URL of the site you want to ping. Enter the URL of your internet service provider first, then proceed to other sites that you visit frequently.
- Enter the frequency for site pings (default is 10).
- Click button Ping.
- View test results. After the remote address is pinged, the test will report back the results; the final number after “time =” is the time it takes for the packet (in milliseconds) to go to the remote site and return to your computer. Note: additional “-n 20” must be used for this command. If you forgot, press Ctrl+C to undo it.
Step 4. Run a traceroute test
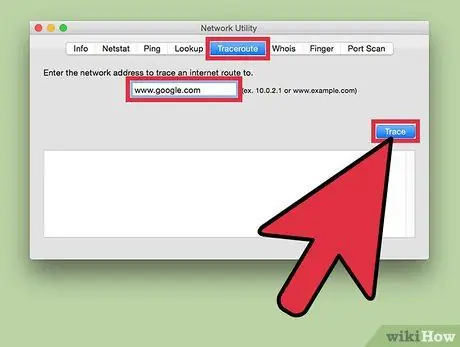
The traceroute test will show the path of the data as it goes from your computer to the remote server along with any delays if any. This step can help determine the source of the delay on the network or internet.
- Select the Traceroute tab from the Network Utility menu.
- Enter the IP address or URL of the site you want to route to.
- Click the traceroute button.
- See the results. After the test traces the path of the data movement, each address traversed will be displayed along with the time it takes for the data packet to travel as well as an acknowledgment of receipt of each hop along the way. The more hops or other devices a data packet has to route, the greater the delay you will experience.


