- Author Jason Gerald gerald@how-what-advice.com.
- Public 2024-01-19 22:11.
- Last modified 2025-01-23 12:04.
Archive and AutoArchive are features of Office 2007 that allow you to move old files to an archive location within a specified period of time. Generally, Outlook 2007 archives files automatically every 14 days, but you can archive files manually, or set AutoArchive to archive files on a schedule.
Step
Method 1 of 2: Manually Archiving
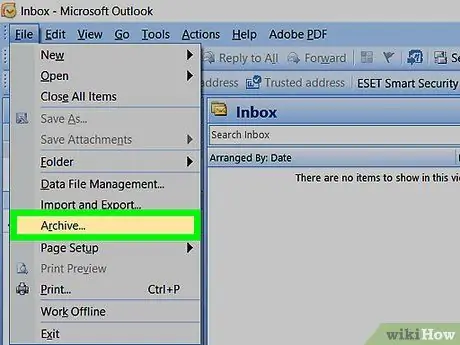
Step 1. Click File at the top of your Outlook 2007 window, then select Archive
An archive dialog box will appear.
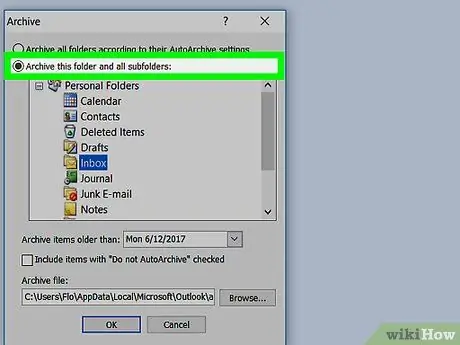
Step 2. Select the Archive this folder and all subfolders button.
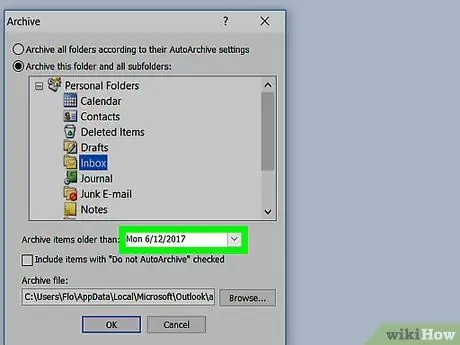
Step 3. Click the menu next to Archive items older than, then select the date you like
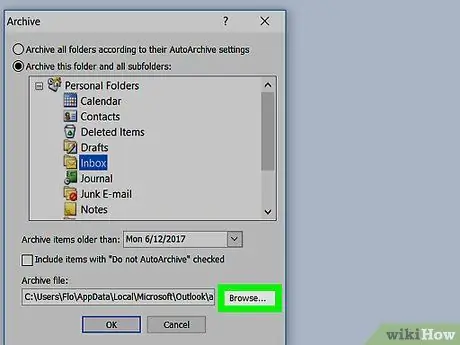
Step 4. Click Browse, then select a location to save the archive file
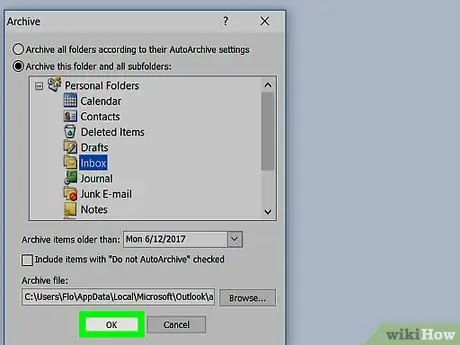
Step 5. Click OK
All files in Outlook that are older than the date you selected will be archived.
Method 2 of 2: Customizing AutoArchive
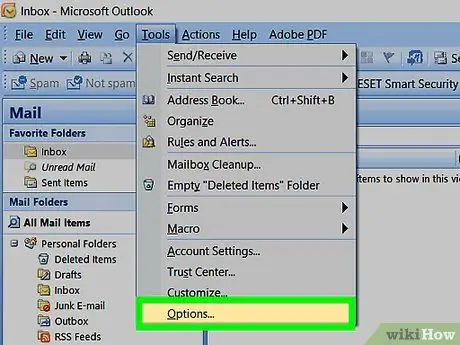
Step 1. Click Tools at the top of your Outlook 2007 window, then select Options
The Options dialog box will appear.
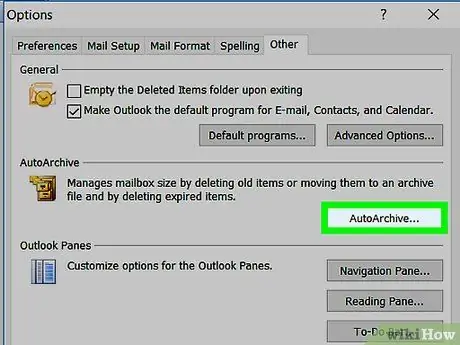
Step 2. Click the Other tab, then click AutoArchive.
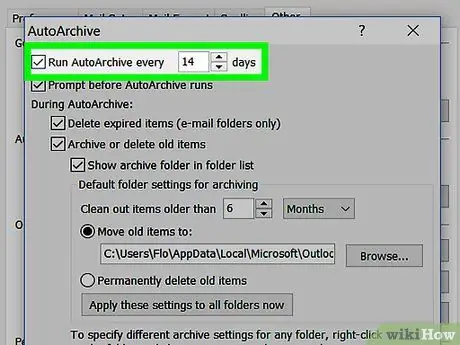
Step 3. Check the Run AutoArchive every check box, then select the scan frequency from the available menu
Generally, Outlook 2007 will scan old files every 14 days.
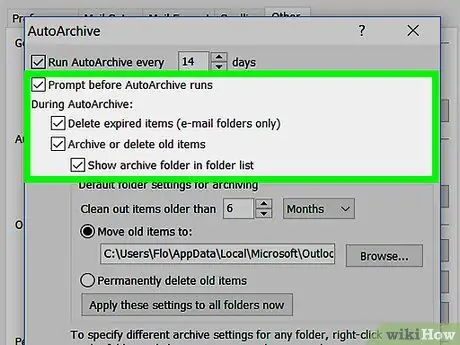
Step 4. Check one or more of the options below as needed:
- Prompt before AutoArchive runs: This feature will display a reminder message before the archiving process, so you can cancel the AutoArchive session if you wish.
- Delete expired items: This feature allows Outlook to delete files once they are old enough.
- Archive or delete old items: This feature allows you to archive or delete certain files once they are old enough.
- Show archive folder in folder list: When this feature is on, the Archive directory will appear in the Outlook navigation pane, so you can browse archived files easily.
- Clean out items older than: This setting allows you to specify the age of the files to be archived, from 1 day to 60 months.
- Move old items to: This feature allows you to choose where to save your archived files.
- Permanently delete items: This feature allows Outlook to directly delete old files without archiving them first.
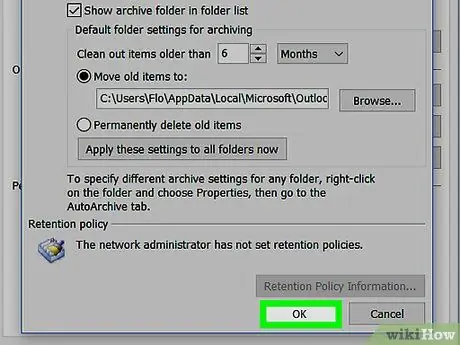
Step 5. Click OK. Your AutoArchive settings will be saved and active.


