- Author Jason Gerald gerald@how-what-advice.com.
- Public 2023-12-16 10:50.
- Last modified 2025-01-23 12:04.
It sucks, doesn't it, if your computer slows down even while doing light tasks? A slow computer can be a waste of time and money if left unchecked. While you can pay a technician to repair your computer and restore its performance, you can also follow some basic steps to help fix the system yourself.
Step
Method 1 of 3: Optimizing Windows 10 PC Performance
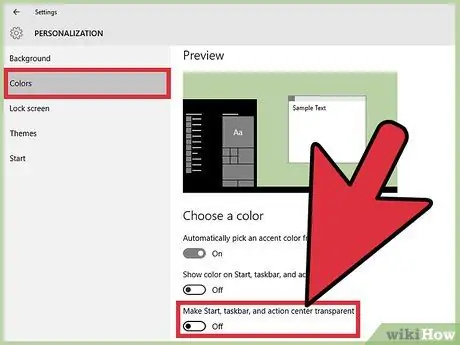
Step 1. Disable the transparency effect
Although it looks cool, this effect can eat up computer resources. Disable effects and use the classic Windows look to speed up computer performance.
- Right-click the desktop.
- Select "Personalize".
- Select "Colors".
- Disable the “Make Start, taskbar, and action center transparent” option.
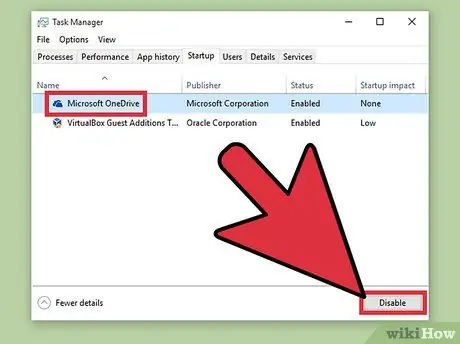
Step 2. Disable programs that open automatically when the computer starts by following these steps
Some programs have components that activate as soon as the PC starts up. While this feature is useful if you use the program frequently, running unwanted programs while the computer is on can slow down the computer.
- Right-click the Start button.
- Click "Task Manager".
- Click "Startup".
- Select the program you want to disable.
- Click "Disable".
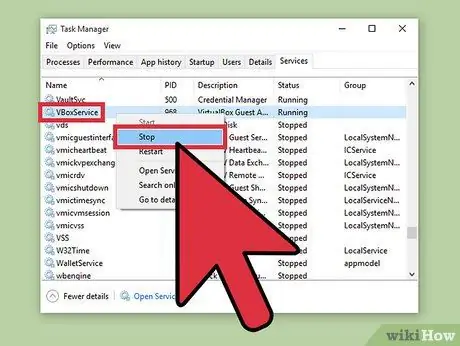
Step 3. Disable unused services
Some services are very important for Windows. While many Windows-related services are turned on by default, you can disable some services you don't really need, either temporarily or permanently.
- Right-click the Start button.
- Click "Task Manager".
- Click "Services".
- Select the service you want to disable.
- Select "Stop".
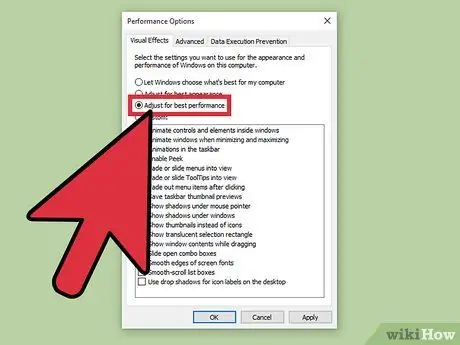
Step 4. Disable shadow and animation effects
The effect looks pretty on the screen, but can increase CPU usage.
- Select "System".
- Click "Advanced system settings".
- Click the "Advanced" tab.
- Under "Performance", click the "Settings" button.
- Click "Adjust for best performance", or disable each effect manually.
- Or, click Settings > Ease of Access > Other Options. In this menu, you can disable animation.
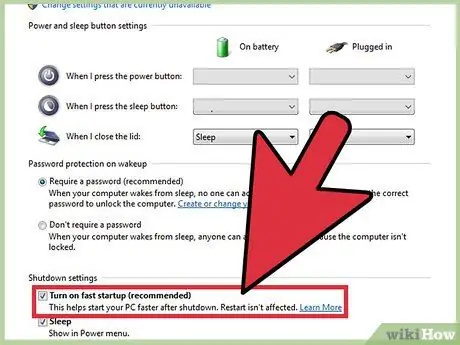
Step 5. Enable the fast startup feature
This advanced feature built into Windows 10 can speed up computer performance. When you shut down your PC, Windows saves the drivers and kernels that are loaded in a "hiberfile" file. Then, when you restart the PC, the system will load the file, which will reduce the waiting time when the computer starts up.
- Right-click the Start button.
- Open "Control Panel".
- Select "System and Security".
- Click "Power Options".
- Click "Choose what the power buttons do".
- Click the “Turn on fast startup” option under the Shutdown option.
- Click "Save changes".
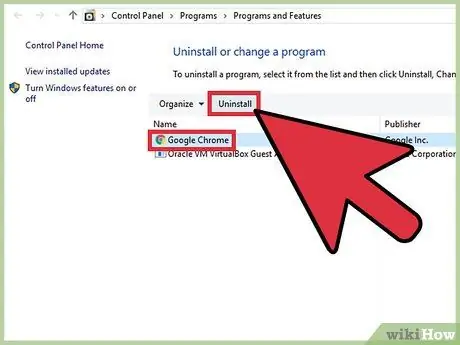
Step 6. Remove unnecessary programs
This step is highly recommended to maintain PC performance. You may occasionally install a trial version of a program and forget to remove it when the trial period expires. These programs eat up memory and will eventually slow down the computer.
- Right-click the Start button.
- Click "Programs and Features".
- Select the program you want to remove.
- Click "Uninstall/Change".
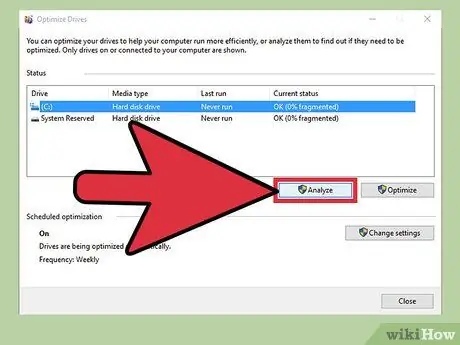
Step 7. Perform a drive defragmentation by searching the internet for instructions
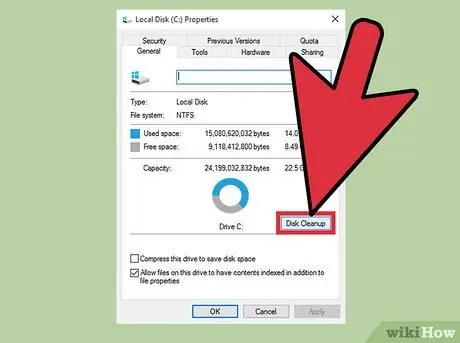
Step 8. Perform regular drive cleaning
Windows provides Disk Cleanup by default, which is a program for deleting files that are no longer needed on your computer.
- Click the Start button.
- Click "File Explorer"
- Right click "Local Disk (C:)".
- Select "Properties".
- Click "Disk Utility" on the "General" tab.
- Click "Unnecessary Files".
- When finished, click "OK".
- Advanced users can use the "Clean up system files" feature.
Method 2 of 3: Optimizing Windows 8 PC Performance
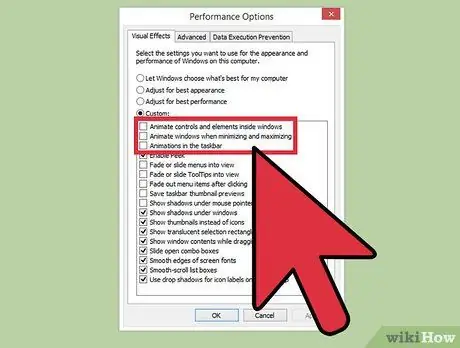
Step 1. Disable animation by following these steps
Windows 8's default animations can cause the computer to stutter when switching screens.
- Click the Windows button.
- Enter the keyword "System Performance Properties".
- Press "Enter".
- Uncheck the "Animate Windows" box.
- Disable other animations if desired.
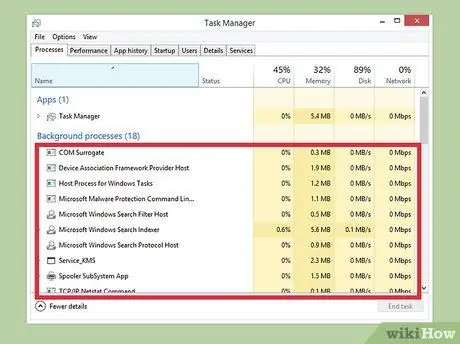
Step 2. Determine which applications are consuming a lot of computer resources through the Task Manager
- Right-click the taskbar on the desktop.
- Select "Task Manager".
- Click "More Details" to display the full Task Manager interface.
- Apps sucking up resources will be flagged.
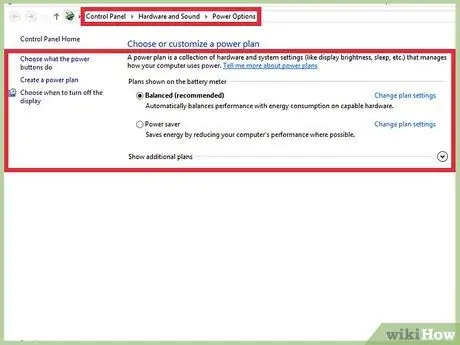
Step 3. Change the power settings
Windows provides the Power Plan and Settings Tool, which allows you to set the amount of power your computer consumes. Power settings can help save computer power and get maximum performance.
- Click the battery icon on the computer taskbar.
- Click "More power options".
- Choose between 3 options, namely "Balanced" (provides full performance and saves power when the computer is not in use), "Power Saver" (save power by lowering the performance of the computer), and "High Performance" (increases the performance and responsiveness of the computer).
- You can change the power options by clicking the "Change Plan Settings" link.
- To set the existing power usage options, you can select/change the "SLEEP" and "DISPLAY" options.
- To create custom options, open the "Create a Power Plan" window. Name the power option, then click "Next" and make adjustments.
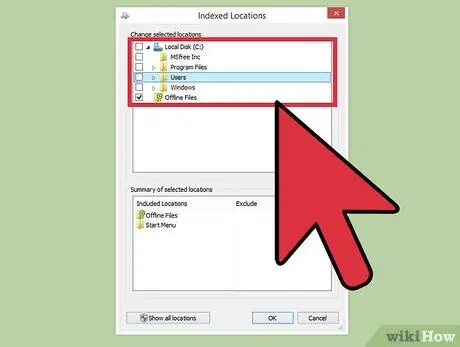
Step 4. Change Windows index options by following these steps
Windows 8 organizes and keeps files and folders up to date so you can find them faster. While this feature will make your computer easier, unnecessary information will eventually slow down your computer.
- Click Start.
- Enter the keyword "Indexing". You will see which folders are indexed.
- Click "Modify".
- Clear the check boxes on folders you don't want indexed.
- To disable indexing on a drive, open the Computer folder, and right-click the local drive.
- On the "General" tab, clear the check box on the "Allow files on this drive to have contents indexed" option.
- Select the folders and subfolders that you don't want indexed.
- Restart the computer to save changes.
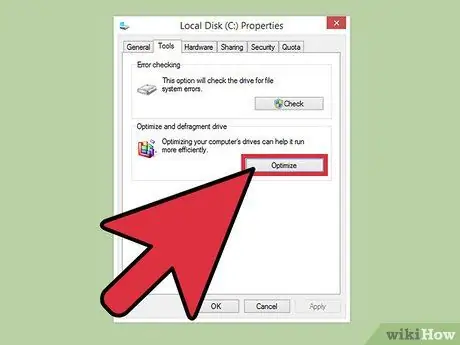
Step 5. Optimize the drive by following these guidelines
In Windows 8, the Disk Defragmenter feature was renamed Optimize Drives.
- Click Charms Bar.
- Click "Optimize Drives". You will see a new dialog box containing all the drives connected to your computer.
- Select the drive you want to optimize.
- Click "Optimize" to start the defragmentation process.
- You can schedule defragmentation at any time. The drive will be defragmented at the time you specified.
- Click "Change Settings".
- Select the "Run on a Schedule" check box.
- Click "OK" to save changes.
Method 3 of 3: Optimizing Windows 7 PC Performance
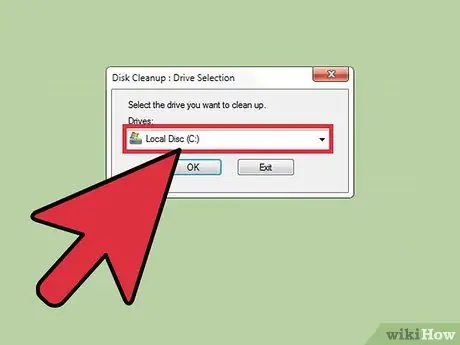
Step 1. Clean the drive
Use a program like Disk Cleanup to delete temporary files, system files, and other files that you no longer use.
- Open the Start menu.
- In the search box, enter "cleanmgr".
- Click the "Cleanmgr" program.
- Select the drive you want to clean.
- Click "OK" to start the drive cleaning process.
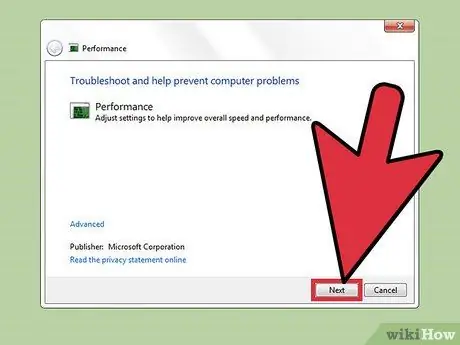
Step 2. Run the Performance Troubleshooter to fix computer performance issues
This program can speed up a slowing computer.
- Click the Start button.
- Click "Control Panel".
- Under "System and Security", click "Find and Fix Problems".
- Click "Check for performance issues".
- The Performance Wizard window will appear. Click "Next", and wait for the program to finish diagnosing computer problems.
- When the Performance Wizard recommends checking the program, click "Next".
- Click "View Detailed Information" to access a detailed report on computer performance.
- If you want to close the program, click Close.
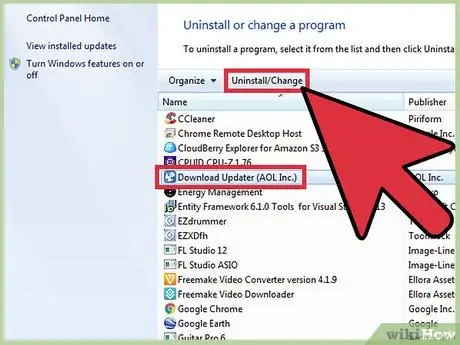
Step 3. Remove programs that are no longer in use
Programs that you no longer use can take up a lot of storage space on your computer and reduce its performance over time. Therefore, it is recommended that you remove programs that you no longer use.
- Click the Start button.
- Click "Control Panel".
- Select the "Uninstall a Program" option under "Programs". You will see all the programs installed on your computer.
- Click the program you want to remove, and click the "Uninstall" tab at the top of the window.
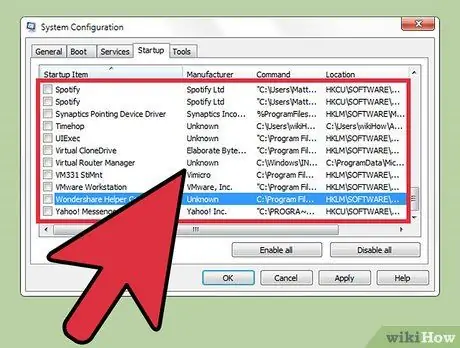
Step 4. Disable programs that open automatically when the computer starts by following these steps
Some programs have components that activate as soon as the PC starts up. While this feature is useful if you use the program frequently, running unwanted programs while the computer is on can slow down the computer.
- Press Windows key + R on the desktop.
- In the "Open" field, enter "msconfig".
- Press Enter.
- Click the "Startup" tab.
- Clear the check box for the program you want to disable.
- When finished, click "OK".
- In the dialog box that appears next, click "Restart" to restart the computer and complete the process.
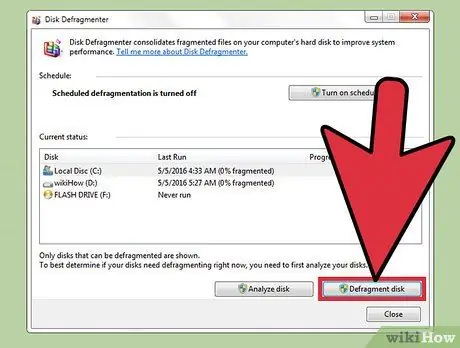
Step 5. Defragment the drive regularly with Disk Defragmenter to organize files on the computer and increase storage space
- Click the Start button.
- In the search field, enter "Disk Defragmenter".
- Click "Disk Defragmenter".
- In the "Current" status, select the drive to be defragmented.
- Click "Analyze Disk" to see if the drive requires defragmentation.
- Once the analysis is complete, you will see the amount of fragmentation on the drive. If the amount of fragmentation exceeds 10 percent, perform a drive defragmentation.
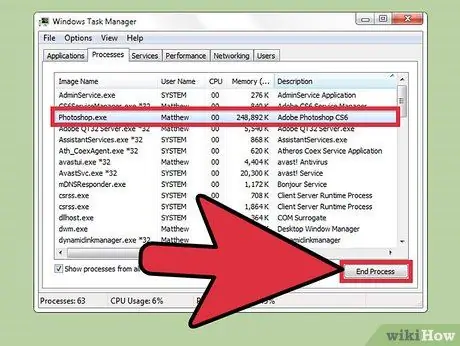
Step 6. Limit the programs that work at one time
Opening too many programs at one time can slow down your computer's performance. Therefore, it is recommended that you use fewer programs at the same time.
- Press Ctrl+Shift+Esc to open Task Manager.
- Click "Processes" to see a list of processes running on the computer.
- Swipe to see the entire program.
- Check the process name and description to identify it.
- Check the "Memory" column to see how much memory each process is using.
- Click a process and click "End process" to close the program.
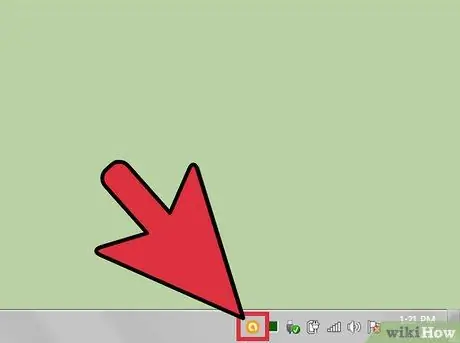
Step 7. Run only one antivirus program
Running two or more antiviruses can slow down your computer's performance.
Windows Action Center will generally notify you if you are running more than one antivirus program
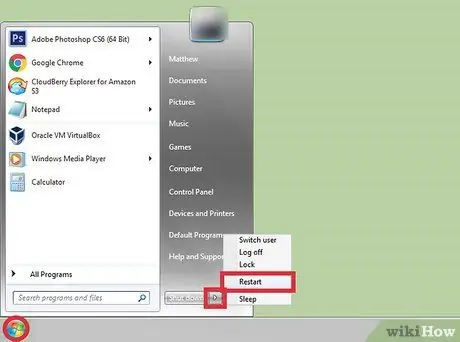
Step 8. Restart the computer periodically
Do this at least once a week to clear memory and completely close programs running in the background, both knowingly and automatically.
Tips
- It is recommended that you schedule a computer data backup. Once you have a backup, you can restore it when your computer is seriously damaged.
- If you suspect that an update or new software is slowing down your computer, you can run System Restore to restore your computer to a previous state.


