- Author Jason Gerald [email protected].
- Public 2023-12-16 10:50.
- Last modified 2025-01-23 12:04.
If you frequently install Windows, using a USB flash disk will make your job easier. Flash drives are smaller and more powerful than discs, and you also don't have to download new files for each installation. Follow these steps to turn a regular flash drive into a Windows 8 installation-only tool!
Step
Part 1 of 4: Creating Windows 8 ISO Files
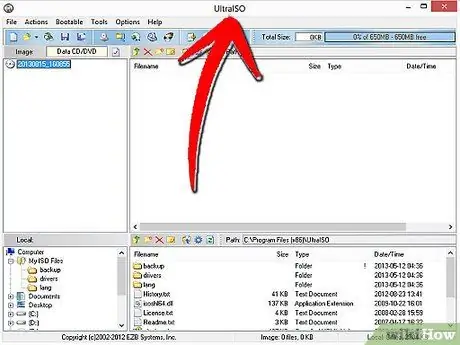
Step 1. Install a free data burning program
You can get various data burning programs from the internet, look for one that has an ISO file creation feature.
If your Windows 8 installation file is an ISO download directly from Microsoft, skip this section
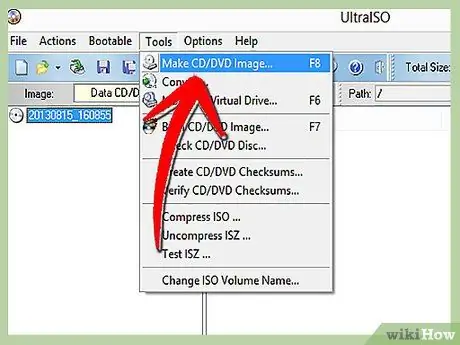
Step 2. Insert the Windows 8 disc you have
Open a burning program and look for the option “Copy to Image” or “Create Image.” Select the DVD drive as the copy source.
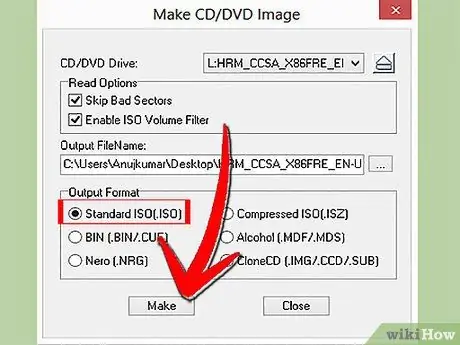
Step 3. Save the ISO file you created with an easy-to-remember name
Make sure you have enough space on your hard disk because the ISO file you create will have the same size as the file on the original.
Creating an ISO file can take a relatively long time, depending on the speed of your computer and the DVD drive you have
Part 2 of 4: Creating a Flash Drive
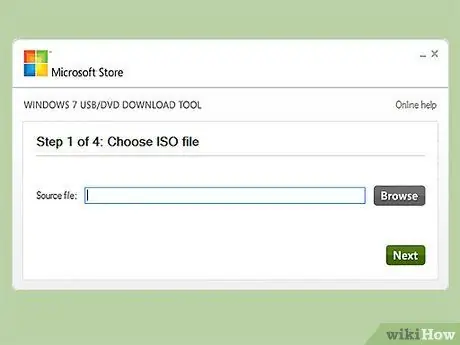
Step 1. Download Windows 7 USB/DVD Download Tool for free from Microsoft
Although the program is intended for Windows 7, you can also use it to copy ISO files of all versions of Windows, including 8.
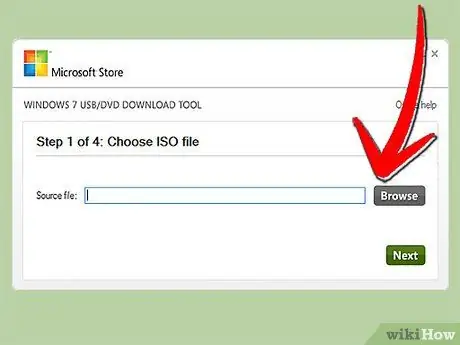
Step 2. Select the Windows 8 ISO file as "Source file"
Click “browse” to find and select the correct file, then select “Next”
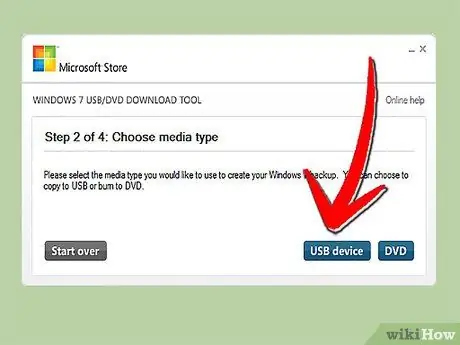
Step 3. Click “USB Device” to select the USB flash disk as the installation media
You will be given the option to create the installation media in the form of a USB or DVD..
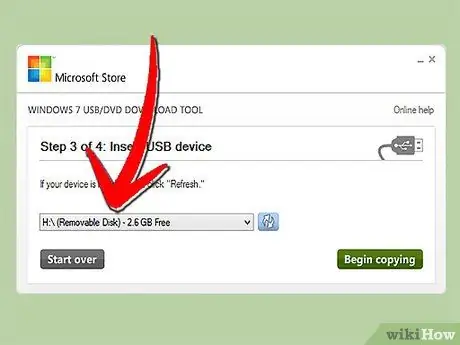
Step 4. Select your flash drive from the list of devices connected to the computer
Make sure the flash drive is properly connected and has at least 4 GB of free space. Click "Begin Copying".
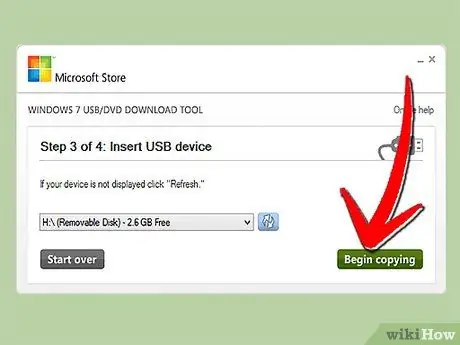
Step 5. Wait for the copying process to complete
The program will reformat the flash drive so that it can be used as a boot medium and copy the Windows installation ISO file to it. The copying process may take up to 15 minutes, depending on the speed of your computer.
Part 3 of 4: Setting the Computer to Read Flash Drives Before Hard Drives
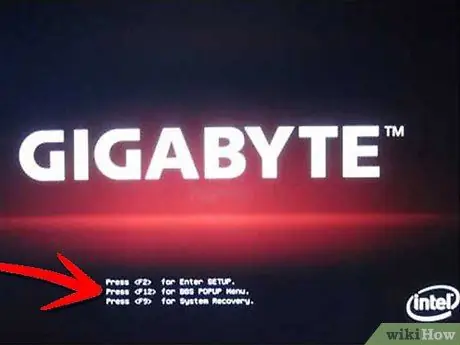
Step 1. Open the BIOS
To start the computer from a flash drive, you must set the BIOS to read the flash drive before the hard disk. Restart the computer and press the F2, F10, F12, or Del key on the keyboard to access “Enter SETUP”, which will take you to the BIOS.
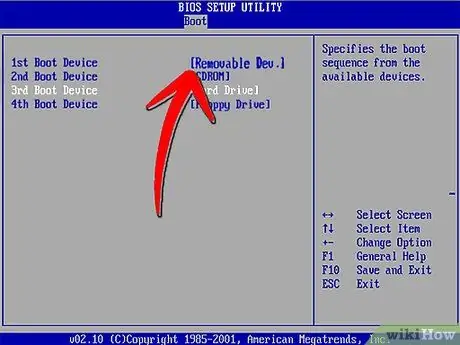
Step 2. Open the “Boot” menu in the BIOS
Change the “1st Boot Device” setting to a USB flash disk. Make sure the flash drive is connected, or this option will not appear. Depending on the manufacturer, your flash drive will appear as “Removable Device” or its model name.
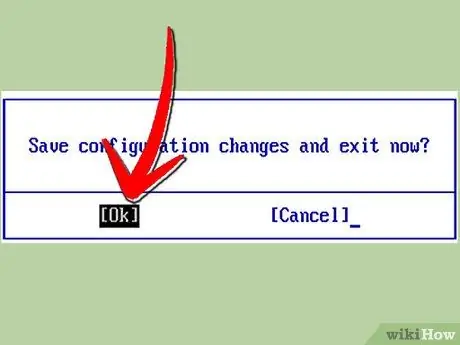
Step 3. Save the changes you made and restart the computer
If the BIOS is set up correctly, the Windows 8 installation process will begin after your computer's factory logo appears.
Part 4 of 4: Installing Windows 8
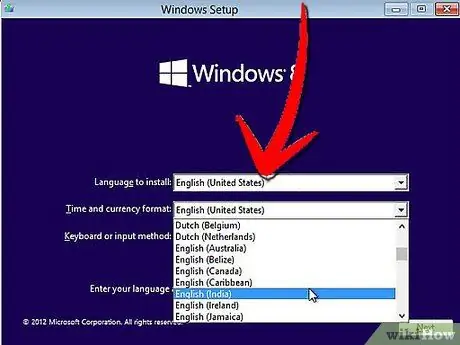
Step 1. Select the language you are using
Once the Windows 8 installation begins, you will be asked to specify the language, time and currency format, and keyboard layout. When finished, select “Next”.
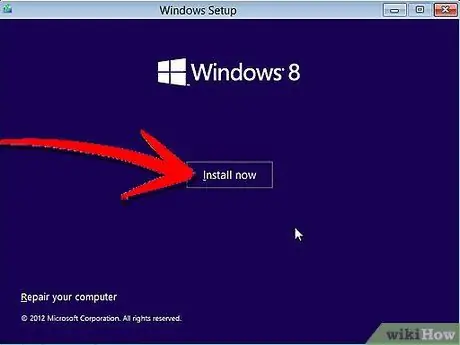
Step 2. Click “Install Now” to start the installation process
You also have the option to perform repairs on previous Windows installations.
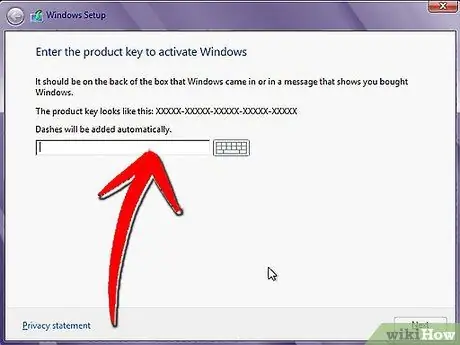
Step 3. Enter the product code
The product code is the 25-character code you get when you buy Windows 8. This code can also be on a sticker attached to your computer or the bottom of your laptop.
-
You don't need to type dashes between groups of characters.

Install Windows 8 from USB Step 14Bullet1 - You can't skip this step. Earlier versions of Windows would give users 60 days after installation to enter the product code, but Windows 8 would ask for the product code before installation began.
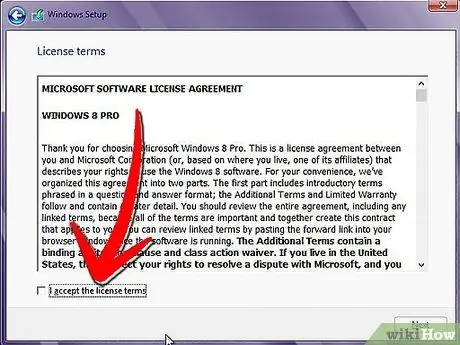
Step 4. Accept the proposed license agreement
After you finish reading the deal, check the box indicating that you accept it. Click "Next".
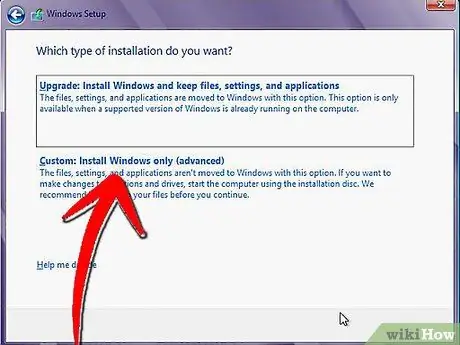
Step 5. Click “Custom Install”
You will be given two options for installing Windows. Choose Custom if you want to fully install Windows. The “Upgrade” option is a type of installation that is not recommended because it can cause problems with your computer's performance in the long run.
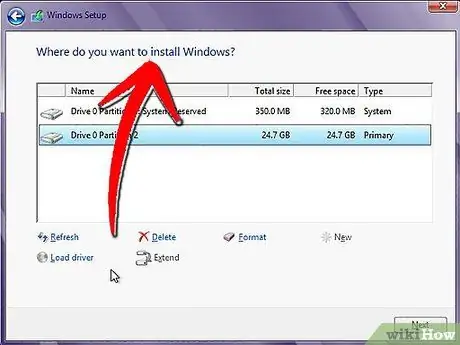
Step 6. Delete the partitions on the hard disk
You will be asked to choose a Windows 8 installation location. To get optimal installation results, delete the old partitions. Click “Drive options (advanced)” to delete and create partitions.
-
Select the partition that contains your operating system and click the “Delete” button.

Install Windows 8 from USB Step 17Bullet1 -
If your computer is still empty, the hard drive will not have partitions that you can delete.

Install Windows 8 from USB Step 17Bullet2 - If your hard disk has multiple partitions, be careful when wiping. All data inside the deleted partition will be lost forever,
-
Give your consent to delete the partition when the confirmation window appears.

Install Windows 8 from USB Step 17Bullet4
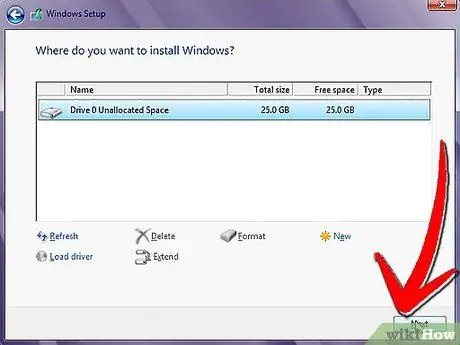
Step 7. Select “Unallocated Space” and click “Next”
The partition will be created automatically in the installation process.
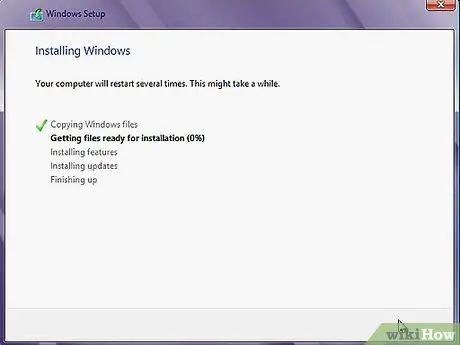
Step 8. Wait until the installation process is complete
You can see how far the installation process has been completed by looking at the indicator displayed as a percentage. In general, this process will be completed in 30 minutes.
-
Windows will restart the computer automatically after the installation is complete.

Install Windows 8 from USB Step 19Bullet1
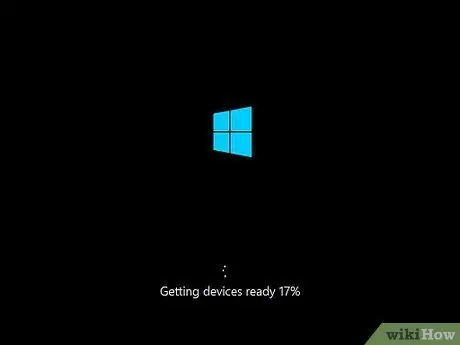
Step 9. Wait while Windows collects the required information
After the computer restarts, you will see the Windows 8 logo along with the words “Getting devices ready” and a working percentage. At this stage Windows will collect information on the hardware installed on your computer.
- When finished, the text will change to "Getting ready".
- The computer will restart one more time.
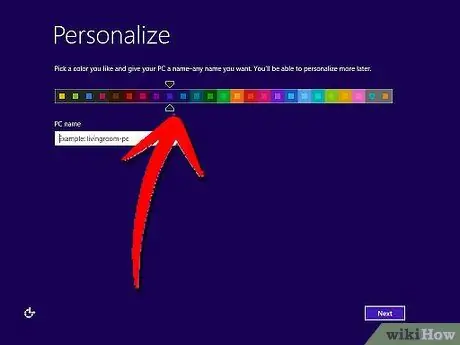
Step 10. Set Windows 8 to suit you
After the computer restarts, you will be prompted to select the Windows 8 installation theme color.
You can change the theme color at any time through Windows 8 settings
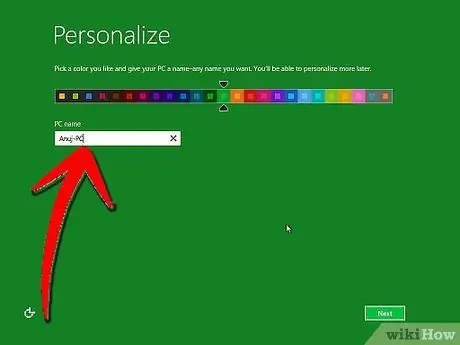
Step 11. Enter the computer name
The computer name will come in handy when you join a network. Other devices connected to the same network will see your computer with this name.
Step 12. Select the wireless network you are using
If the computer or device you are using has wireless features, you will be asked to select a network. This step will be skipped automatically if the device does not have a driver or a wireless network card.
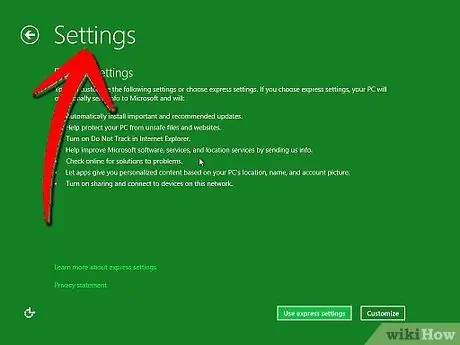
Step 13. Select the settings you want to use
Select “Express Settings” to set automatic update settings, Windows Defender, and crash reports to Microsoft automatically.
-
If you want to use your own settings, select “Customize”.

Install Windows 8 from USB Step 24Bullet1
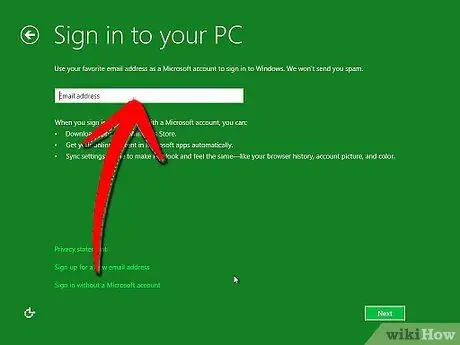
Step 14. Create an account
To log into Windows, you need an account. Microsoft will recommend using a Microsoft account so you can shop at the Microsoft Store. Enter your email address to create a Microsoft account for free.
-
Click “Sign up for a new email address” to create a new email address if you don't have one. This process requires an internet network.

Install Windows 8 from USB Step 25Bullet1 -
If you don't want to use a Microsoft account, select “Sign in without a Microsoft account”. This option will allow you to log in to Windows using a local account like previous versions of Windows.

Install Windows 8 from USB Step 25Bullet2
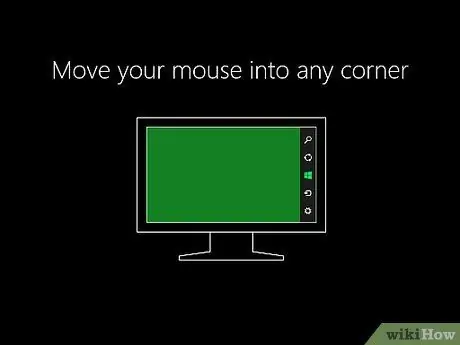
Step 15. Watch the introductory video that appears while waiting for Windows to load
Once all the settings have been set, Windows will go through the final installation process while showing you how to use the new Windows. Once done, you will be taken to the start screen and Windows 8 is ready to go! |using Windows 8.
Warning
- This process will erase all contents of the USB flash drive. Make sure you have copied all valuable data.
- Installing a new Windows may delete your personal data, including photos, music, games, and more. Copy all your valuable data before installing a new Windows.


