- Author Jason Gerald gerald@how-what-advice.com.
- Public 2023-12-16 10:50.
- Last modified 2025-01-23 12:04.
Want to install Ubuntu on your Windows computer, but it doesn't have a CD or DVD drive? There are several ways you can do to install Ubuntu on a computer without a CD or DVD drive. The most common way to install Ubuntu on a computer without a CD/DVD drive is to create a bootable USB and start the computer from that USB. If your computer qualifies, you can also install Ubuntu directly from within Windows.
Step
Method 1 of 2: Using a USB Drive
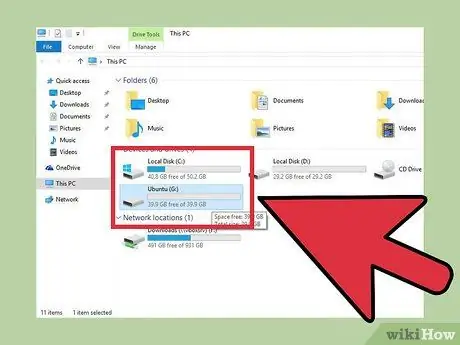
Step 1. Check the available storage space
You'll need at least 7GB of free space on your computer to install Ubuntu, but you'll need more space if you want to install programs or download lots of files. You can install Ubuntu alongside Windows, or you can install Ubuntu instead of Windows.
If you want to replace Windows with Ubuntu, make sure you have backed up important files. When you replace Windows with Ubuntu, Ubuntu will delete the Windows drive
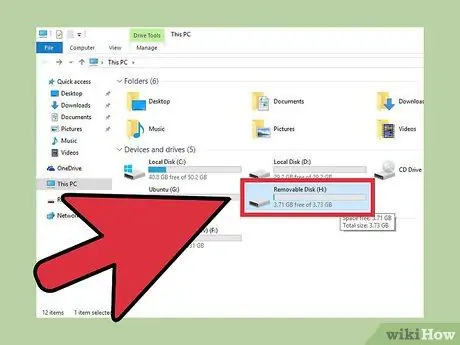
Step 2. Find the appropriate USB drive
You can install Ubuntu from any USB drive, with over 2GB of free space. Make sure the drive you are using does not contain any important files because the drive will be deleted when you create the USB installation drive.
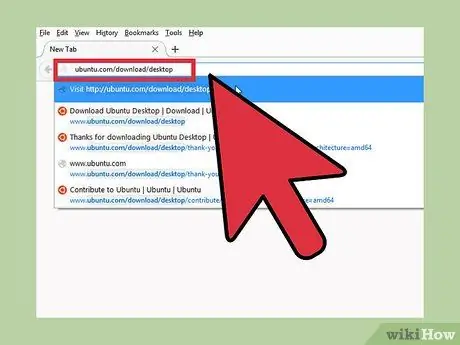
Step 3. Visit the Ubuntu Desktop site at ubuntu.com/download/desktop
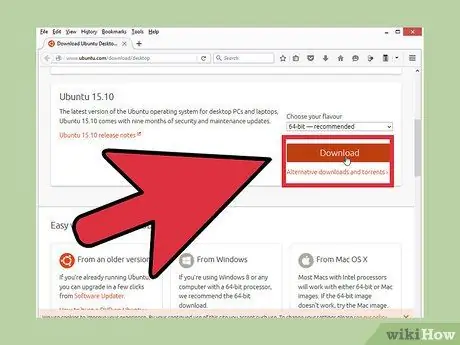
Step 4. Click Download on the version you want
Ubuntu generally offers two versions, namely LTS and latest stable. The LTS version or long term support offers 5 years of system and security updates, and is recommended for many users. On the other hand, the latest stable version only offers updates for 9 months before you are prompted to use the new release.
Most fairly new computers can run 64-bit Ubuntu. If you are using an older computer or are not sure that your computer supports 64-bit, consult your computer manual
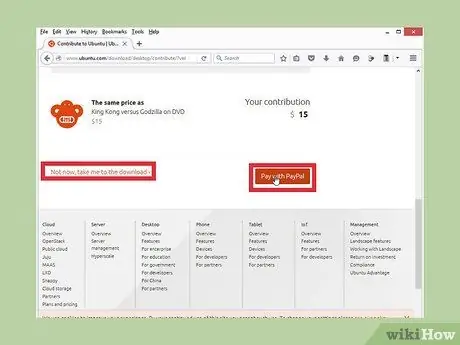
Step 5. Donate funds to Canonical, or directly download Ubuntu
You will be asked to donate to Canonical before starting to download. If you don't want to donate, swipe to the bottom of the screen and click Not now, take me to the download.
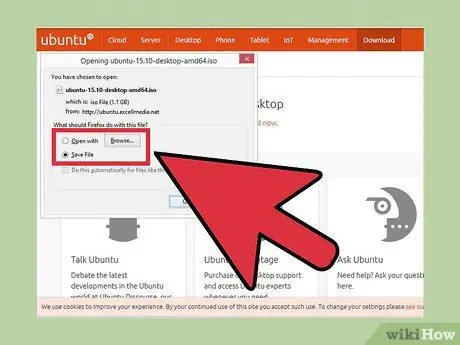
Step 6. Wait for the download to complete
You will download an Ubuntu ISO image, which is a little over 1GB in size. The download process may take some time, especially if your connection is slow.
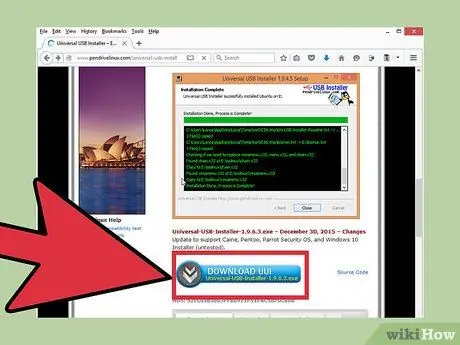
Step 7. Download and install Universal USB Installer
This free program can format your USB drive, include Linux installation files, and make a bootable. You can download Universal USB Installer from pendrivelinux.com.
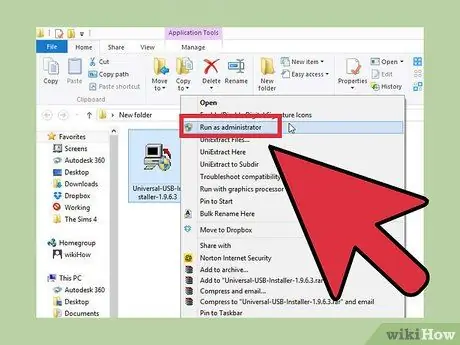
Step 8. Open Universal USB Installer
Make sure that the USB drive is connected to the computer, and that there are no important files on it.
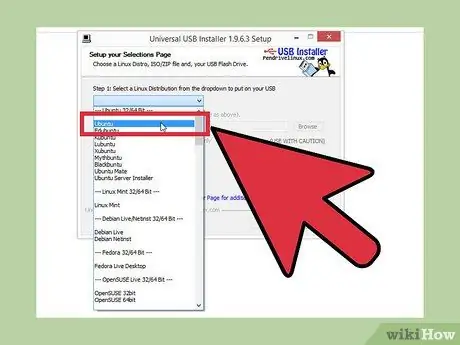
Step 9. Select "Ubuntu" from the list provided
You can use this program to create any Linux installation drive. Make sure you select Ubuntu, so that the drive is properly formatted.
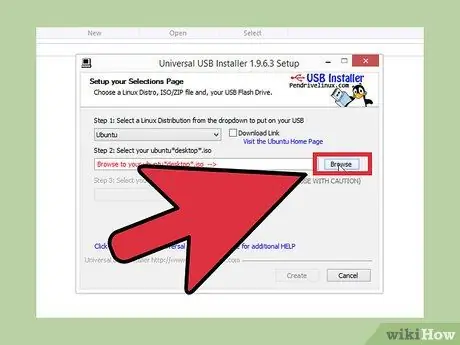
Step 10. Click Browse, then select the downloaded ISO file
Generally, you can find files in the Downloads directory.
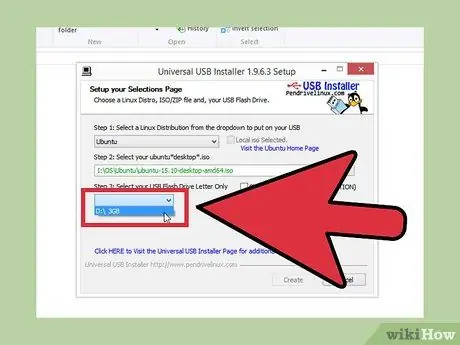
Step 11. Select the USB drive from the bottom of the window
If you are connecting more than one USB drive to your computer, make sure you select the correct one.
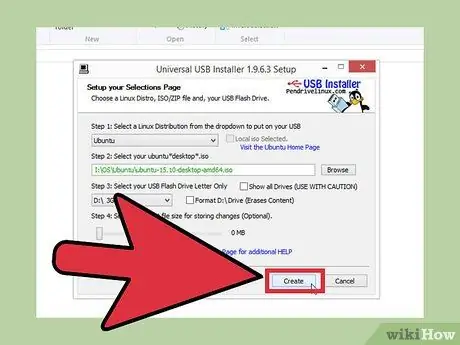
Step 12. Click the Create button to start the process of formatting the Ubuntu drive and copying files, so that the computer can be started via USB
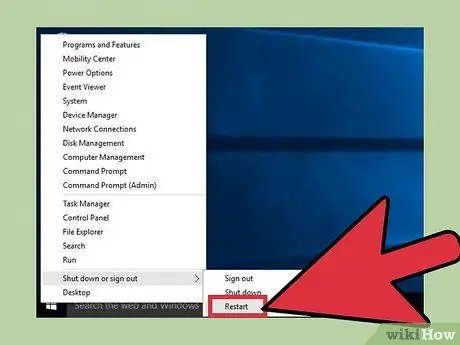
Step 13. Once the USB has been created, restart the computer
You must set the computer to start from USB. The way to do this varies depending on the type of your computer.
- Press the BIOS or BOOT key when the computer starts. The key to be pressed will appear on the same screen as the computer manufacturer's logo, for example F2, F11, F12, and Del. Select the BOOT menu in the BIOS, then set the USB drive as the primary device.
- If your computer goes straight into Windows 8 or 10 without showing the manufacturer logo, you will need to do an advanced startup. Open the Charms menu (Windows 8), or click Start (Windows 10), and select Settings. Open the Update & security option, click Recovery, then click Restart now in the Advanced startup section. On the Advanced startup menu, click Troubleshoot, then click Advanced options. Select UEFI Firmware Settings, then select the BOOT menu. Change the order of devices until the USB drive becomes the primary device.
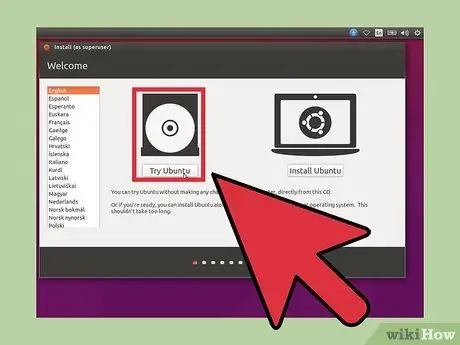
Step 14. Try Ubuntu before installing if desired
When you start Ubuntu from a USB drive for the first time, you will be greeted with a welcome screen. You can choose the language, and choose to try or install Ubuntu right away. If you choose to try Ubuntu, you can use all the features of this Linux distribution, although your changes won't be saved. After trying, you can run the installation program at any time from the desktop.
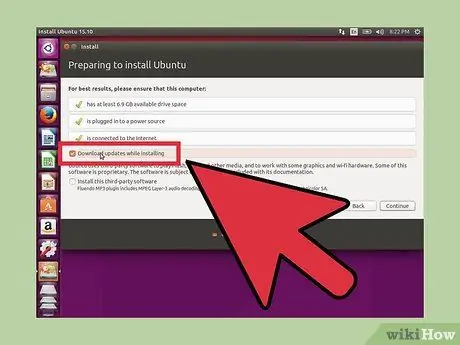
Step 15. Tick both boxes in the Preparing to install Ubuntu window, namely Download updates while installing and Install this third-party software
If you can't check the box, continue to the next step, and return to this screen after connecting to the network.
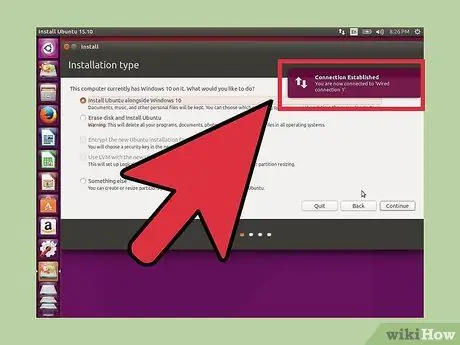
Step 16. Connect the computer to the wireless network if prompted
If your computer is connected to a network via Ethernet, you will not see this screen, and your network connection will be set up automatically. If your computer is connected to a wireless network, you will be asked to select a network name, and enter a password if required. If you connected your computer to a wireless network in this step, we recommend that you go back to the previous step and choose to download updates and third-party software.
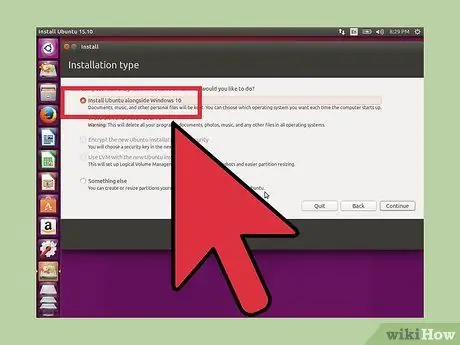
Step 17. Decide whether you want to replace Windows, or install Ubuntu along with Windows
This step is the most important step in the Ubuntu installation process. If you install Ubuntu together with Windows, your files will remain safe, and a partition will be created from your free storage space. You can choose the operating system you will use when the computer starts up. If you choose to replace Windows and Ubuntu, all your files and programs will be deleted.
- If you choose to install Ubuntu alongside Windows, you can use the sliders to specify the amount of storage space to use for Ubuntu, and how much storage space is left for Windows.
- If you replace Windows with Ubuntu, your Windows partition will be erased, and Ubuntu will replace Windows. Your partition size will not change.
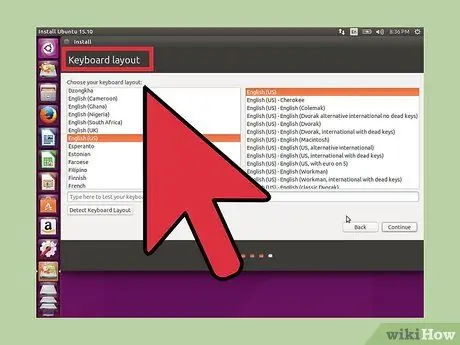
Step 18. Choose a location and keyboard layout
If your computer is connected to the internet, your location will be detected automatically, and if you don't know a suitable keyboard layout, click Detect Keyboard Layout.
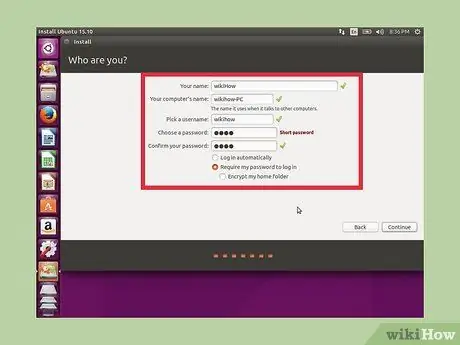
Step 19. Create a user account
Enter a name, then create an account for yourself. Usernames should not have spaces, and passwords should be difficult to guess but easy to remember. You can choose to log in immediately when the computer starts, or require a password to be entered to access the computer.
On the same screen, you can also change the computer name. Your computer name will appear on the network
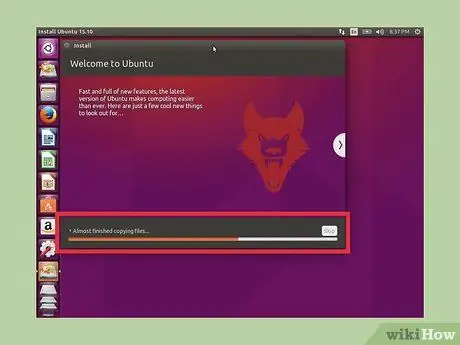
Step 20. Wait until the Ubuntu installation process is complete
After creating an account, you just need to wait until the installation process is complete. Generally, the installation process will take 20-30 minutes.
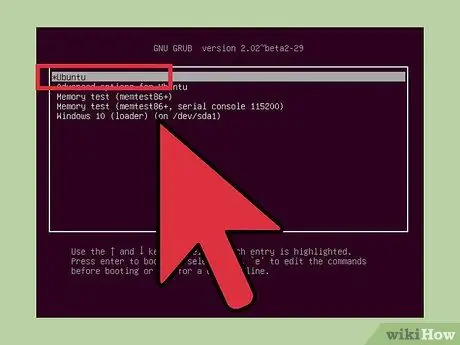
Step 21. If you installed Ubuntu alongside Windows, select Ubuntu when starting the computer
Once the installation is complete, your computer will restart, and if you installed Ubuntu with Windows, you'll see a new menu when you start your computer, allowing you to choose your operating system. Select Ubuntu, then you will either be logged into the system or prompted for a password, depending on the option you selected during user creation.
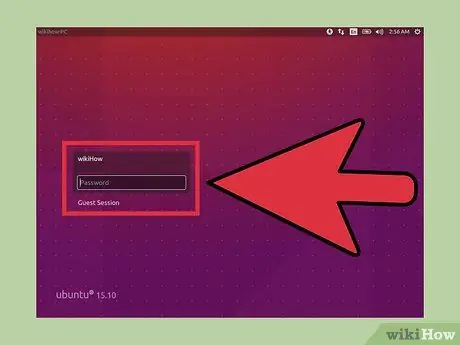
Step 22. Start using Ubuntu
Once you are logged into the Ubuntu desktop, you can start using this operating system. Ubuntu usage guides are widely available on the Internet.
- Read the guide to learn basic Terminal commands.
- Read the guide to installing software on Ubuntu.
- Read the guide to setting up a network connection in Ubuntu.
- Read the guide to installing graphics card drivers in Ubuntu.
Method 2 of 2: Using a Desktop-Based Installation Program
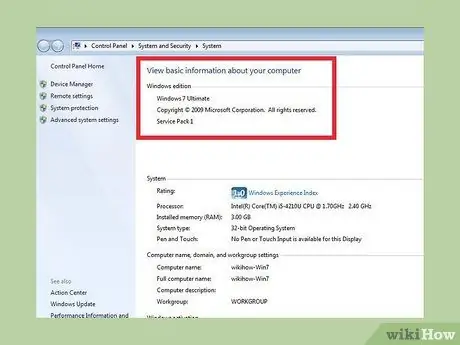
Step 1. Understand the installation process
Ubuntu no longer supports the Windows installation program to install Ubuntu from within Windows, but you can still use it if you wish. This installation program cannot be used on Windows 8 and above, so your computer must be running Windows XP, Vista, and 7. This installation program may also cause problems that would otherwise be avoided if you installed Ubuntu via a USB drive, even on supported machines. We recommend using the USB installation method above, unless you absolutely have to install Ubuntu via Windows.
The Ubuntu installation program from Windows only supports installing Ubuntu alongside Windows. To replace Windows with Ubuntu, use the USB method above
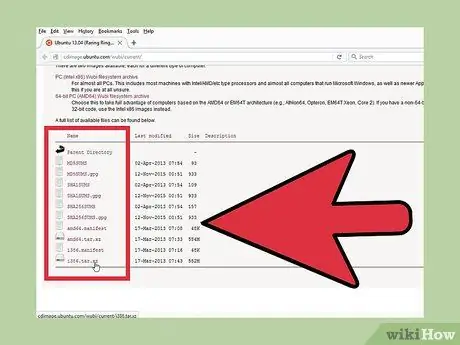
Step 2. Download Wubi
Wubi is an installation program that allows you to install Ubuntu from within Windows. You can download Wubi from cdimage.ubuntu.com/wubi/current/.
Click "i386.tar.xz" if you don't know which file is compatible with your computer. If you know that your computer supports the 64-bit version, select "amd64.tar.xz"
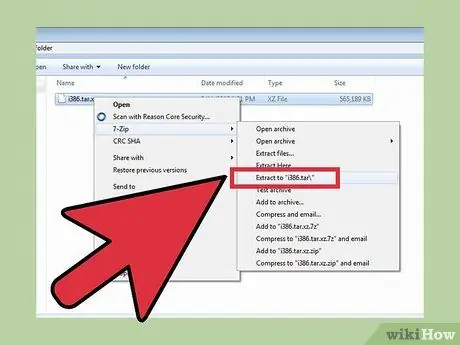
Step 3. Extract the Wubi installation program
You'll need a program that supports Gzip to extract the.tar.gz file you just downloaded, such as 7-Zip which you can download at 7-zip.org. Once you've installed 7-Zip, use the program to open the "tar.xz" file you just downloaded. Extract the files to a new directory.
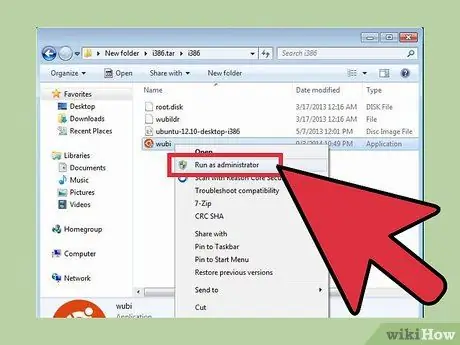
Step 4. Run Wubi
You only need to change a few settings in the program, and all of them are in the same menu.
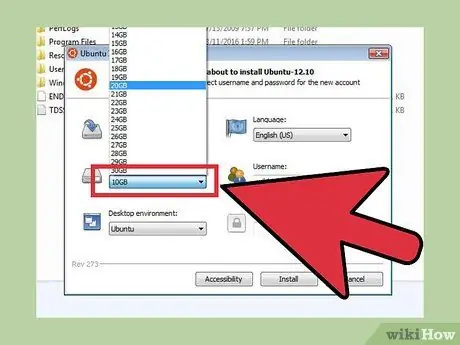
Step 5. Set the amount of storage space you want to give to Ubuntu
Ubuntu will create a partition of the storage space you have. Use the menu to select the partition size. Ubuntu requires at least 7GB of free space, and more if you want to install programs and download files.
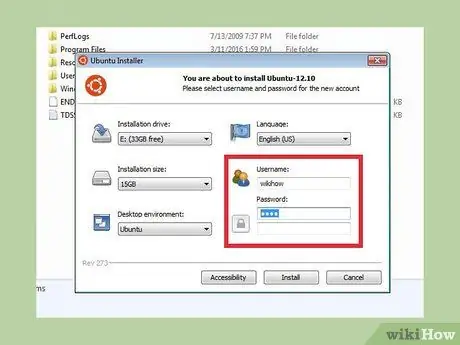
Step 6. Create a username and password
You must create a username and password before installing Ubuntu. After the installation is complete, you can create additional users. Enter the password to secure the account.
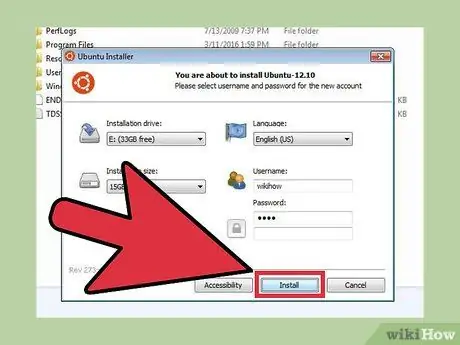
Step 7. Click Install, then wait for the installation process to complete
The program will download the necessary files. When finished, you will be prompted to restart the computer.
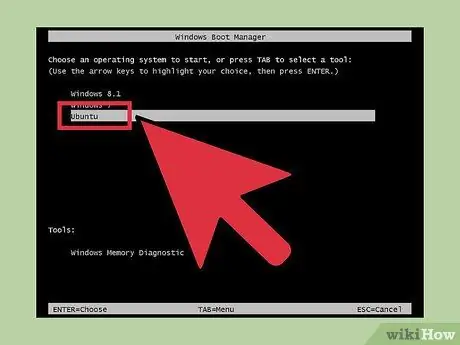
Step 8. After the computer restarts, you will see a new menu to select the operating system you want to use
In the menu, select "Ubuntu" to continue the installation process.
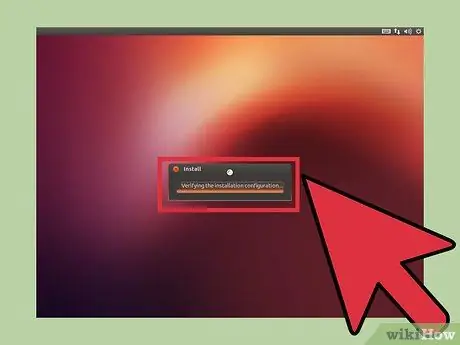
Step 9. Wait until the installation process is complete
Once Ubuntu starts, the installation process will continue for at least 15 minutes. After the installation is complete, the computer will restart again.
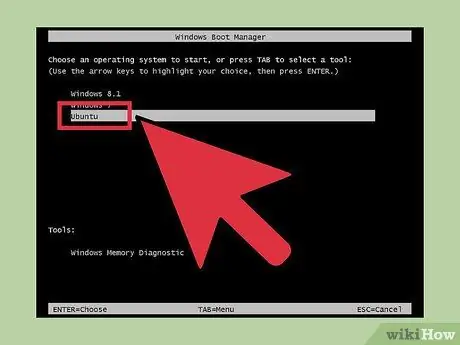
Step 10. When the computer starts, use the menu that appears to select an operating system
Once Ubuntu is installed, you will be asked to select an operating system each time you start your computer. The menu is your way of switching operating systems.
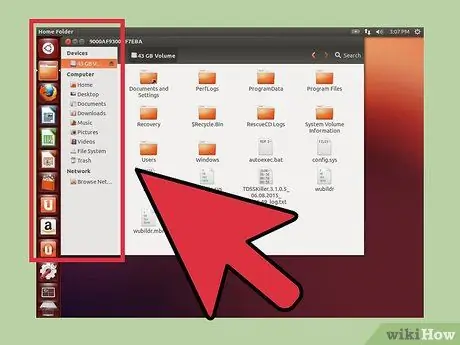
Step 11. Start using Ubuntu
Once you are logged into the Ubuntu desktop, you can start using this operating system. Ubuntu usage guides are widely available on the Internet.
- Read the guide to learn basic Terminal commands.
- Read the guide to installing software on Ubuntu.
- Read the guide to setting up a network connection in Ubuntu.
- Read the guide to installing graphics card drivers in Ubuntu.


