- Author Jason Gerald gerald@how-what-advice.com.
- Public 2024-01-19 22:11.
- Last modified 2025-01-23 12:04.
The name of the watermark is taken from the embossed stamp affixed to the paper. The watermark described in this article is a graphic image or text that overwrites an existing graphic image or text, but does not cover its appearance. Watermarks can be used to indicate the level of confidentiality of a report, to indicate whether a bill has been paid, or who owns an image displayed on a website. Read on for instructions on how to create a watermark in Word, Excel, and image-editing programs.
Step
Method 1 of 3: Using Microsoft Word (2002 and Newer)

Step 1. Launch Microsoft Word
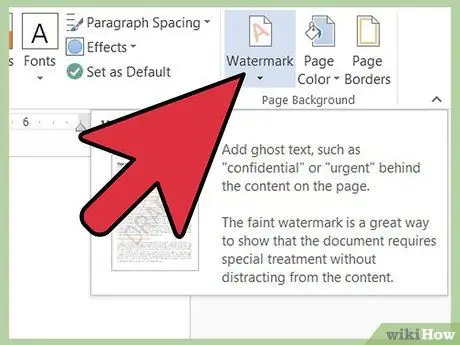
Step 2. Open the Printed Watermark dialog
How to access it depends on the version of Microsoft Word used. Word 2002 and 2003 use a menu and toolbar interface, while Word 2007 and later use a ribbon interface.
- In Microsoft Word 2002 and 2003, open the Printed Watermark dialog by selecting Background from the Format menu, then selecting Printed Watermark.
- In Microsoft Word 2007 and later, select the Page Layout tab. Look for the Page Background group, then click the Watermark options button. Select the Custom Watermark option at the bottom of the Watermark gallery.
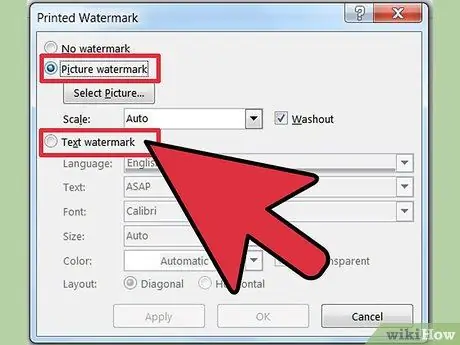
Step 3. Select the type of watermark you want to create
Watermarks can be made from text or images (graphics).
- If you want to create a watermark from text, select the Text Watermark option. Type the text for the watermark into the Text box (or select one of the available options), then select the font (font), size, and color of the text from the options in the Font, Size, and Color boxes. If you want a non-transparent watermark, uncheck the Semitransparent box. If you want otherwise, leave the box checked so that the watermark text you create is semi-transparent. Select the Diagonal or Horizontal Layout option, according to the desired watermark text orientation.
- If you want to create a watermark from an image, select the Picture Watermark option. Click Select Picture to open a window where you can browse the image you want to use. When the desired image is found, select it and click Insert. Adjust the size of the image by selecting the options in the Scale box. If you want to display the image at the best size, select Auto. If you want the image to appear clearly, uncheck the Washout box. If you want otherwise, leave the box checked to make the watermark image look faded.
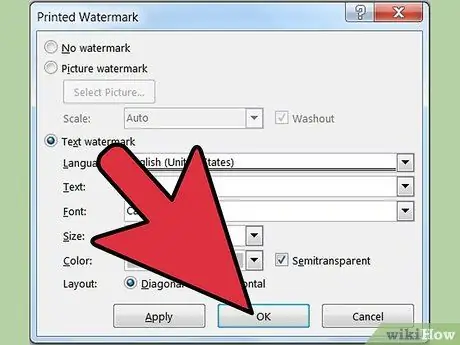
Step 4. Close the Print Watermark dialog by clicking OK
Now the watermark will be displayed in the document.

Step 5. Set how the watermark appears
Use the Word Art command if the watermark is text. Use commands to handle images if the watermark is an image.
In Microsoft Word 2002 and 2003, the Word Art and Picture commands are options on the Format menu. In Microsoft Word 2007, this option is on the Insert menu ribbon, with Word Art in the Text group, and Picture in the Illustrations group
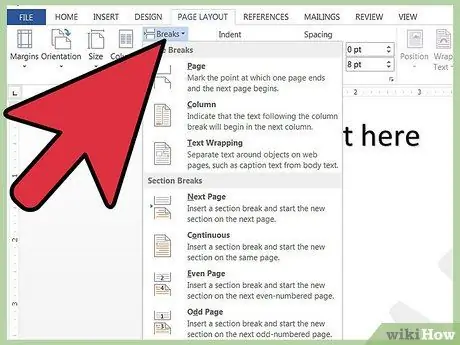
Step 6. Set the page to be watermarked
Even if it doesn't appear there, the watermark will act as a header. Therefore, if you want the watermark to appear only on one or more pages of a Word document, insert a section break (a feature for dividing and formatting documents) in the document and provide its own header and footer for each section. Once you've clicked on the top of the first page that won't be watermarked, do the following:
- In Word 2002 or 2003, select Break from the Insert menu. Select Next Page as the section break type, then click OK. Click any page in the section you created, then select Header and Footer from the View menu. Select Link to Previous from the Header and Footer toolbar to break the link between the header in the new section and the header in the previous section. Click the watermark, then press the Delete key.
- In Word 2007, select Breaks in the Page Setup group of the Page Layout menu ribbon, and then select Next Page from the Section Breaks section of the drop-down menu. Click any page in the section you created, then click in the new header and select Link to Previous from the Navigation section of the Design menu ribbon to break the link. Click your watermark, then press the Delete key.
- If you want to create a watermark in versions of Microsoft Word earlier than Word 2002, visit
Method 2 of 3: Using Microsoft Excel

Step 1. Run Microsoft Excel
This method is not actually to create an actual watermark, but only to insert an image into the header or footer.
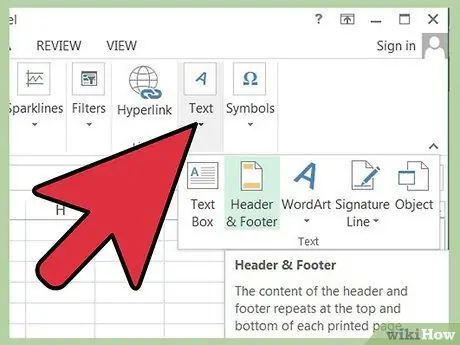
Step 2. Open the header and footer controls
In Excel 2003 and earlier, you can do this through the Page Setup dialog box. In Excel 2007 and later, this can be done via the Insert and Design menu ribbon. After selecting the worksheets that you want to watermark, do the following:
- In Excel 2003 and earlier, select Header and Footer on the View menu, and then select Custom Header or Custom Footer.
- In Excel 2007, click the Header and Footer button in the Text group on the Insert menu ribbon.
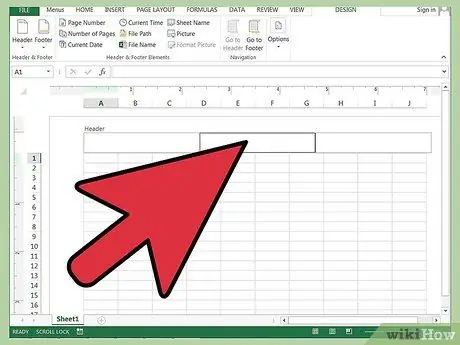
Step 3. Decide where you want to watermark
You can choose in the left, right, or center box. In Excel 2003 and earlier, these boxes are displayed side by side in the Page Setup dialog box.
- In Excel 2003 and earlier, these boxes are displayed side by side in the Page Setup dialog box.
- In Excel 2007, the window below the Design menu ribbon displays a spreadsheet with the header at the top and says "Click to add header". Click on it to display three subsections. (If you want to place the image in the footer position, click the Go to Footer button in the Navigation section.)

Step 4. Place the desired image
Use the appropriate method for the version of Excel you're using to place the image in either the footer or header section.
- In Excel 2003 and earlier, open the Header and Footer dialog box, click Insert Picture, then browse to the image you want to insert and double-click the image. The image size can be changed by clicking Format Picture and selecting an option in the Format Picture dialog.
- In Excel 2007, click Picture in the Header & Footer Elements group on the Design menu ribbon, then browse to the picture you want to insert and double-click it. The size of the image can be changed by clicking Format Picture and selecting an option in the Format Picture dialog.
- You can also imitate the appearance of a watermark in Excel by adding a graphic image as a background. However, this background only appears on the computer screen, not in the printed document.
Method 3 of 3: Using Image Editing Programs

Step 1. Run an image editing program
The instructions described here are general in nature. If you want specific, detailed instructions for the image-editing program you're using, consult the program's help files.
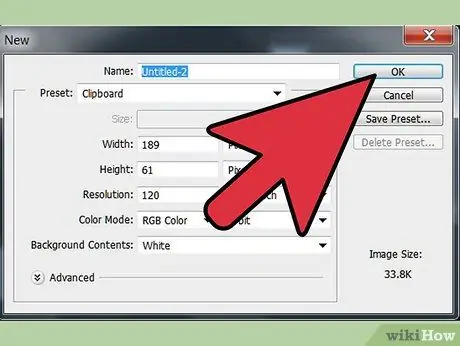
Step 2. Create a new graphics file
You can set the file size however you want, although you may need to resize it later to match the file size of the image you want to watermark.
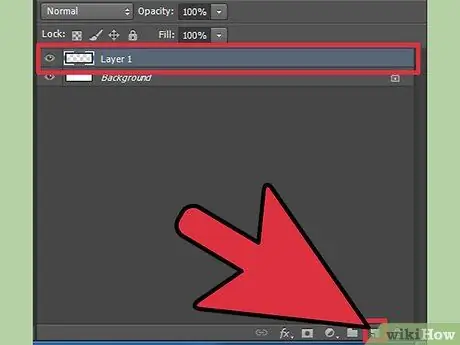
Step 3. Create a new layer in this graphic file
Layers are transparent sheets that can be used to place and arrange multiple components to create a graphic image. Later you will copy this layer to the graphic file that you want to watermark.

Step 4. Type the text for the watermark using the text tool in the image editor
If you want to watermark an image on your website, the embedded watermark text must include a copyright notice containing your name, the URL of your website, or both.
You can also use a bold font to make the watermark text clearer. You may also want to enhance the appearance of the text with an embossed or beveling effect
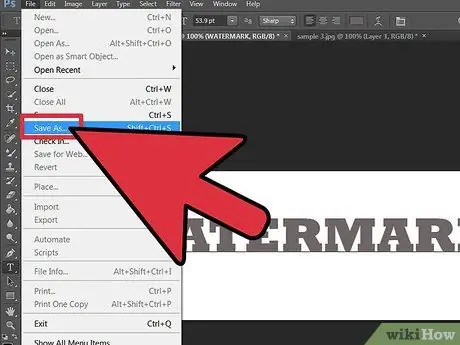
Step 5. Save the watermark as a file
This allows you to use the watermark at a later time and apply it to other graphic files.
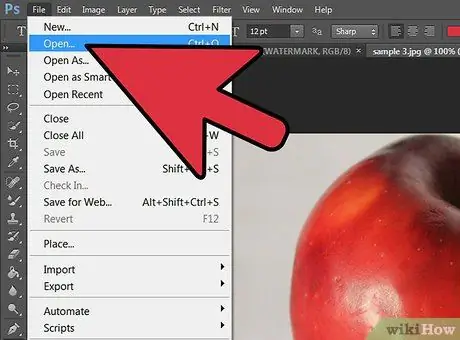
Step 6. Open the graphic image file that you want to watermark

Step 7. Copy the layers from the watermark file to the image file
Depending on the image editing program you use, you can drag and drop the layer, or copy it to the Clipboard, and then paste it into a new graphic.
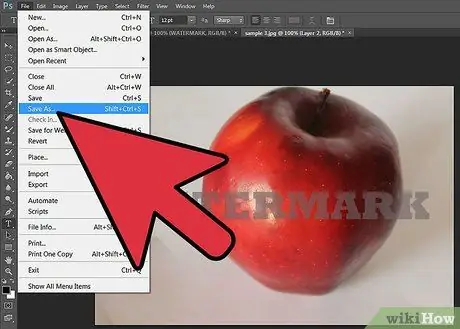
Step 8. Save the watermarked image file
Save this file with a different name so that you still have an unwatermarked copy of the graphic file.


