- Author Jason Gerald gerald@how-what-advice.com.
- Public 2023-12-16 10:50.
- Last modified 2025-01-23 12:04.
Did you know that a person's blood pressure shows how hard his body is working to pump blood to all organs? In general, your blood pressure can be considered low (hypotension), normal, or high (hypertension). Both hypotension and hypertension can cause serious medical problems such as heart disease or impaired brain function.
Step
Part 1 of 2: Getting Accurate Measurement Results
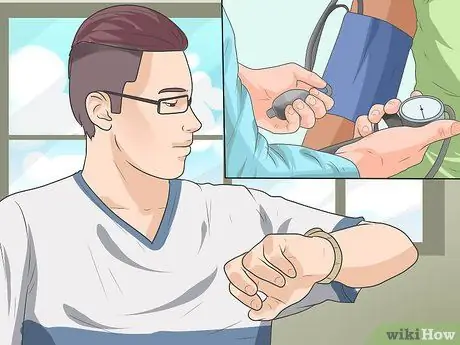
Step 1. Measure blood pressure at the same time every day
Do this for the most accurate results!
It's best to measure your blood pressure when your body feels most relaxed, such as in the morning and at night. If necessary, ask your doctor to recommend a measurement time that is most appropriate and relevant to your goals

Step 2. Prepare to take your blood pressure
In fact, a variety of factors can affect the results of your blood pressure readings. Therefore, first carry out the various preparations listed below to get the most accurate results:
- Make sure you are fully awake and out of bed for at least 30 minutes.
- Do not consume any food or drink, at least 30 minutes before the measurement is taken.
- Avoid caffeine and tobacco, at least 30 minutes before the measurement is taken.
- Avoid any form of physical activity or exercise, at least 30 minutes before the measurement is taken.
- Empty the bladder before taking the measurement.
- Read the instructions on the sphygmomanometer package before taking measurements.

Step 3. Sit properly
Maintaining the position of the body and hands while the measurement is in progress is essential to obtain more accurate readings. Previously, sit as relaxed as possible for a few minutes to stabilize blood pressure and prepare your body for the measurement.
- Do not move or talk while taking measurements. Instead, sit as straight as you can with your back leaning and place the soles of your feet on the floor without crossing them.
- Wrap the cuff just above the elbow crease. Then, place the hand that has been wrapped by the cuff on the table or arm of a chair. If necessary, support your hands with pillows or bolsters so that they are at heart level.
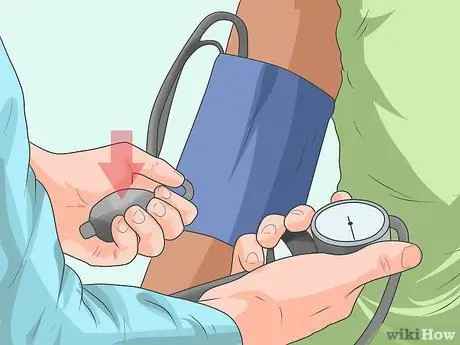
Step 4. Deflate the cuff to get the result
Once the position is comfortable and you have sat still for a few minutes, begin the measurement process. Turn on the sphygmomanometer and take the measurement as quietly as possible so that the results are more accurate or your blood pressure does not increase.
Remove the cuff and/or cancel the measurement if your arm feels uncomfortable, the cuff is too tight, or your head feels dizzy

Step 5. Stay calm
While the test is in progress, do not move or talk, and calm yourself so that the results are more accurate. Then, stay in this position until the measurement ends, the cuff is deflated, or the reading is displayed on the sphygmomanometer screen.

Step 6. Remove the sphygmomanometer cuff from your arm
Once the cuff is deflated, remove it from your arm. Make sure you don't move too fast or too suddenly, okay? Once the cuff is removed, you may feel a little dizzy, but don't worry, the sensation will go away quickly.
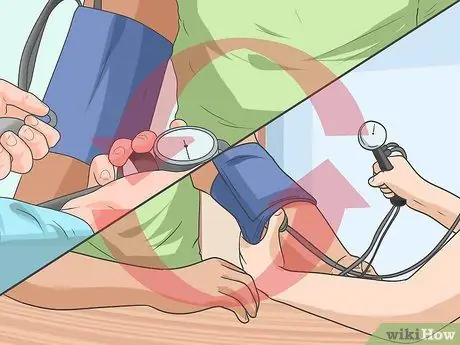
Step 7. Take additional measurements
At least take an additional measurement or two after the first measurement to get a more accurate blood pressure reading.
Allow a minute or two between each measurement process, and apply the same procedure to each process

Step 8. Record the measurement results
Recording the measurement results is a very important thing to do. In addition, also record relevant information in a special book or on your laptop to get the most accurate blood pressure readings, as well as identify fluctuations in results that can cause health problems.
Also note the time and date the measurement was taken, such as “January 5 2016, 6:20 am, 110/90.”
Part 2 of 2: Interpreting Measurement Results

Step 1. Recognize the various features in the results of blood pressure measurements
In general, the result of a blood pressure measurement will consist of two numbers, which are often called the lower limit (systolic pressure) and the upper limit (diastolic pressure). The systolic number shows the level of pressure when the heart pumps blood throughout the body, while the diastolic number shows the level of pressure when the heart is resting between pumping blood.
- Generally, Indonesians read blood pressure by saying, "110 90" without adding a conjunction between the two numbers. On paper, you may see a description of mmHg (millimeters of mercury) which is actually the unit of measurement for blood pressure.
- Understand that most doctors will pay more attention to the systolic number (the first number in a blood pressure measurement), especially since it is a better yardstick for identifying cardiovascular disease risk in people over 50. In general, the systolic number will also increase as a person ages. This condition is caused by increased stiffness in the large arteries, the occurrence of long-term plaque buildup, and the increased frequency of cardiovascular disease.
Step 2. Identify your average systolic number
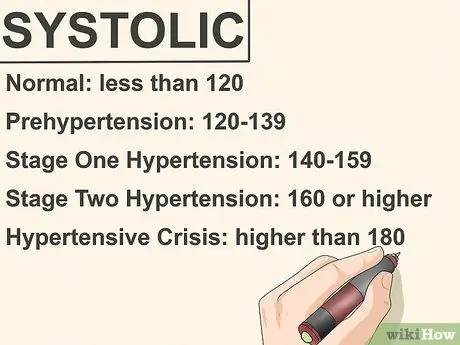
Indeed, taking blood pressure measurements regularly is done to minimize the risk of cardiovascular disease that may accompany it. That's why you need to know your average systolic number so you can more easily spot fluctuations and identify potential health problems. The systolic number range categories are:
- Normal: under 120
- Prehypertension: 120-139
- Stage One Hypertension: 140-159
- Stage Two Hypertension: 160 or higher
- Hypertension Crisis: above 180
Step 3. Identify your average diastolic number
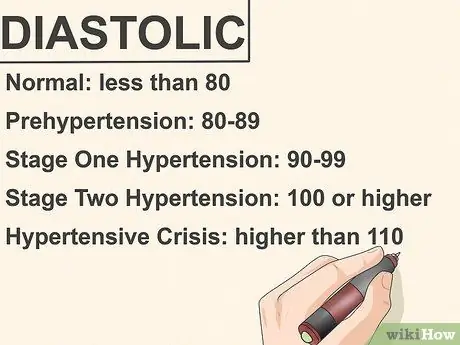
Although doctors generally pay more attention to the systolic number, understand that your diastolic number is no less important. By monitoring your average diastolic number, you can identify a variety of potential health problems, including hypertension. The following are categories of diastolic number ranges that you should understand:
- Normal: under 80
- Prehypertension: 80-89
- Stage One Hypertension: 90-99
- Stage Two Hypertension: 100 or higher
- Hypertension Crisis: above 110
Step 4. Perform emergency treatment for hypertensive crisis conditions
Although the process of measuring blood pressure is carried out periodically, stay alert if you find a rapid increase in the systolic or diastolic number. Remember, these situations need to be addressed immediately to normalize blood pressure while reducing the risk of serious health problems, such as heart attacks and organ damage.
- If the systolic number exceeds 180 and/or the diastolic number exceeds 110, perform a second measurement process. If the results do not change on the second measurement, see a doctor immediately! Keep doing this even if only one number, not both, exceeds the normal limit.
- Be prepared to experience a variety of physical symptoms such as severe headaches, shortness of breath, nosebleeds, and severe anxiety that accompany a high systolic or diastolic number.

Step 5. Don't underestimate the condition of low blood pressure
For most doctors, a low blood pressure reading (such as 85/55) is not considered a problem, unless it is accompanied by certain symptoms. As with crisis hypertension sufferers, you will also have to repeat the measurement process if the results are low. Call your doctor immediately if the second measurement remains low and is accompanied by the following symptoms:
- Dizziness or lightheadedness
- Fainting or loss of consciousness
- Unusual dehydration and thirst
- Difficulty concentrating
- Blurred view
- Nauseous
- Skin that feels cold, moist, and pale
- Breath that catches and shortens
- Fatigue
- Depression

Step 6. Continue to monitor the results
In most cases, blood pressure measurements will be taken periodically. In other words, you can certainly identify what the measurement results are normal, as well as what factors can contribute to the measurement results (such as stress or changes in activity). Try sharing your measurements with your doctor if necessary, or provide a copy of your measurement history. Monitoring the results of blood pressure measurements can help indicate a problem that requires immediate medical attention.
Remember, one abnormal measurement result does not necessarily diagnose an abnormality in your blood pressure. However, if the abnormality persists in subsequent measurements (about a few weeks or months), see a doctor immediately to rule out or confirm an underlying health problem. Don't procrastinate measurement so that negative risk can be minimized

Step 7. Check with a doctor
Remember, regular health check-ups are essential for everyone! This will be even more essential if the results of your blood pressure measurement are problematic or different than usual. Therefore, immediately see a doctor if the results of your blood pressure measurement are always high or always low for a certain period of time, to reduce the risk of health problems that can damage liver and brain function.


