- Author Jason Gerald gerald@how-what-advice.com.
- Public 2023-12-16 10:50.
- Last modified 2025-01-23 12:04.
Rotating the computer screen allows you to view the monitor in portrait mode, or reverse its position. This is great for reading documents or e-books (ebooks), or for sticking the monitor in hard-to-reach places. Rotating the display on Windows or Mac is usually fairly easy, but sometimes computer manufacturers make it even more difficult. To rotate the computer screen in Windows, you can usually open the Screen Resolution menu and change the Orientation setting. In some cases, you can also use a shortcut key or check the control panel of the computer's video card. Meanwhile, to rotate the computer screen on Mac, go to Displays in System Preferences and change Rotation in External Display settings.
Step
Method 1 of 2: Windows
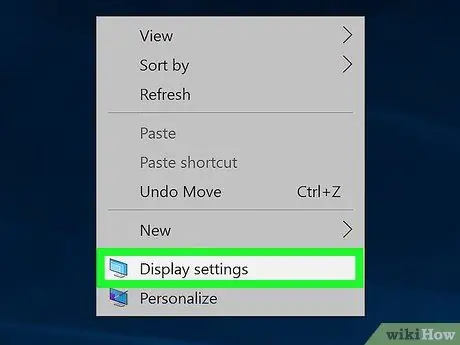
Step 1. Right-click on the desktop and select "Screen Resolution" or "Display settings"
The options that appear will depend on your version of Windows. They all lead to the same common window.
If you are using Windows XP, this will not work. Continue reading Step 5 in this section
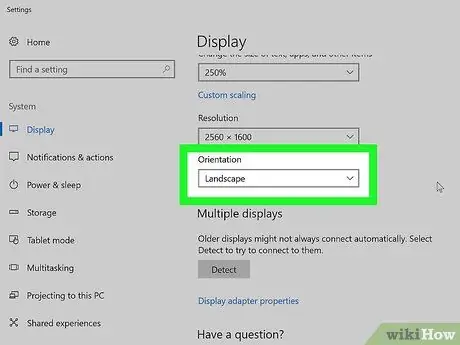
Step 2. Look for the "Orientation" menu
It's at the bottom of the window. By default, this menu will say "Landscape" on most computers. Most graphics cards allow you to rotate the screen using this menu.
If you don't see this menu, there may be a problem with your drivers or your computer manufacturer may have disabled this option. Continue reading Step 4 for more ways to rotate the screen
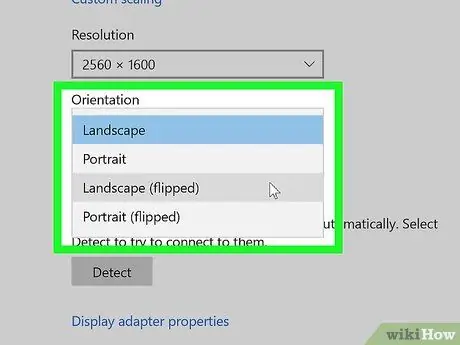
Step 3. Select the orientation you want to use
There are four options you can choose from:
- Landscape - This is the default option for standard monitors.
- Portrait - This will rotate the screen 90° to the right so that the right side of the monitor is now the bottom half of the screen display.
- Landscape (flipped) - This will flip the screen from top to bottom so that the top side of the monitor is now bottom.
- Portrait (flipped) - This will rotate the screen 90° in the opposite direction, so that the left side of the monitor becomes the bottom half of the screen display.
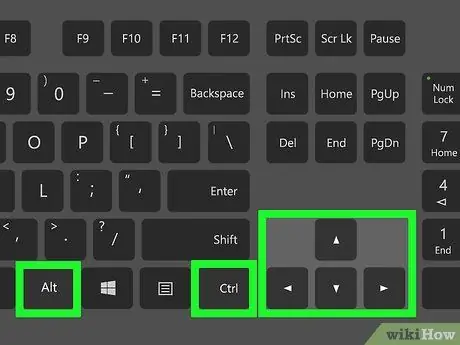
Step 4. Try using the shortcut keys (Intel)
Some adapter cards allow the use of shortcut keys to change the screen orientation. You can use this shortcut to quickly change the screen orientation. This shortcut may work if you are using an Intel integrated adapter. Meanwhile, for Nvidia or AMD users, this shortcut won't help.
- Ctrl+Alt+↓ - Flip the screen from top to bottom.
- Ctrl+Alt+→ - Rotates the screen 90° to the right.
- Ctrl+Alt+← - Rotates the screen 90° to the left.
- Ctrl+Alt+↑ - Returns the screen to standard landscape orientation.
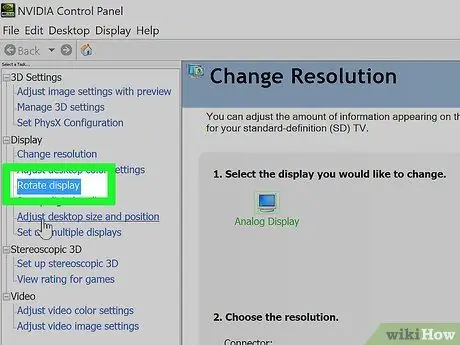
Step 5. Check the control panel of your video card
Nvidia, AMD, and Intel graphics adapters usually have a control panel program installed that allows you to make specific adjustments to the adapter. You can usually access this control panel from the menu that appears when you right-click the desktop, but you may have to look for it in the Start Menu or in Windows Control Panel.
Look for the "Rotate" or "Orientation" option. In the Nvidia control panel, look for the "Rotate display" option in the left menu. In the AMD Catalyst Control Center, you can find the "Rotation" menu in the Desktop Properties section. For Intel, you can find the "Rotation" option in the "Display Settings" menu

Step 6. Create a shortcut key for AMD
If you are using an AMD or ATI card, the Catalyst Control Center software allows you to create shortcut keys to rotate the computer screen.
- Right-click on the desktop and select "Catalyst Control Center".
- Click the "Preferences" button and select "Hotkeys".
- Select "Display Manager" from the menu that opens and specify the combination code you want to use for the different rotation options. The combination code in Step 4 usually can't be used for other functions so it's a good choice.
- Make sure to check the box and enable your new hotkey.
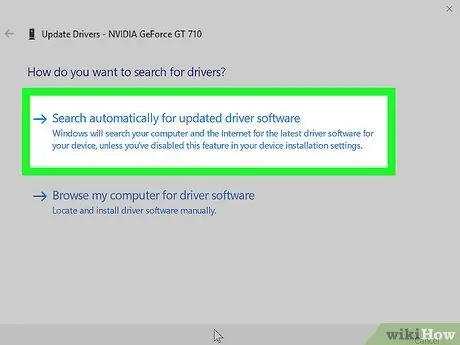
Step 7. Update the drivers on the computer if you don't have the rotation option
If you don't see any rotation options and the shortcut keys don't work, you may be able to enable the function by updating the video card driver. You should download the latest drivers directly from the manufacturer, not by using Windows Update.
- AMD and Nvidia have hardware detection tools that will automatically detect the graphics card you are using and provide the latest drivers. You can run this tool from their driver download page, or do a search on the specific model of your graphics card if you know one.
- If you want to see which graphics adapter model you have, press Win+R and type dxdiag. Click the "Display" tab to see the manufacturer and model of your graphics adapter.
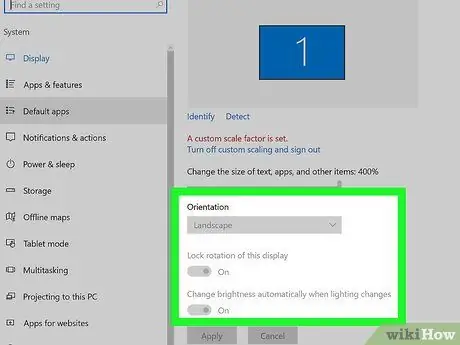
Step 8. Understand that computer manufacturers can disable screen rotation
This option is not actually provided by Windows; it is up to the hardware manufacturer to enable it. Most computers have it enabled, but your computer may not support screen rotation. The device that is most often the victim of the loss of the ability to rotate the screen is a laptop.
Method 2 of 2: Mac
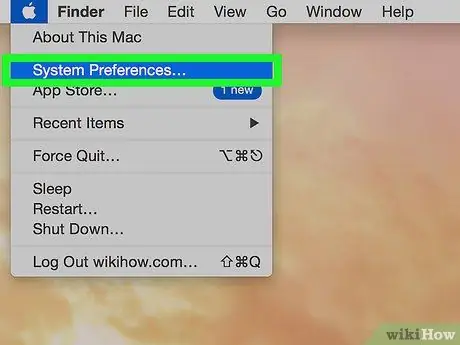
Step 1. Click the Apple menu and select "System Preferences"
You can only rotate the external display, and the screen must support rotation (not all of them do). If you're running an older version of OS X, you can try to force rotate your built-in screen, but this won't work in the new version.
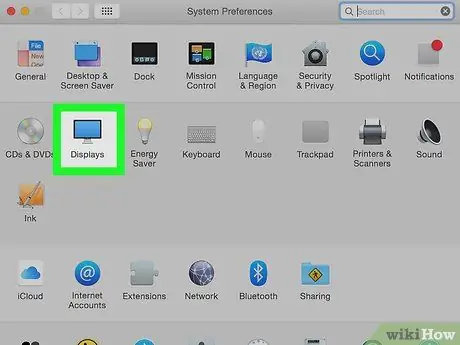
Step 2. Click the "Displays" option
This will show all connected screens.
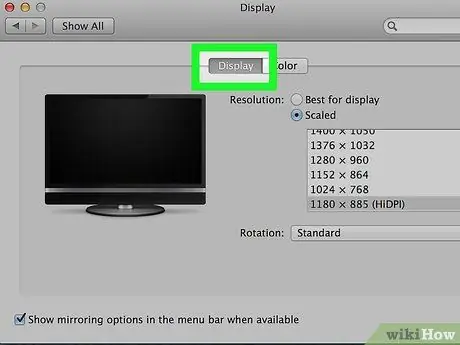
Step 3. Select your external display
Select your external display from the available screens.
If you want to try rotating the internal display, like on a MacBook or iMac, see Step 6
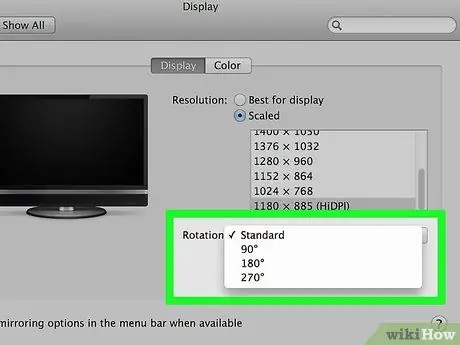
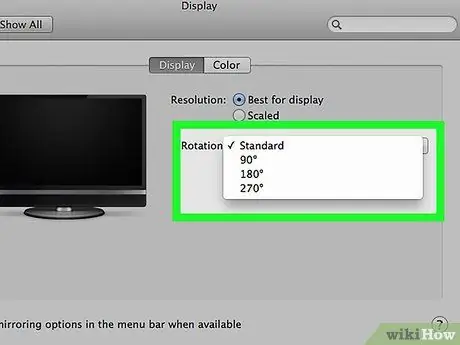
Step 4. Specify the "Rotation" menu on the options you want in the "Display" tab
You can choose 90°, 180°, or 270°. These numbers indicate the number of degrees the screen is rotated to the right.
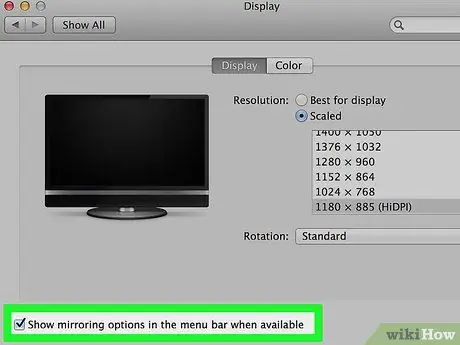
Step 5. Check if mirroring is enabled or not
If all your screens rotate when you activate one of them, then mirroring is enabled. This makes all screens will imitate each other. Click the "Arrangement" tab and uncheck the "Mirror Displays" box.
Step 6. Try rotating the built-in monitor (OS 10.9 and earlier)
If you're using Mavericks or earlier, you can try to force the built-in screen to rotate by opening the special Displays version menu. Make sure System Preferences is closed before continuing. Don't try this on OS X 10.10 (Yosemite) or later, as it could cause serious problems.
- Click the Apple menu and select System Preferences.
- Press and hold Cmd+⌥ Opt and click the "Displays" option.
- Your built-in screen will have a rotation menu.


