- Author Jason Gerald [email protected].
- Public 2024-01-19 22:11.
- Last modified 2025-01-23 12:04.
Windows and Linux installation CDs/DVDs, as well as various diagnostic tool CDs/DVDs, are bootable CDs/DVDs. This means, the CD/DVD contains boot files that make booting or starting the computer start from the associated CD/DVD. Most computers are set up to boot from the hard drive, which allows you to enter the Windows operating system immediately when the computer starts up. In order to boot from the CD/DVD first, you need to change the boot order of your computer. The steps for changing the boot order on a computer with the latest version of Windows and earlier versions are slightly different.
Step
Method 1 of 2: Windows 8 Version and Up
Step 1. Know in advance which method you can follow
If your computer is already designed for a version of Windows 8, 8.1, or 10, use this method. If you upgraded your computer's operating system from Windows 7 or earlier to Windows 8 or later, follow the second method below.
This is because the latest versions of computers use UEFI (Unified Extensible Firmware Interface) instead of BIOS (Basic Input/Output System) to set the boot order of the computer. UEFI makes the process of booting a computer into Windows faster and safer, but making changing the boot order a little more complicated to do. UEFI requires UEFI-compliant hardware and certain configurations when you build your own computer
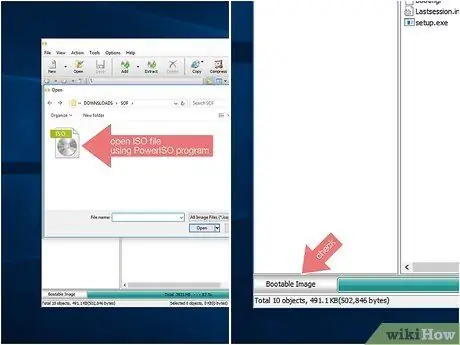
Step 2. Check if the CD you want to use is bootable
The CD used must be programmed to be bootable in order to boot from the CD. Windows and Linux installation CDs/DVDs, and various computer utilities CDs/DVDs, are configured to be bootable. The CD already contains the files that make booting from the CD possible.
- If you burned the ISO file to a CD to make it a bootable CD, you can use PowerISO to check if the ISO file is bootable or not. When you insert an ISO file into PowerISO, PowerISO will display information on whether or not the file can be booted in the lower left corner.
- The quickest and easiest way to check whether a CD can boot or not is to try it directly.
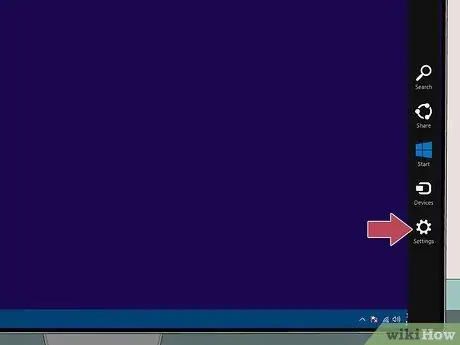
Step 3. Open the Charms menu and click "Settings"
You can open the Charms menu by moving the pointer to the top right corner of the screen or by pressing Win+I
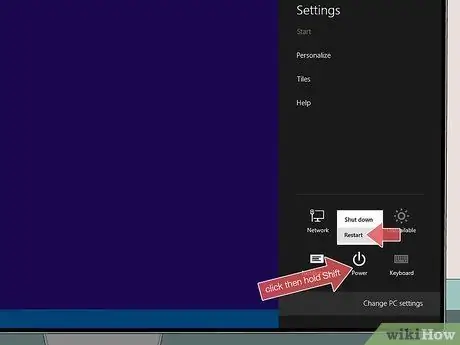
Step 4. Click the Power icon, press and hold
Shift and click "Restart".
This will make your computer display a screen with several options.
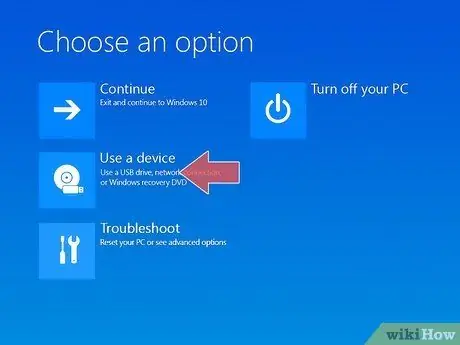
Step 5. Click "Use a device", and select CD/DVD drive
Make sure the CD/DVD you want is inserted into your computer. Your computer will reboot to the CD or DVD you inserted. If the CD is not a bootable CD, you will go straight to Windows.
If the "Use a device" option does not appear, or you cannot select the CD/DVD drive, continue reading
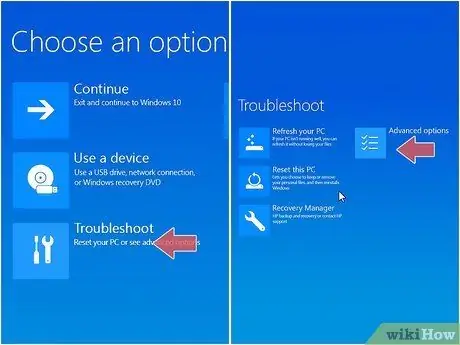
Step 6. Click the "Troubleshoot" and "Advanced options" options
Click this option if you were unable to select the CD/DVD in the previous step.
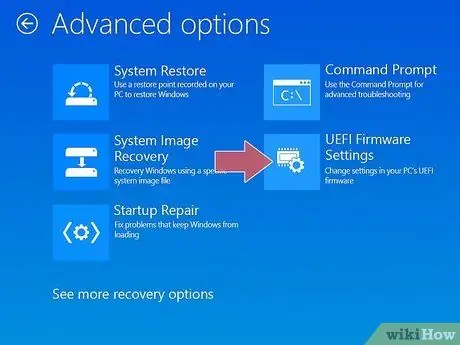
Step 7. Select "UEFI Firmware Settings"
This will open the UEFI view.
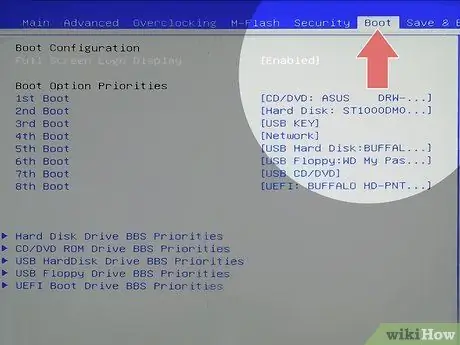
Step 8. Look for the "BOOT" menu
This menu will allow you to change the boot order of your computer. The appearance of the UEFI menu on each computer may vary.
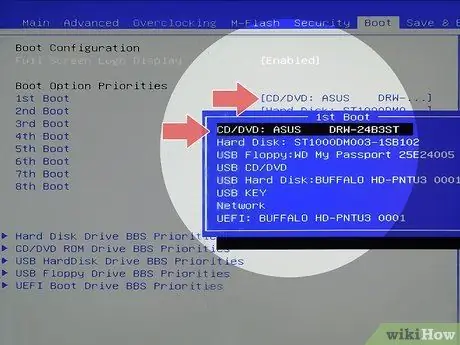
Step 9. Set the CD/DVD drive to be the first boot device
This will make your computer boot from the CD/DVD drive first before entering the hard drive.
You may have to turn off "Secure Boot" to be able to change the boot order. You can find these settings in the BOOT menu
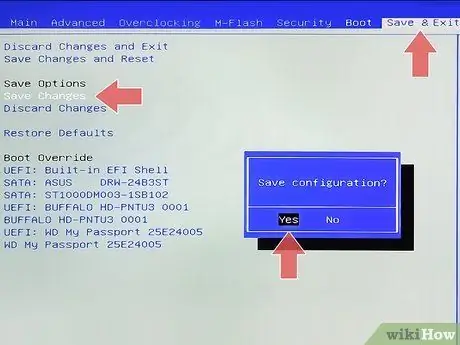
Step 10. Save your changes and restart your computer
After changing the boot order, save your changes and close the UEFI menu. Your computer will also reboot from the CD/DVD drive.
Method 2 of 2: Windows 7 and Lower
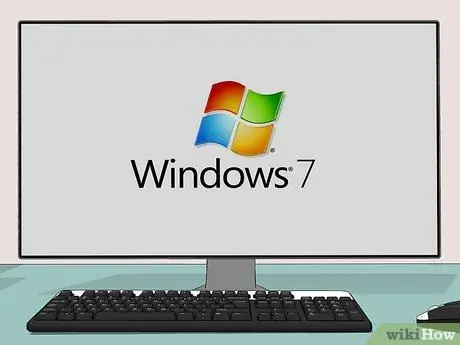
Step 1. Know in advance if this method you can follow
If your computer was designed for Windows 7 or earlier, use this method. Use the previous method above if your computer is designed for a version of Windows 8 and above.
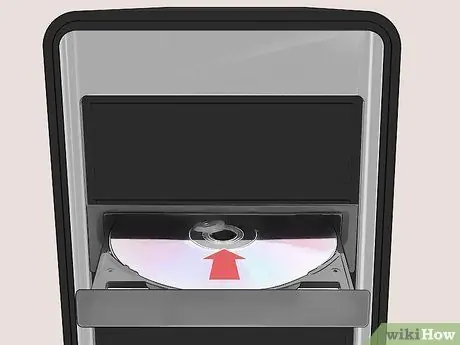
Step 2. Insert the CD you want
The CD/DVD you insert into the computer must be configured to be bootable. This means that the CD must already contain the files that make booting from the CD possible. Windows and Linux installation CDs/DVDs, and various diagnostic tools CDs/DVDs, are configured to be bootable.
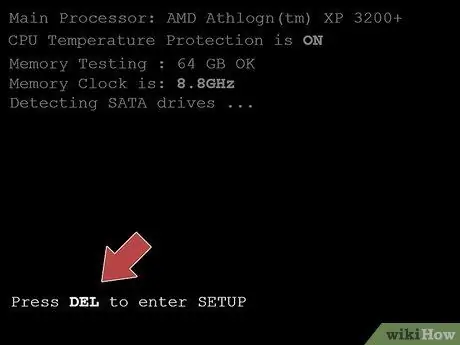
Step 3. Restart your computer to enter the "BIOS" menu. You can find the button to enter the "BIOS" menu on the display screen of the computer manufacturer's logo that you used when the computer first turned on. The keys used may vary depending on the computer manufacturer. The frequently used keys are F1, F2, F11, and Delete.
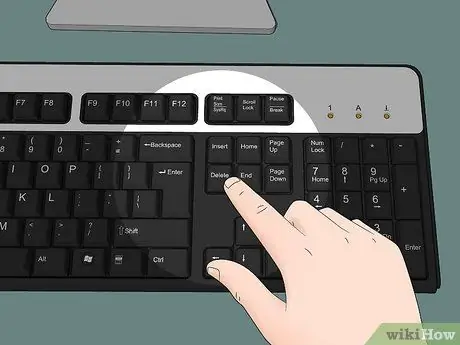
Step 4. Press the appropriate key to open the BIOS menu
If you do not press the key to enter the BIOS menu in time, Windows will continue the boot process. If you press the key at the right time, the BIOS menu will open.
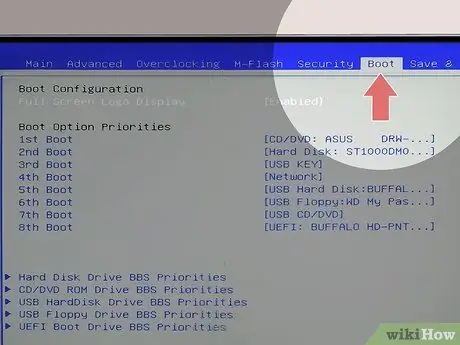
Step 5. Find the BOOT menu
Use the arrow keys on the keyboard to open the BOOT menu. Each BIOS has a different appearance, although you can certainly find a BOOT menu or something similar.
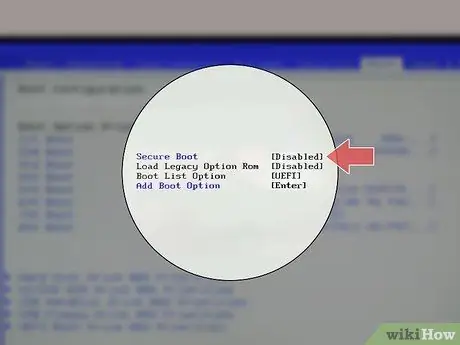
Step 6. Turn off "Secure Boot" (if it is on)
Secure boot will prevent you from changing the boot order. Although for security, Secure boot will prevent you from booting from CD/DVD. Turn it off first before changing the boot order. You can find the "Secure Boot" setting in the BOOT menu.
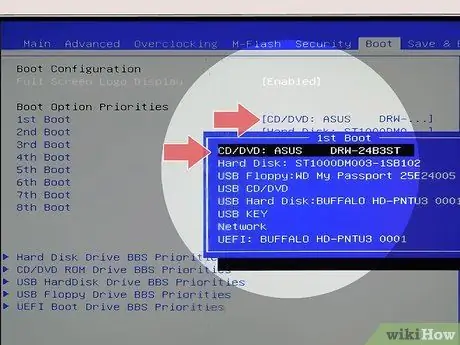
Step 7. Change the boot order so that the CD/DVD drive will be the first booted device
Use the arrow keys to change the order of the CD/DVD drives to be first before the hard drive. In some BIOS menus you must use the + and - keys to change the boot order. This will make your computer boot from the CD/DVD drive first before entering the hard drive.
If there is another CD/DVD drive also installed on your computer, make sure you select the appropriate drive to be the first boot device when the computer starts up
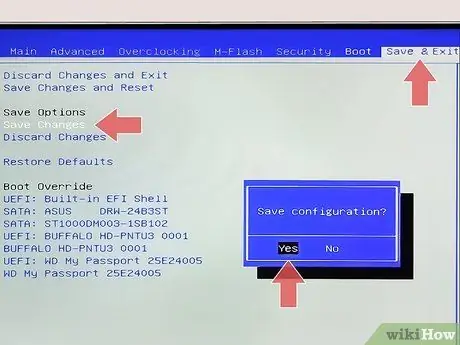
Step 8. Save your changes and close the BIOS menu
Your computer will reboot from the CD/DVD drive. If after booting your computer goes straight to Windows, it could be that you didn't save your boot order changes or the CD you inserted is not a bootable CD.


