- Author Jason Gerald [email protected].
- Public 2024-01-19 22:11.
- Last modified 2025-01-23 12:04.
An audio mixer, also known as a mixer board or soundboard, is a device for controlling multiple sound inputs to balance the sound output. Mixing is an important part in the process of recording music or stage performances because this technique is able to balance the sound of each instrument. Using an audio mixer for the first time can be a bit intimidating, but it's not that hard once you know what each knob does. After connecting the instrument or microphone, adjust the volume of each input until you get the right result!
Step
Method 1 of 3: Connecting Equipment
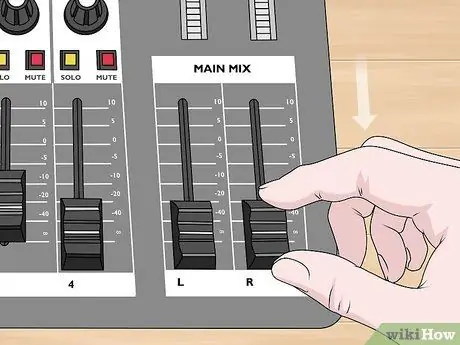
Step 1. Turn the master volume knob and channel sound to the lowest point
Look for the master volume knob at the bottom right of the audio mixer. This button is usually labeled with the words “Main Mix” or something similar. Voice channels are knobs or sliders that control the volume of each voice input individually at the bottom of the instrument. If the button is a knob, turn it counterclockwise until it feels stuck. If it's a slider, push it all the way to the very bottom to lower the volume.
- If you turn on the audio mixer without turning the volume and channel controls, there will be a loud feedback sound or damage to the audio mixer or loudspeaker.
- The master volume controller and the sound channel are usually in a different color making them easier to identify than the other controllers.
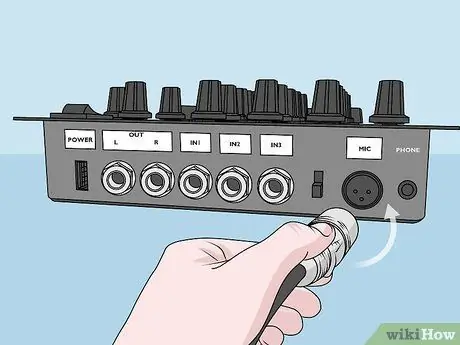
Step 2. Plug the microphone into the channel with the XLR cable
The XLR cable is used to plug the microphone into the audio mixer. This thing has a 3 pin tip inside a metal cylinder. Audio mixers usually have XLR ports on the top or back. Plug the other end of the XLR cable into one of the round ports that have 3 small holes. The number listed above the port indicates the input channel, which is the column on the audio mixer with a knob to set a single input from that port.
- You can buy an XLR cable from a music supply store or online.
- The number of inputs that can be entered into the audio mixer depends on the number of channels. An 8-channel audio mixer can accommodate 8 different inputs, while a 32-channel audio mixer can accommodate 32 sound inputs.
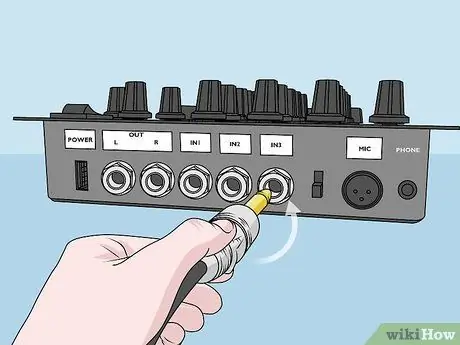
Step 3. Connect the instrument to one of the mixer's audio inputs
The input connections on the audio mixer can be found near the XLR ports on each channel and can be accessed with a 6.35 mm jack cable. Plug the end of the cable into the instrument you want to play. After that, select a channel on the audio mixer that has not been plugged in, then plug the other end of the cable into the input hole. The number above the input port indicates the channel that controls the audio on the connected instrument.
- You cannot plug the instrument into an input channel that has an XLR cable attached.
- You can also use a special audio cable to connect the instrument to the XLR cable port on the audio mixer. The result is the same.
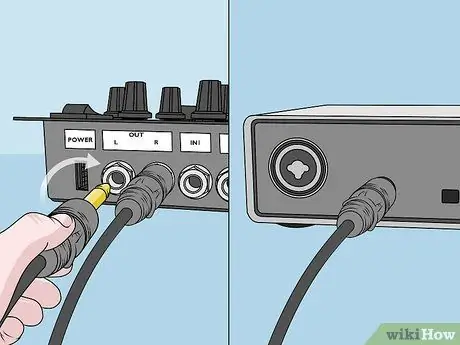
Step 4. Connect the output on the audio mixer to the audio interface with a TRS cable
The TRS cable is a neutral audio source. This cable can reduce feedback and noise from the input. The end of the cable looks like the 6.35mm jack on the jema speaker. Look for the main output port on the top of the audio mixer or on its side. Plug one cable into the port labeled “L” and plug the other cable into the port labeled “R”. Plug the other end of the cable into the audio interface that is used according to the input port on the back of the interface.
- You can purchase an audio interface and TRS cable at an online or music store.
- The system interface allows you to play audio from an audio mixer through monitor speakers or a computer.
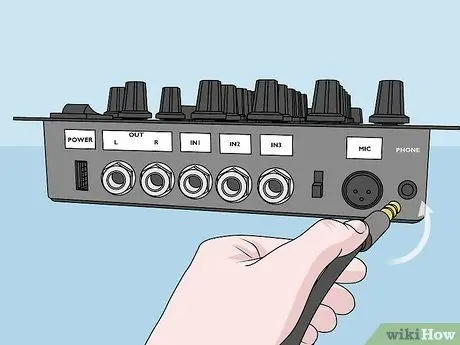
Step 5. Plug the speakerphone into the “Phones” port on the audio mixer
Listening to the sound produced by the audio mixer through the jemala speaker will make the sound clearer so that it is easier for you to make adjustments. Plug the 6.35 mm jack on the jema speaker into the audio mixer. Make sure the speaker wires are not tangled around the knobs.
You don't have to use the jema speaker if you don't want to
Tip:
Most audio mixers don't have a port for the standard 3.5mm speaker. If your speaker doesn't plug into your audio mixer, you'll need to purchase a 3.5mm to 6.35mm adapter at an online or music supply store.
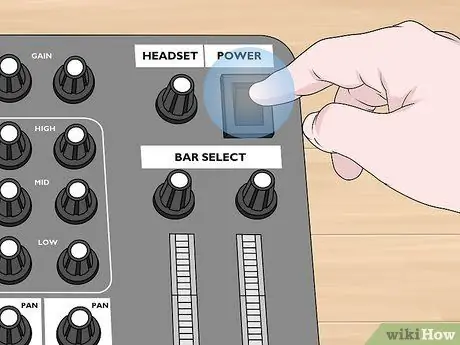
Step 6. Turn on the power button on the audio mixer
This button is usually located on the back of the audio mixer or at the top right of the knobs. Make sure all volume control buttons and sound channel are still lowered before turning on the appliance. You will see the indicator light come on once the device is turned on.
Some audio mixers have a power button labeled “phantom” that provides power to the microphones that need it. If you're using a microphone powered by the Phantom system, you'll also need to turn that switch on
Method 2 of 3: Adjusting the Loudness Level
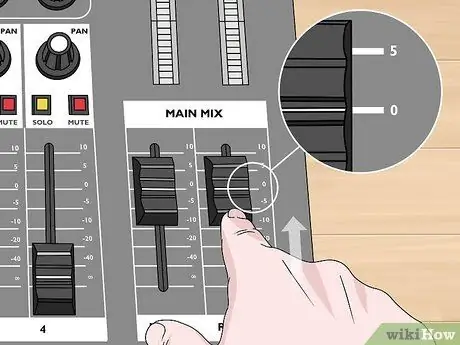
Step 1. Turn the main volume to 0 dB
The main volume control has a number stamped on the side to see its output level. Press the slide button or turn the knob so that it points to the 0 dB usually found at the maximum setting. More than that, the sound that comes out will start to get distorted.
You won't hear any sound from the loudspeaker or the speakerphone because the sound channel control on each channel is still lowered
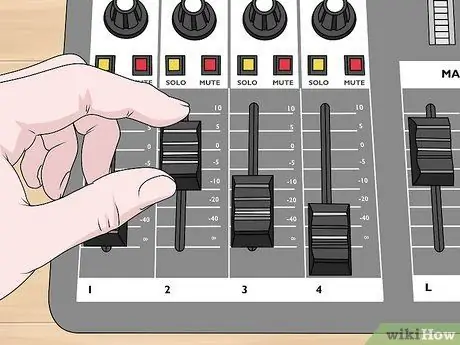
Step 2. Balance each sound channel so you can hear the input clearly
Start by pressing the slider or turning the knob clockwise on one of the sound channels. Keep turning the dial on each input until you can hear it through the speaker or speakerphone. Test the inputs at the same time to make sure you can hear instrument or microphone sound through the audio mixer. Increase or decrease the sound channel until you can hear all audio sources.
Do not play the sound channel more than of the maximum volume as this may cause interference and make the audio sound indistinct
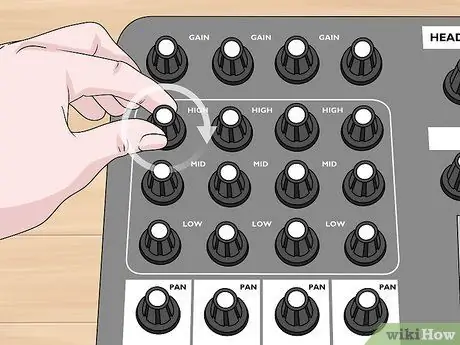
Step 3. Change the composition of the treble, mid, and bass to adjust which frequencies you want to highlight
Each sound channel on the audio mixer has a column of knobs that control the treble, mid, and bass of the sound channel. The treble control knob sets the high frequencies, the bass knob sets the lowest frequencies, while the mid knob changes all the frequencies between the two frequencies. Listen to the audio input on the voice channel while adjusting the knob settings to see the difference in the sound produced.
- If the voice channel has a microphone, lower the bass and increase the treble to make the sound clearer.
- If the channel is connected to an instrument, try adjusting each knob as you play the instrument to see how it affects the sound produced.
- There is no perfect setting to balance the sound as the result depends on the audio source and the desired sound.
Tip:
Some audio mixer models have a button labeled “Lo Cut” that removes sound below a certain frequency limit on the sound channel. Use this button to remove unwanted low-pitched microphones or vocals.
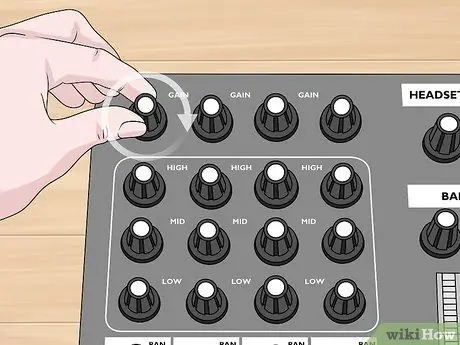
Step 4. Use the knob labeled Gain to increase the volume for a specific voice channel
This knob is usually at the top of each channel and is labeled “Gain”. Slowly raise this knob on the channel you want to amplify to amplify the audio and compare the audio with the sound of other instruments until it can be heard clearly.
You don't need to raise the Gain button on all inputs. If you do this, the sound that comes out will sound indistinct
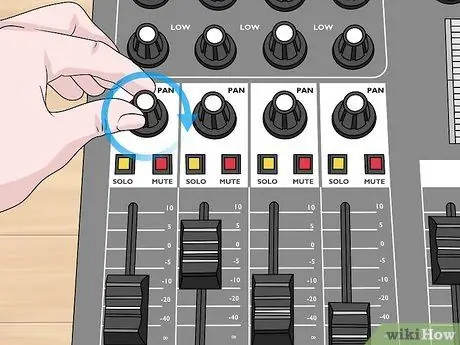
Step 5. Adjust the pan knob to channel the sound to the speaker on the right or left
The pan knob controls the balance between the right and left speakers. These controls are usually placed directly above the sound control of each channel. When the knob is in the middle, the sound will come out equally on the right and left speakers. Turn the knob to the left if you want the audio to stand out more on the left, or turn it to the right if you want the audio to sound louder on the right. Continue to adjust the position of the pan knob on each sound channel.
- If you point the entire audio source directly into the center, the sound from the audio mixer will sound flat.
- You can turn the knob slightly from the center if you want the audio input to come out of both speakers, but sound more prominent on one side.
Method 3 of 3: Isolating and Moving Sound Channels
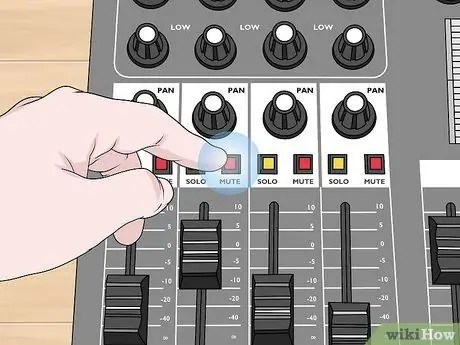
Step 1. Press the “Mute” button on the voice channel to mute the audio
Look at the channel control section for a small button labeled “Mute”. When you press it, the audio from all other channels will stay on, while the audio in the selected channel will turn off. If you want to turn the audio back on, press the “Mute” button again.
- Pressing the “Mute” button does not mute the audio from the sound source, but only makes the sound “disappear” from the loudspeaker or speaker plug connected to the audio mixer.
- You can remove multiple sound sources at once if you want.
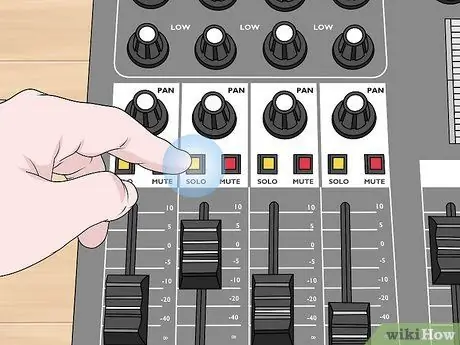
Step 2. Press the “Solo” button on the voice channel controller to isolate it
Notice the button labeled “Solo” next to the “Mute” button. When pressing the button, all other channels will be turned off so that only the channel of your choice is heard. When you want to turn on other inputs, press the “Solo” button again to turn off the function.
- Turning on one channel of sound in the audio mixer will make it easier for you to make adjustments to certain instruments or vocals without needing to lower the sound on other channels.
- You can turn on multiple “solo” buttons at once.
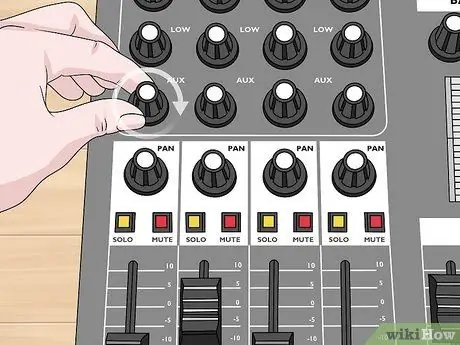
Step 3. Use the auxiliary channel to “send” the audio signal to another source
Auxiliary channels work effectively for sending audio copies to specific speakers or adding additional effects. Plug the monitor's speaker cable or effect generator into the port labeled "AUX" on the audio mixer to start using the auxiliary port. Turn the knob labeled “AUX” on the channel you want to move to adjust the input volume level.
- Make sure you use the auxiliary knob that matches the auxiliary channel you are using.
- You can send multiple voice channels to one auxiliary channel.
- For example, you can use the auxiliary channel for singers who want to hear the sound of drums and guitars through the monitor's speakers so they don't lose tempo while performing.


