- Author Jason Gerald gerald@how-what-advice.com.
- Public 2024-01-19 22:11.
- Last modified 2025-06-01 06:05.
This wikiHow teaches you how to fix computer internet connection problems caused by domain name server (DNS) errors. DNS is a server that changes website addresses so that browsers can connect to them. If the address is not updated or the server is down, you will experience DNS errors and cannot connect to certain sites or groups of sites, even when the computer is connected to internet access. You can fix DNS issues by resolving connection crashes, clearing the DNS cache, disabling additional connections, changing the primary DNS server, and resetting the router.
Step
Part 1 of 5: Solving Connection Problems
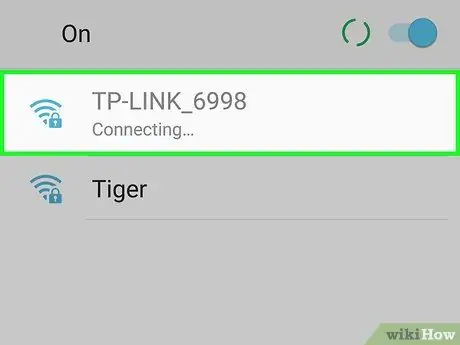
Step 1. Try connecting several different devices to the network
If you can connect your phone, tablet, or computer to the network and access a web page you can't access with your primary device, the problem is with the device, and not the router.
- If the second device can't access the web page, the problem isn't necessarily caused by the router.
- If you can't access a certain website, try accessing the site using a cellular connection. If the site is still not accessible, the problem is with the site.

Step 2. Try using a different browser
This is the fastest way to test DNS connections. Download some free browsers like Firefox or Chrome and try to access the internet using them. If the problem persists, the cause of the no response from the DNS server is not the browser you are using.
If the problem is resolved successfully, try uninstalling and reinstalling the old browser so that the problem doesn't happen again
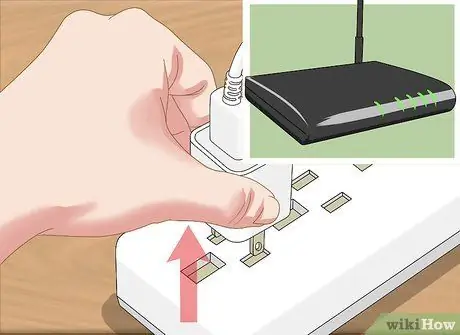
Step 3. Perform a power cycle on the modem and router
This process can clear the router's cache and resolve DNS errors. To do a power cycle:
- Unplug the modem power cable, as well as the router power cable.
- Leave both devices for (at least) 30 seconds.
- Reconnect the modem and wait for it to connect to the internet.
- Reconnect the router to the modem and wait for the router to connect to the network.
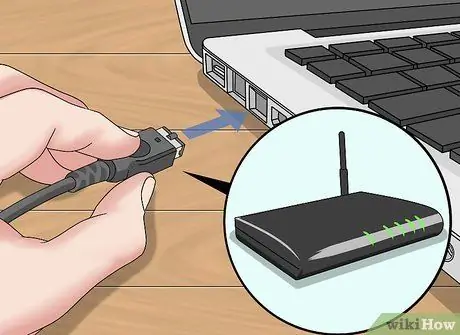
Step 4. Connect the computer to the router via ethernet
If you are already using ethernet, skip this step.
- If you can connect to web pages when using ethernet, the problem may be with the router. It is possible that you will need to reset the router.
- If you can't connect to the web page via ethernet, the problem may be caused by DNS settings.
Part 2 of 5: Clearing DNS Cache
Windows

Step 1. Open the “Start” menu
Click the Windows logo in the lower-left corner of the screen, or press Win.
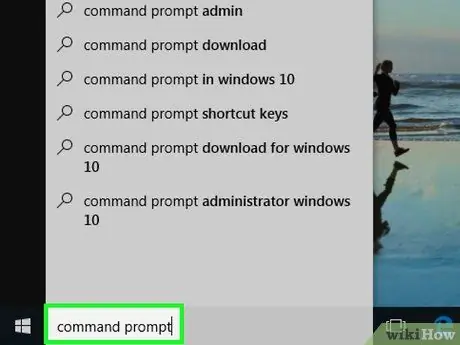
Step 2. Type command prompt into the “Start” window
After that, the computer will search for the Command Prompt program.
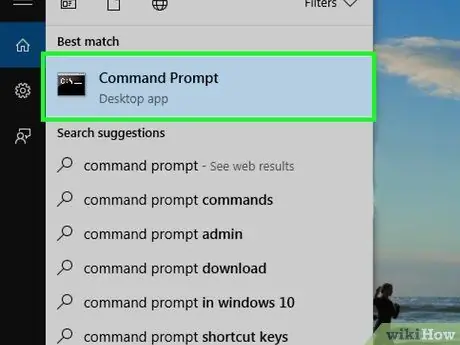
Step 3. Click
"Command Prompt".
It's at the top of the “Start” window. After that, the Command Prompt program will be opened.
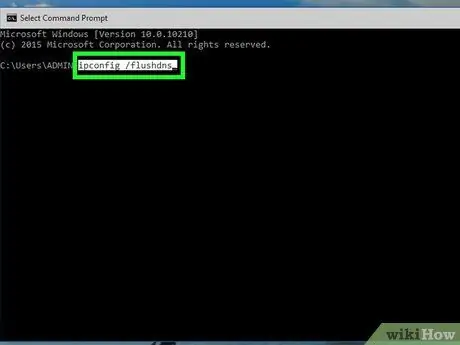
Step 4. Type ipconfig /flushdns and press Enter key
This command serves to delete all stored DNS addresses. When you reopen the website, the new DNS address will be opened.

Step 5. Restart the browser
After that, the browser cache will be updated. Now, you can connect to the previously inaccessible web page and the problem has been resolved successfully.
If you're still having connection issues, move on to the next method
Mac
Open Spotlight
Step 1.
. This feature is shown in the upper right corner of the screen.
Step 2.
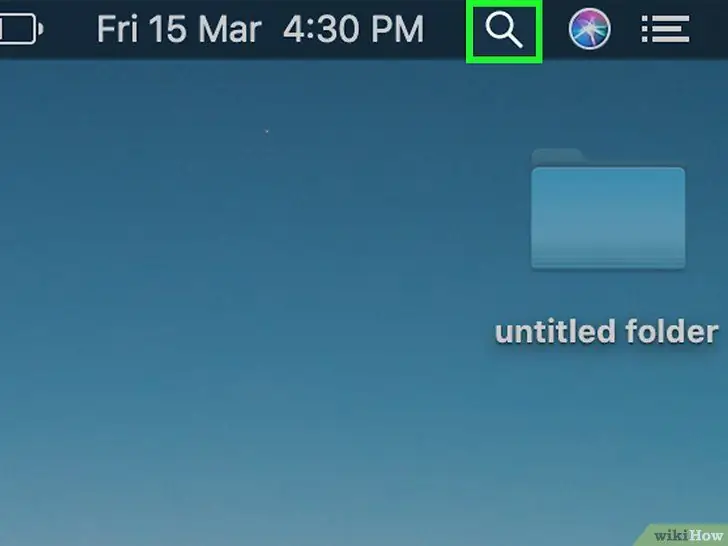
You can also press the Command+Space key combination to open Spotlight
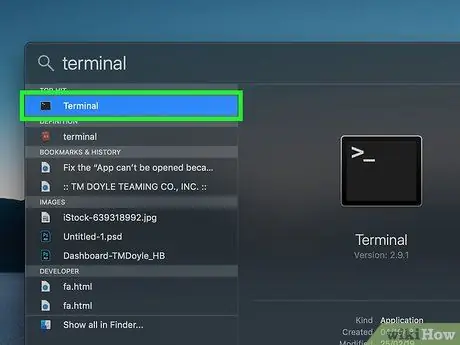
Type terminal into the Spotlight window. After that, Spotlight will search for the Terminal program on your Mac.
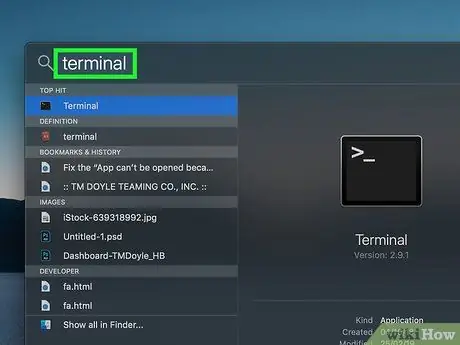
Click
"Terminals". This is the first option that appears at the top of the list of Spotlight search results.
Type this command into a Terminal window:
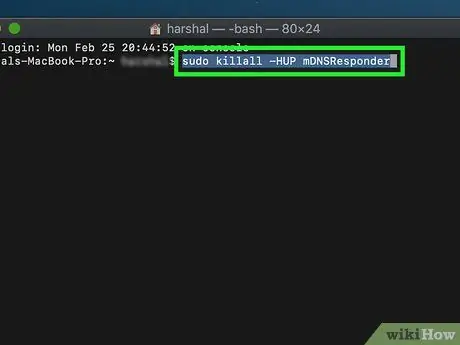
sudo killall -HUP mDNSResponder
and press the Return key.
After that, the DNS process on the computer will be restarted.
You may need to enter the administrator password first
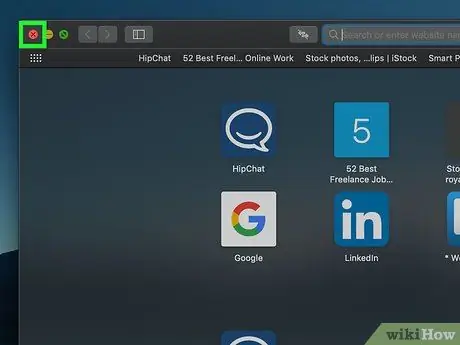
Restart the web browser. After that, the browser cache will also be updated. If you are able to connect to a previously inaccessible web page, the problem has been resolved successfully.
Part 3 of 5: Disabling Additional Connections
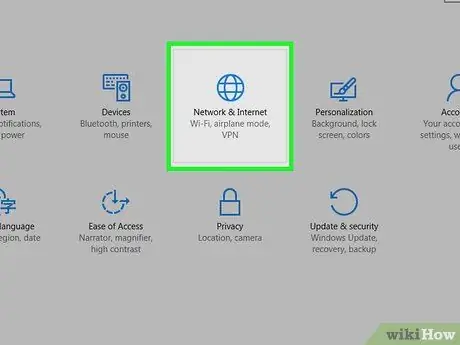
Step 1. Open the computer's network settings menu (“Network Settings”)
-
For Windows:
Open menu Start ”
click Settings ”

Windowssettings choose
“ Network & Internet, and click " Change adapter options ”.
-
For Macs:
Open menu Apple ”

Macapple1 click " System Preferences, and select " Network ”.
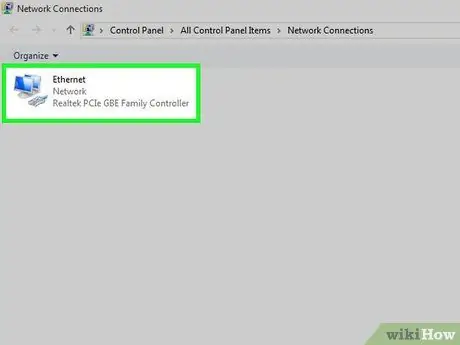
Step 2. Look for additional connections
You can delete connections that are not currently in use. This connection includes both Bluetooth and wireless connections.
The most common cause of DNS issues is the presence of "Microsoft Virtual WiFi Miniport Adapter"
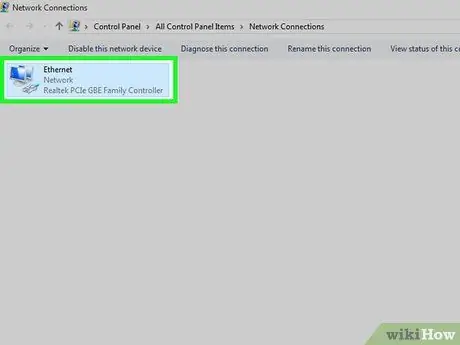
Step 3. Select additional connections
Just click the connection to select it.
- On Windows, each icon on the page represents a single connection.
- On a Mac, the connection is shown on the left side of the window.
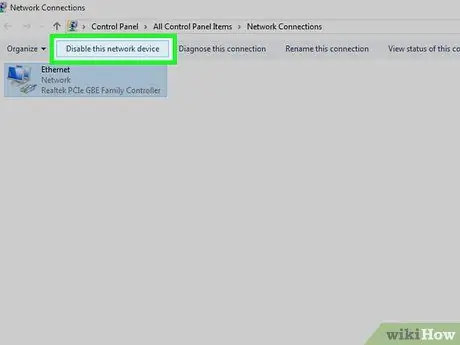
Step 4. Delete unused connections
To delete it:
- Windows - Click the option " Disable this network device ” at the top of the window.
- Mac - Click the minus sign (-) which is at the bottom of the network window.
Step 5. Try visiting the web page
If you can access it, the problem has been resolved successfully. If not, continue to the next step.
Part 4 of 5: Editing DNS Servers
Windows
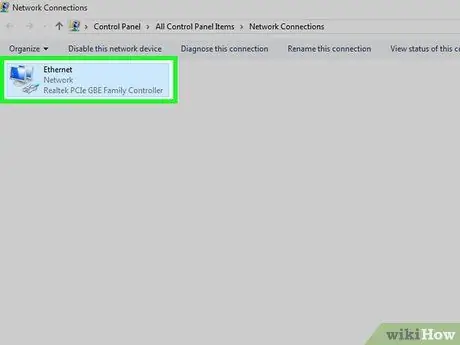
Step 1. Click the name of the connection currently in use
The name is displayed on the “Connections” page. Once clicked, the connection will be selected.
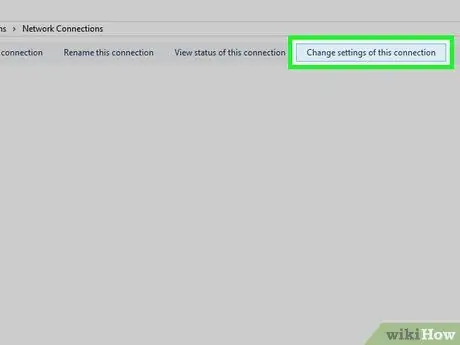
Step 2. Click Change settings of this connection
It's in the row of options that appears at the top of the window. After that, the connection settings will be opened.
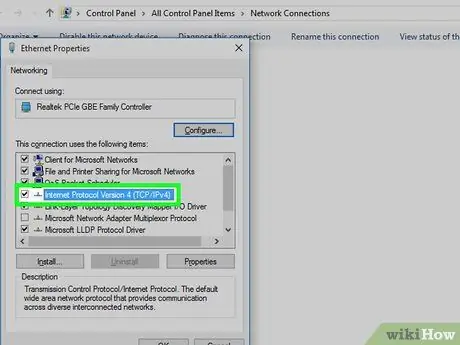
Step 3. Click the "Internet Protocol Version 4 (TCP/IPv4)" result
It's in the window in the middle of the “Wi-Fi Properties” pop-up window. After that, the option will be selected.
If you don't see this window, click the tab “ Networking ” at the top of the “Wi-Fi Properties” window.
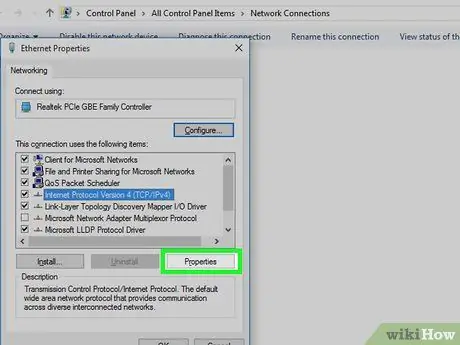
Step 4. Click Properties
It's at the bottom of the window.
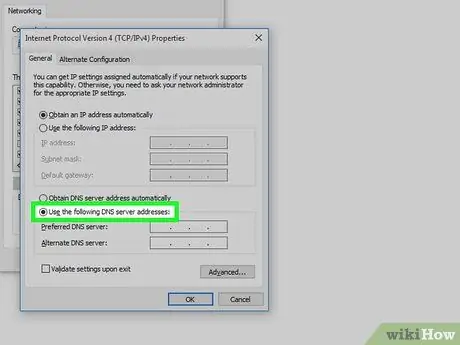
Step 5. Mark the circle "Use the following DNS server addresses"
It's at the bottom of the “Properties” window.
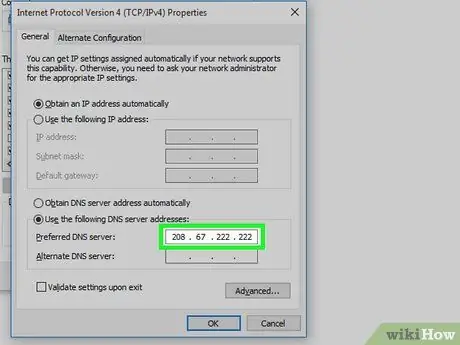
Step 6. Enter the desired DNS address
Type the address into the " Preferred DNS server " field at the bottom of the window. Some reliable DNS servers include:
- OpenDNS - Enter 208.67.222.222.
- Google - Enter 8.8.8.8.
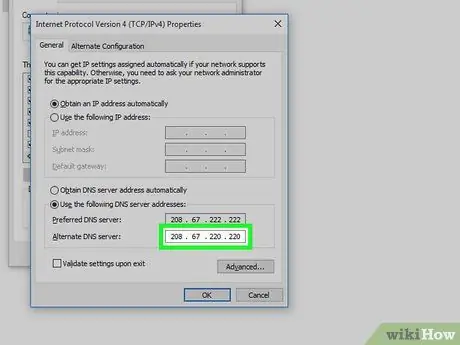
Step 7. Enter an alternate DNS address
This address needs to be entered in the "Alternate DNS server" field under the first column. The address that needs to be entered will be different, depending on what you previously entered in the " Preferred " field:
- OpenDNS - Enter 208,67,220,220.
- Google - Enter 8.8.4.4.
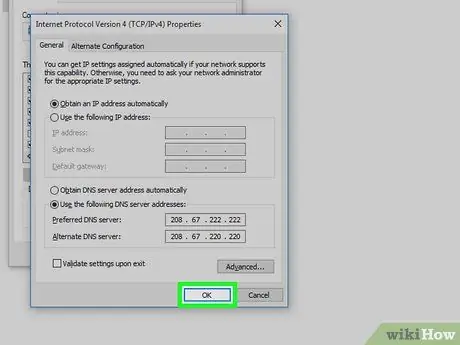
Step 8. Click OK
After that, the DNS settings will be saved.
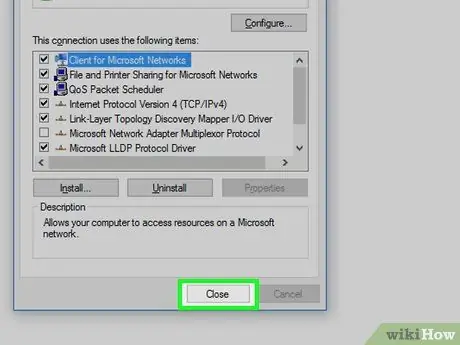
Step 9. Click Close
It's at the bottom of the window.
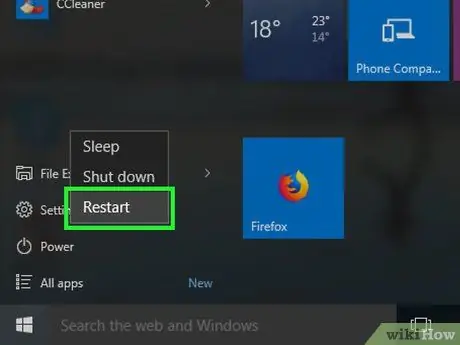
Step 10. Restart the computer
Once it's finished loading, you can test the network connection. If successful, the computer's built-in DNS server is causing the connection problem.
- If your computer still won't connect, try contacting your internet service provider (ISP) to tell them about the DNS problem.
- If the problem is still not resolved, move on to the next method.
Mac

Step 1. Open the “Apple” menu
It's in the top-left corner of the screen.
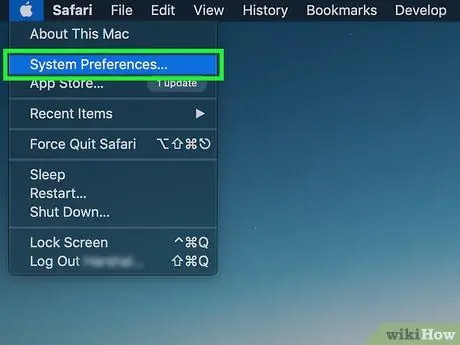
Step 2. Click System Preferences
It's at the top of the Apple drop-down menu.
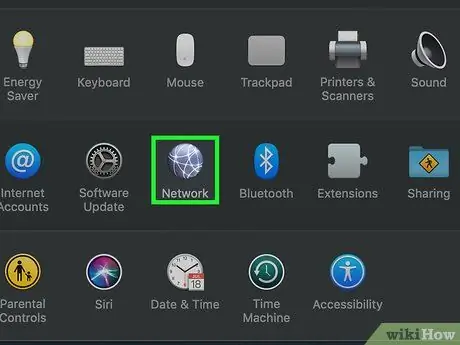
Step 3. Click Network
This globe icon is in the “System Preferences” window.
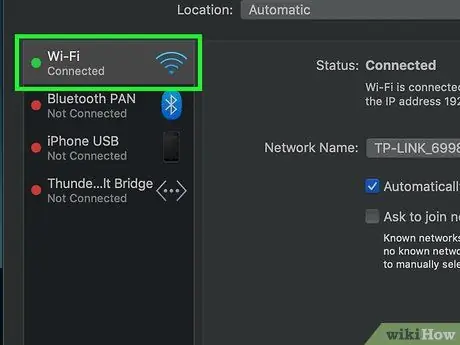
Step 4. Click the currently used WiFi network
The network is displayed in the left pane of the window.
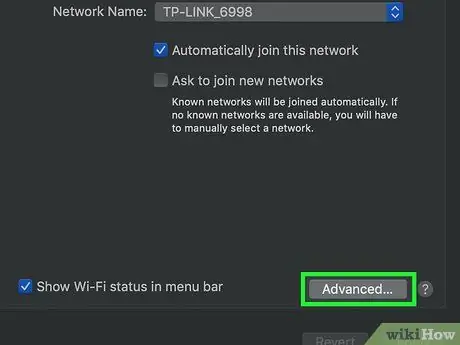
Step 5. Click Advanced
It's in the middle of the window.
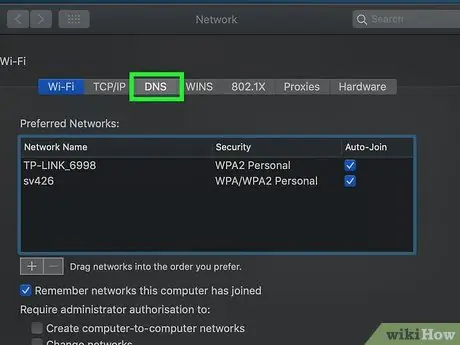
Step 6. Click the DNS tab
It's a tab at the top of the window.
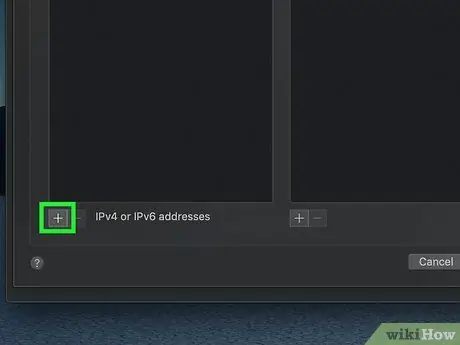
Step 7. Click +
This option is shown under the “DNS Servers” window.
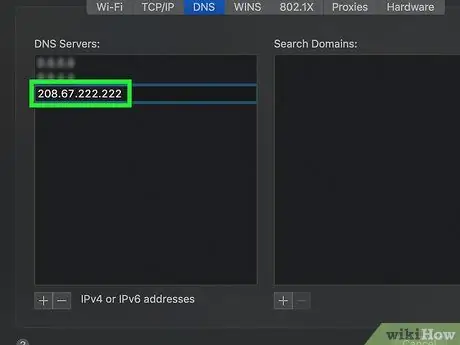
Step 8. Enter the DNS server address
OpenDNS and Google have fast and reliable DNS servers:
- Google - 8.8.8.8 or 8.8.4.4.
- OpenDNS - 208.67.222.222 or 208.67.220.220
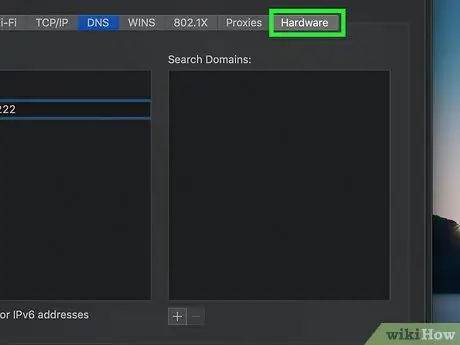
Step 9. Click the Hardware tab
This tab is at the far right of the row of tabs at the top of the window.
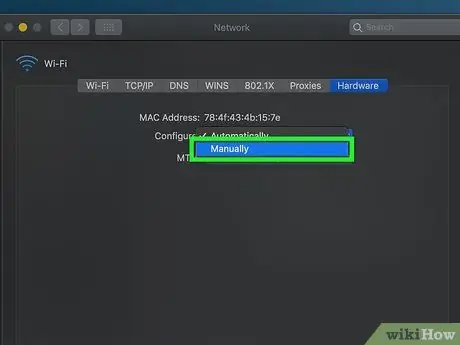
Step 10. Click the " Configure " box, then click Manually
This box is at the top of the page “ Hardware ”.
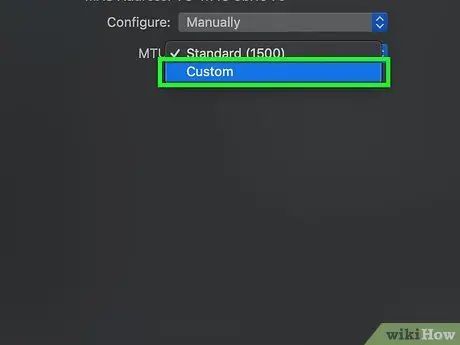
Step 11. Click the " MTU " box, then click Custom
The " MTU " box is below the " Configure " box.
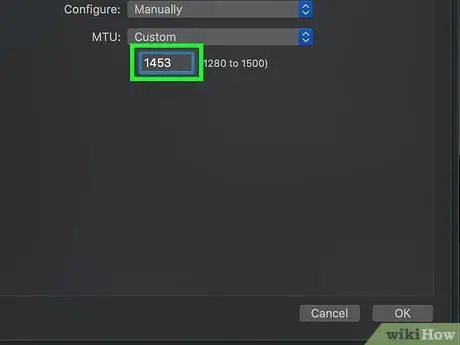
Step 12. Type 1453 into the text field
This column is below the " MTU " box.
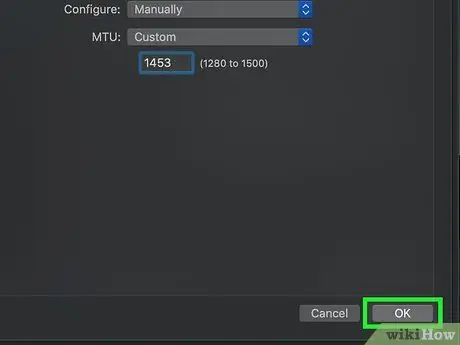
Step 13. Click OK
It's at the bottom of the page.
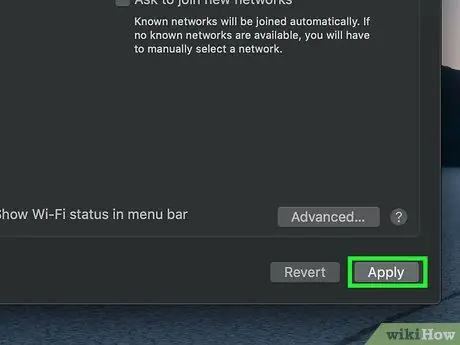
Step 14. Click Apply
It's at the bottom of the page. After that, the settings will be saved and applied to the currently connected WiFi network.
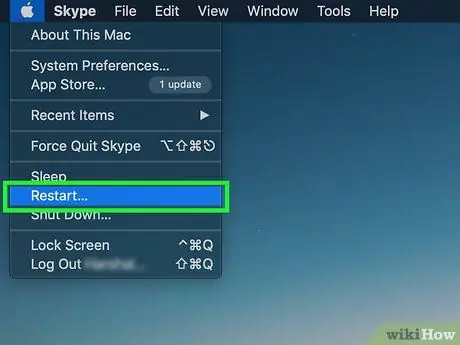
Step 15. Restart the computer
Once it's finished loading, you can test the network connection. If successful, the previous connection problem was caused by the computer's built-in DNS server.
- If your computer still won't connect, try contacting your internet service provider (ISP) to report any DNS issues.
- If the problem still occurs, move on to the next method.
Part 5 of 5: Resetting the Router
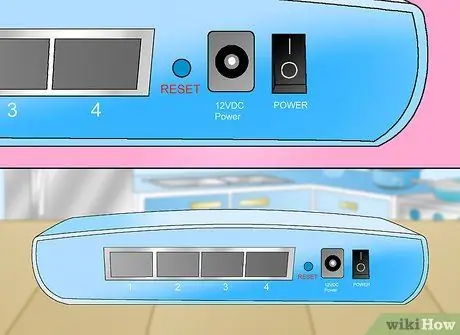
Step 1. Look for the "Reset" button on the router
This button is usually located on the back of the device.
- You usually need a needle, paper clip, or other flat or thin object to press the " Reset " button.
- A router reset will disconnect every device connected to the router.
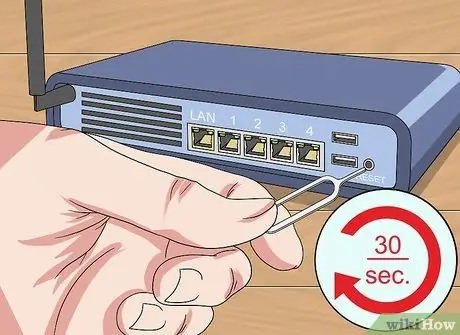
Step 2. Press and hold the "Reset" button
Hold for about 30 seconds to make sure the router is completely reset.
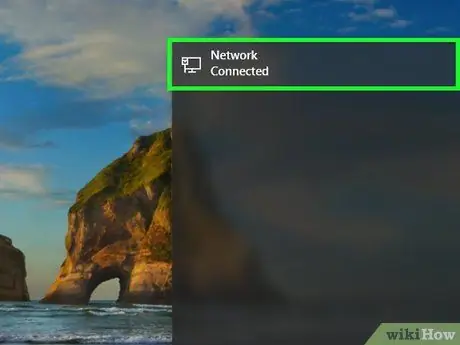
Step 3. Connect the device to the internet network
Use the default password printed on the bottom of the router to complete the connection.
Step 4. Try opening a previously inaccessible website
If you can't connect to the internet or the site isn't accessible, it's time to contact your internet service provider to report any DNS issues you're having.


