- Author Jason Gerald [email protected].
- Public 2024-01-19 22:11.
- Last modified 2025-01-23 12:04.
Command Prompt (CMD) is a feature in Windows that serves as a medium or entry point for typing MS-DOS (Microsoft Disk Operating System) commands and other computer commands. You can use the Command Prompt to remotely shut down or restart another computer. In order to do this, you must have administrator access to the target computer. In addition, the file and printer sharing feature must be enabled on the computer.
Step
Method 1 of 4: Using CMD
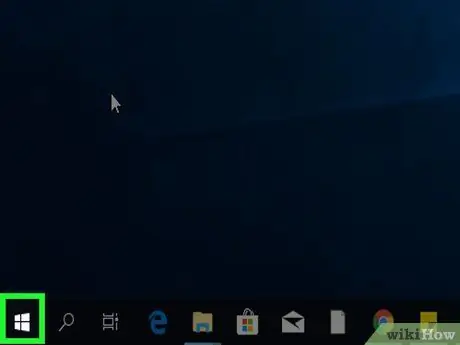
Step 1. Click the “Start” button
This button is indicated by the Windows icon in the lower-left corner of the screen.
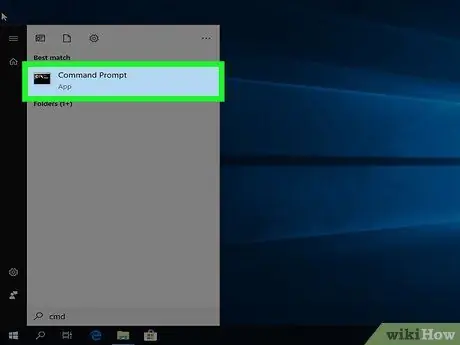
Step 2. Type cmd
The Command Prompt feature will be searched for and displayed at the top of the Windows “Start” menu.
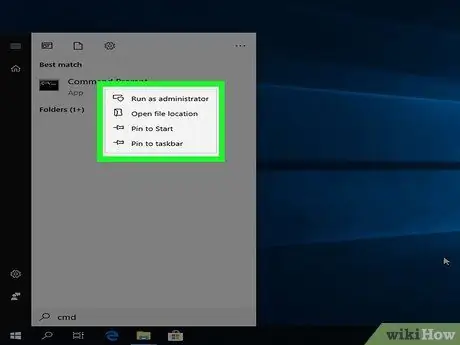
Step 3. Right-click Command Prompt
This option is indicated by a black screen icon with a white command line. Right-click the icon to display the menu to the right of the icon.
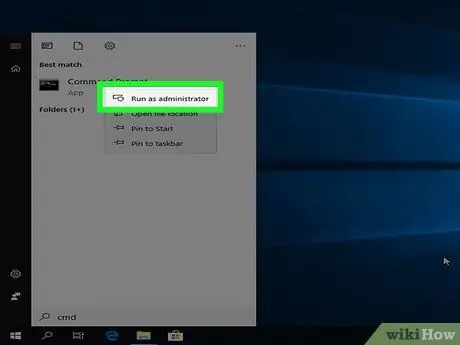
Step 4. Click Run as administrator
Command Prompt will be run with administrator rights.
You must be logged into an administrator account on the computer in order to run Command Prompt as an administrator
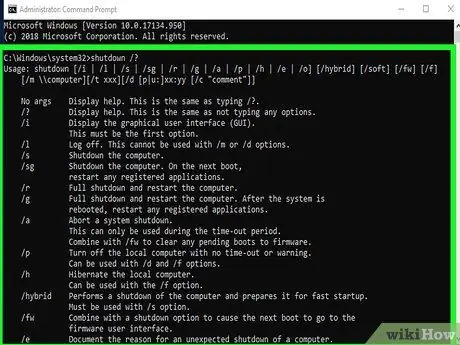
Step 5. Type shutdown into the Command Prompt window
This is the first line of the command to shut down the computer.
To see a complete list of shutdown commands, type shutdown /? in the Command Prompt window
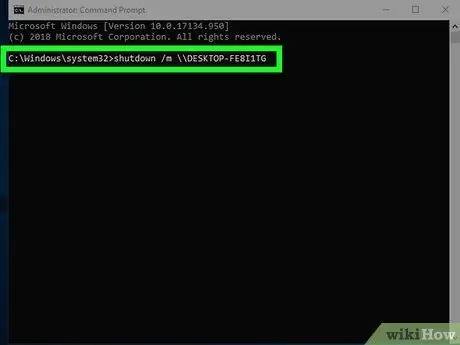
Step 6. Type m \computername
Enter this entry one space after the word "shutdown" on the same line. Replace "computername" with the name of the target computer.
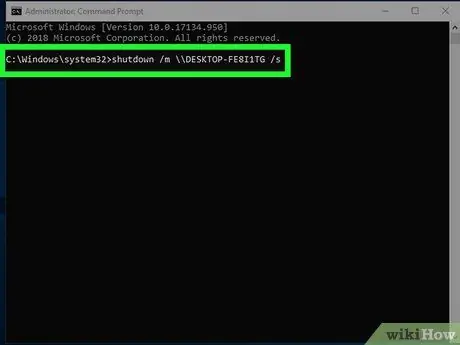
Step 7. Type /s or /r, one space after the computer name
If you want to shut down the target computer, type "/s", one space after the computer name. To restart the computer, type "/r", one space after the computer name.
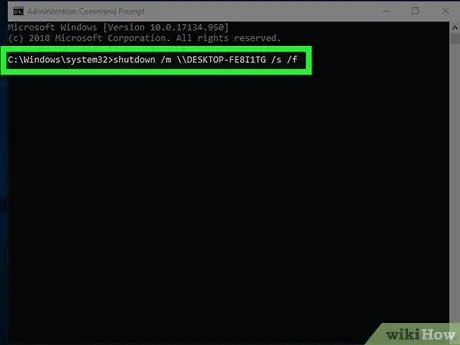
Step 8. Type /f
Insert a space after "/s" or "/r" and enter the entry. This entry serves to force close all programs on the target computer remotely.
-
Notes:
Users can lose unsaved work if the program is forced to close. Move on to the next step to learn how to warn the user and give them a few seconds to save their work before shutting down or restarting the computer.
- Up to this point, the overall command entered should look like this: shutdown \workspace1 /r /f. Press Enter to restart the computer. Proceed to the next step to add a timer and a comment or message.
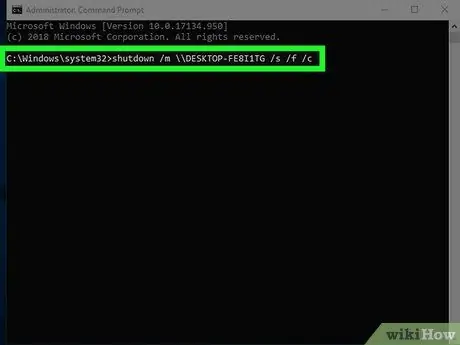
Step 9. Type /c
Insert a space after "/f" and enter the entry on the same line. With this entry, you can send messages to the target computer.
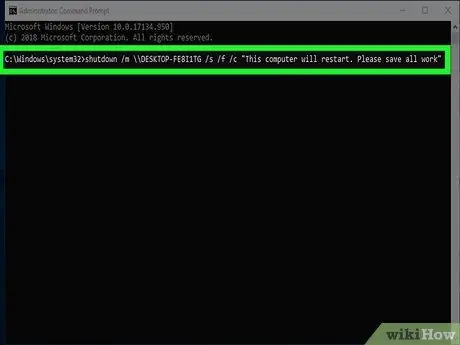
Step 10. Enter the message and enclose it with quotes
Insert a space after "/c" and type your message. This message serves to warn the target computer user that the computer will be shut down. For example, you could type, “This computer will restart. Please save all your work.” Make sure the message is enclosed in quotes (" ").
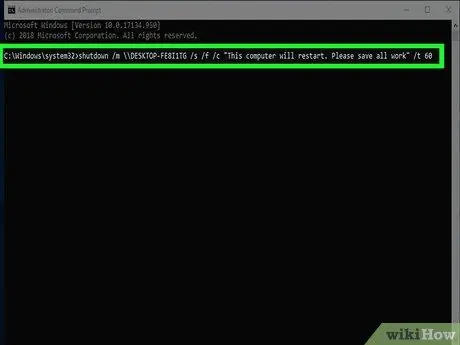
Step 11. Type /t, followed by the countdown duration (in seconds)
This entry is entered one space after the entry in the previous step. With this entry, you can give the user a few seconds to save their work before the computer shuts down. For example, you could type /t 60 to give the user 60 seconds to save their work before the computer shuts down or restarts.
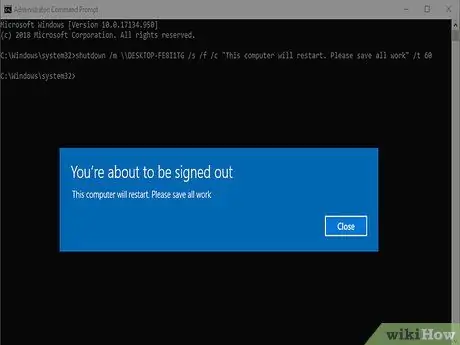
Step 12. Press Enter key
The command will be executed. At this point, your overall command should look like this: shutdown m\workspace1 /r /f /c " This computer will restart. Please save all your work." /t 60.
- If you receive the message " Access Denied ”, make sure you are logged into an administrator account and have administrator access to the target computer. Read the third method to find out how to enable file and printer sharing on both computers and set it up to bypass Windows firewalls.
- If you can't connect to the target computer's registry, read the fourth method to find out how to edit the registry on that computer.
Method 2 of 4: Using the Remote Shutdown Dialog Window
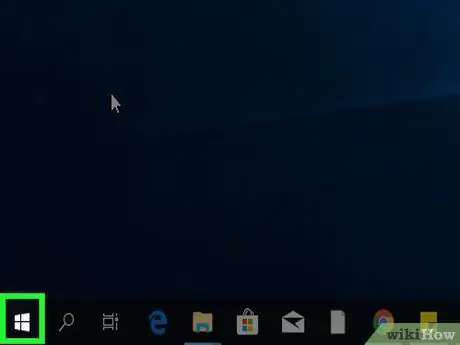
Step 1. Click the “Start” button
This button is indicated by the Windows icon in the lower-left corner of the screen.
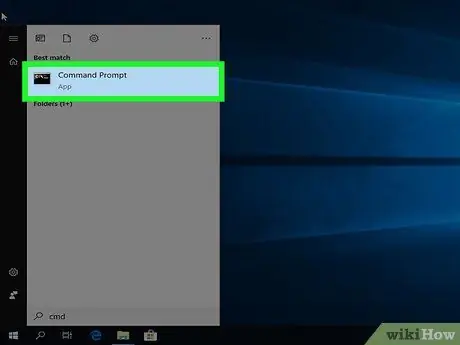
Step 2. Type cmd
The Command Prompt feature/program will be searched for on the computer and displayed at the top of the Windows “Start” menu.
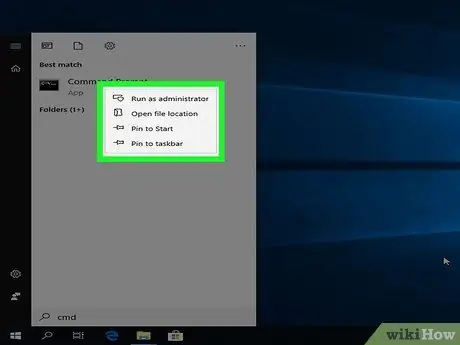
Step 3. Right-click Command Prompt
This option is indicated by a black screen icon with a white command line. Right-click the icon to display the menu to the right of the icon.
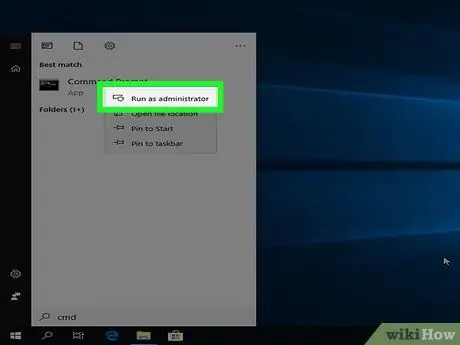
Step 4. Click Run as administrator
Command Prompt will be run with administrator rights.
You must be logged into an administrator account on the computer in order to run Command Prompt as an administrator
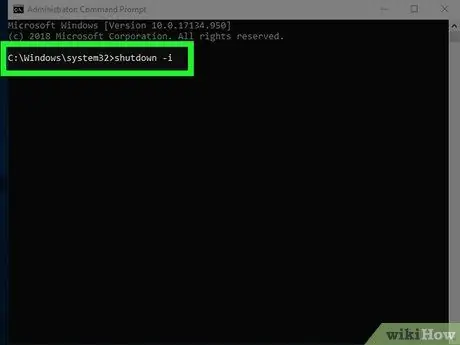
Step 5. Type shutdown -i and press Enter key
The “Remote Shutdown Dialog” window will be displayed.
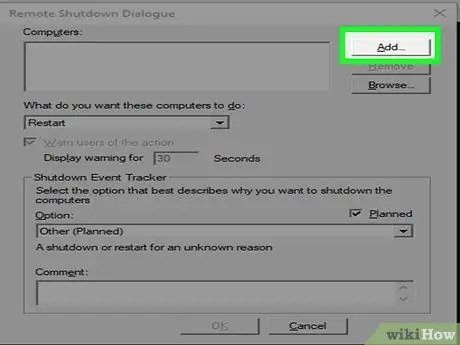
Step 6. Click Add
It's to the right of the "Computers" box.
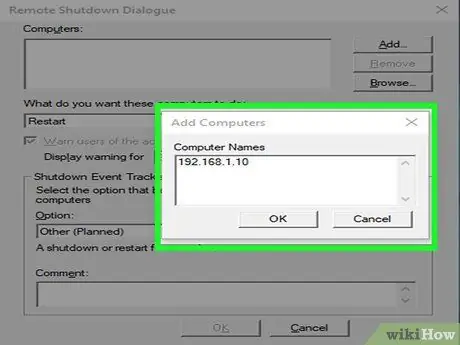
Step 7. Type in the IP address of the target computer and click Ok
The target computer is the one you need to shut down or restart. Enter the IP address of the computer in the "Add Computers" window, then click " Ok ”.
If you don't know the private IP address of the target computer, you can find out the address through the target computer directly
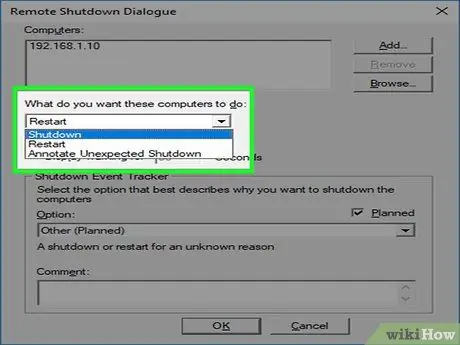
Step 8. Decide whether you want to shut down or restart the computer
Use the drop-down menu under " What do you want these computers to do " to select " Shutdown " (if you want to shut down the computer) or " Restart " (if the computer needs to be restarted).
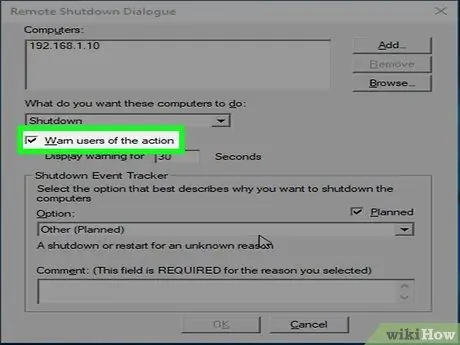
Step 9. Click the checkbox
next to "Warn users of action" (optional).
With this option, you can set a timer until the computer shuts down.
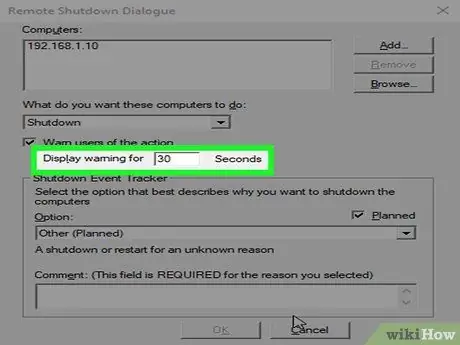
Step 10. Type in the duration of the timer (in seconds) until the computer shuts down (optional)
Enter a number in the column with the sentence " Display warning for seconds ". The timer will be activated until the target computer is turned off.
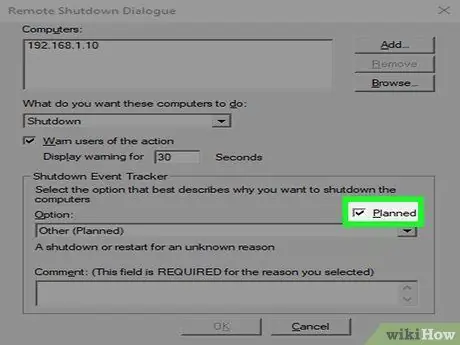
Step 11. Click the checkbox
next to "Planned" (optional).
With this option, you can log or record any time the computer is shut down or restarted remotely.
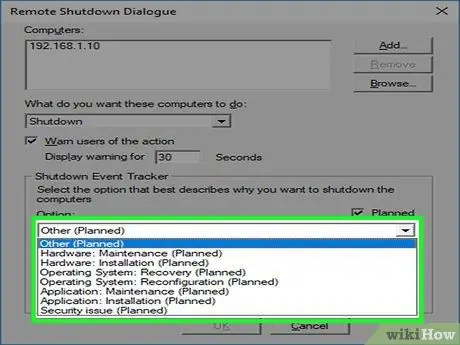
Step 12. Select the reason for shutting down the computer (optional)
Use the drop-down menu under " Options " to determine the best reason for shutting down/restarting the computer. For example, you can select " Hardware: Maintenance (Planned) ".
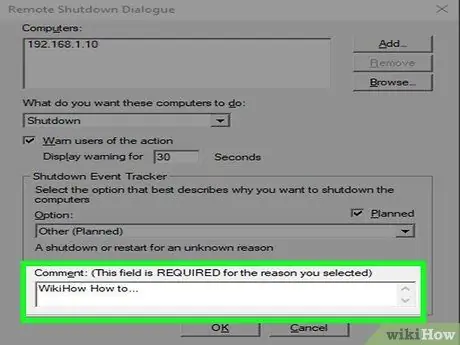
Step 13. Type in a comment (optional)
The comments will be displayed on the target computer. For example, you could type a message such as “The computer will shut down in 60 seconds. Please save all your work."
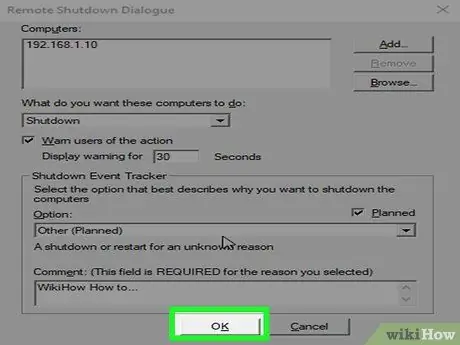
Step 14. Click Ok
The command to shut down or restart the computer will be executed.
- If you receive the message " Access Denied ”, make sure you are logged in to an administrator account and have administrator access to the target computer. Read the third method to find out how to enable file and printer sharing on both computers and set it up to bypass Windows firewalls.
- If you can't connect to the target computer's registry, read the fourth method to find out how to edit the registry on that computer.
Method 3 of 4: Setting the Printer and File Sharing Feature to Pass Windows Firewall
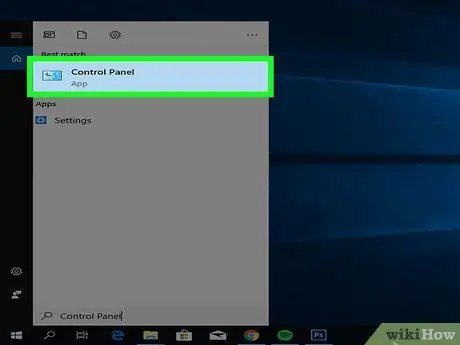
Step 1. Open Control Panel
Follow these steps to open the Control Panel.
- Click the Windows “Start” menu.
- Type in Control Panel.
- Click " Control Panel ”.
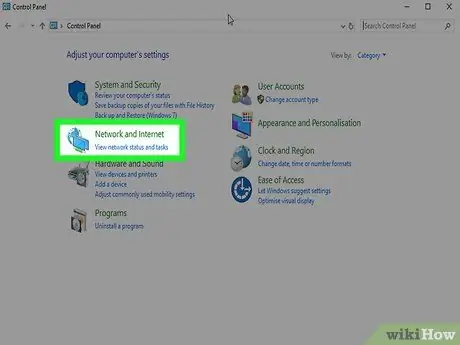
Step 2. Click Network and Internet
This green text is next to the icon of two computer screens in front of a globe.
Skip the next step if you don't see this option,
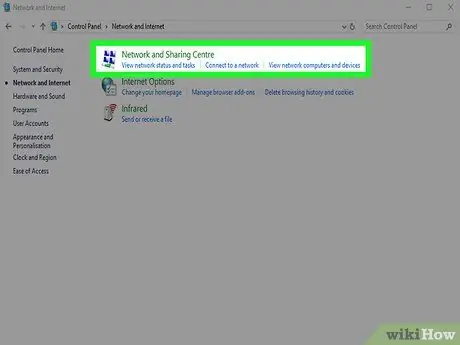
Step 3. Click Network and Sharing Center
It's next to the icon for four connected computers.
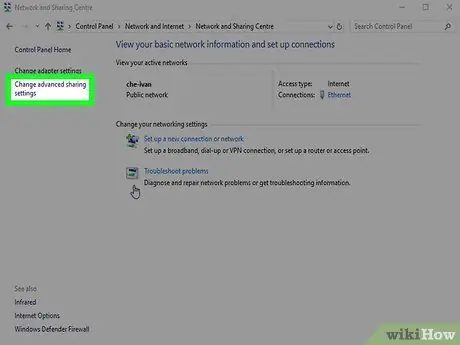
Step 4. Click Change advanced sharing settings
It's in the bottom-left sidebar of the window.
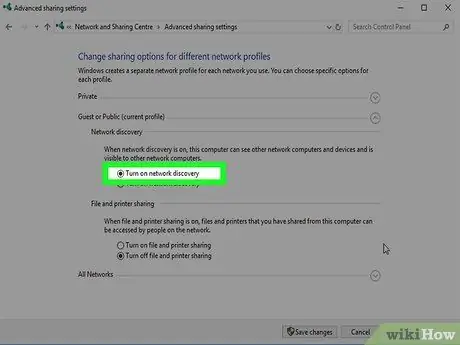
Step 5. Click the circle button next to Turn on network discovery
The network detection feature will be activated.
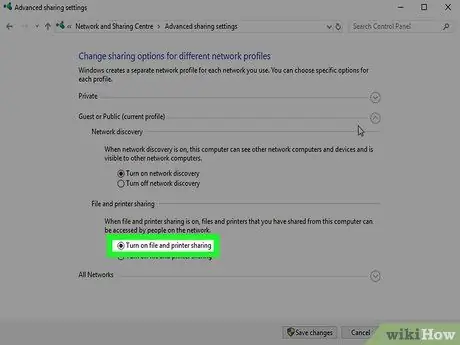
Step 6. Click the radio button next to the Turn on file and printer sharing option
The file and printer sharing feature will be activated after that.
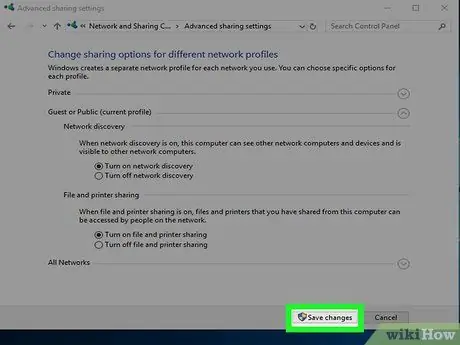
Step 7. Click Save Changes
It's in the lower-right corner of the window.
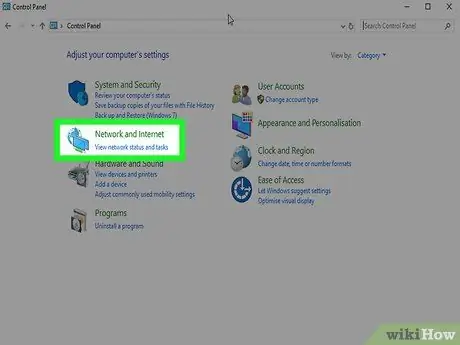
Step 8. Click Network and Internet
It's in the address bar at the top of the Control Panel window. You will be taken back to the “Network and Internet” menu in the Control Panel.
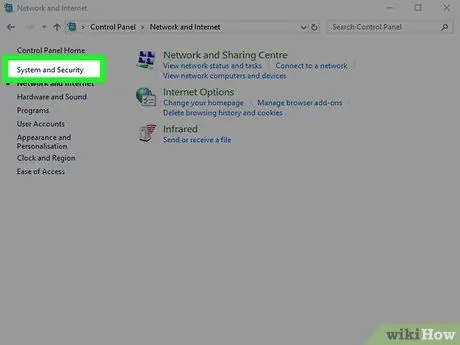
Step 9. Click System and Security
This option is in the left sidebar menu of the Control Panel window.
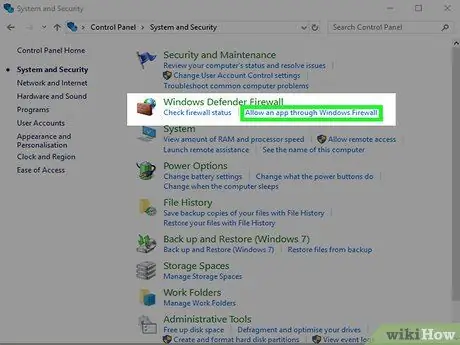
Step 10. Click Allow an app through Windows Firewall
This option is the second option under "Windows Defender Firewall".
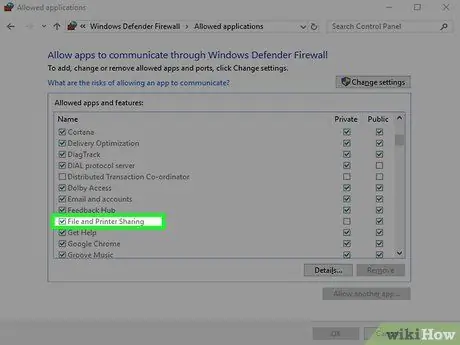
Step 11. Click the checkbox
next to "File and Printer Sharing".
This option is in the list of allowed apps and features.
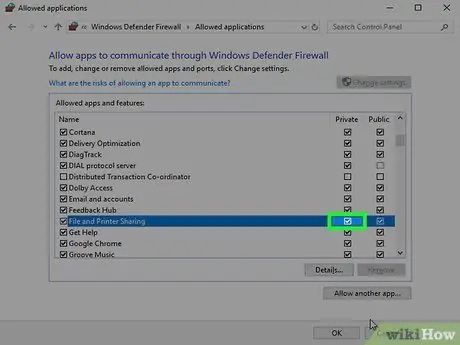
Step 12. Click the checkbox
under "Private".
This box is to the right of the "File and Printer Sharing" option in the list of allowed apps and features.
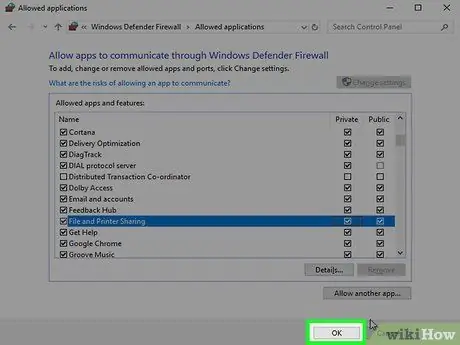
Step 13. Click Ok
It's at the bottom of the Control Panel window. Changes made will be saved and applied to the computer.
Method 4 of 4: Editing the Registry
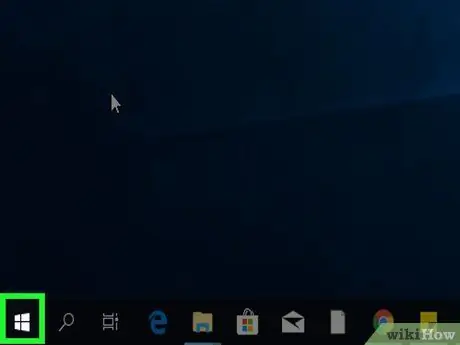
Step 1. Click the “Start” button
This button is indicated by the Windows icon in the lower-left corner of the screen. In newer versions of Windows, administrator rights are usually removed when you try to access another computer remotely. You can get around this limitation by editing the registry.
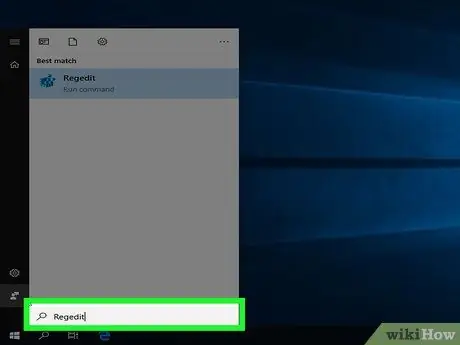
Step 2. Type regedit
The Registry Editor (regedit) application icon will be displayed.
-
Warning:
Editing or deleting content in Registry Editor can cause permanent damage to the operating system. Consider these risks when following this step.
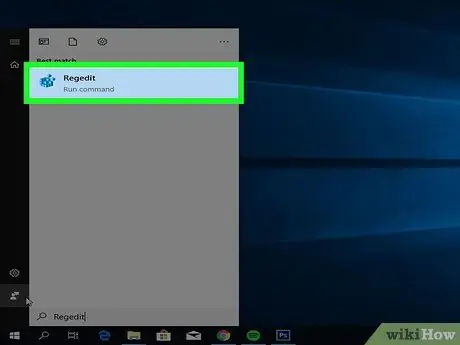
Step 3. Click Regedit
The Registry Editor application will open.
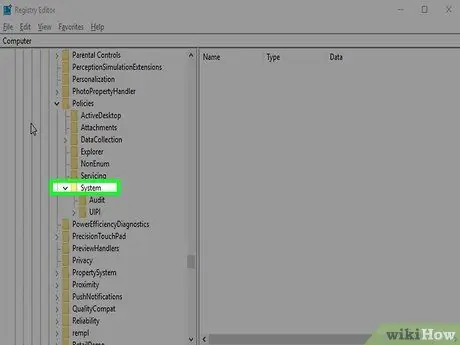
Step 4. Open the "System" folder in the "Policies" section
You can use the folder list on the left sidebar of the window to browse the folders/contents in the Registry Editor. Follow these steps to access the " System " folder in the " Policies " segment:
- Double click the folder " HKEY_LOCAL_MACHINE ”.
- Double click the folder " SOFTWARE ”.
- Double click the folder " Microsoft ”.
- Double click the folder " Windows ”.
- Double click the folder " CurrentVersion ”.
- Double click the folder " Policies ”.
- Double click the folder " System ”.
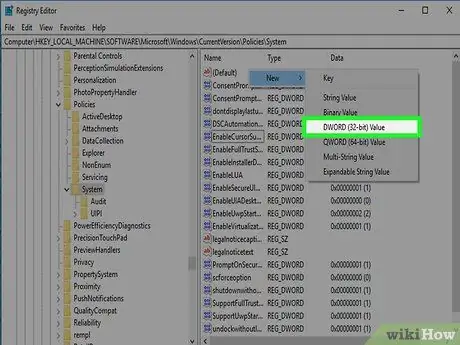
Step 5. Create a new “DWORD” entry/value
Follow these steps to create a new “DWORD” value/entry in the “System” folder.
- Right-click an empty space to the right of the folder in the window's sidebar.
- Hover over the button " New ”.
- Click DWORD (32-bit) Value.
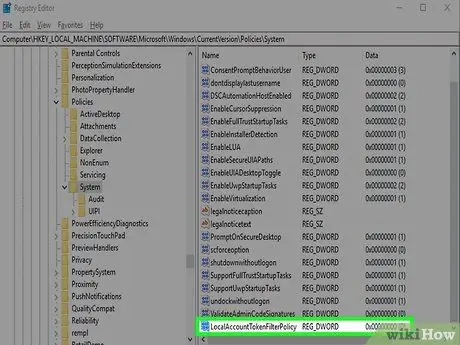
Step 6. Name the new “DWORD” entry/value as “LocalAccountTokenFilterPolicy”
When creating a new “DWORD” entry, the name of the entry will be highlighted in blue. Type "LocalAccountTokenFilterPolicy" directly to rename the entry.
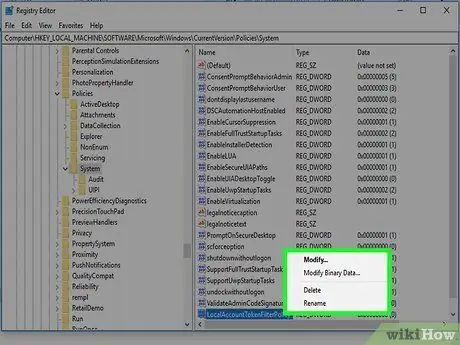
Step 7. Right click LocalAccountTokenFilterPolicy
A menu will appear to the right of the entry.
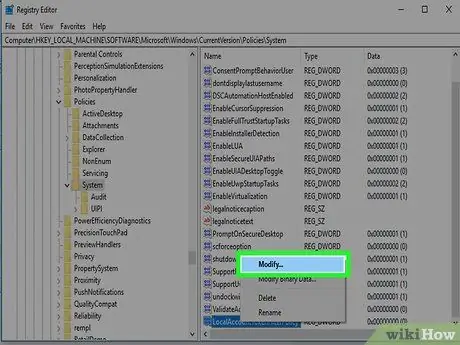
Step 8. Click Modify
The “DWORD” entry editing window will be displayed.
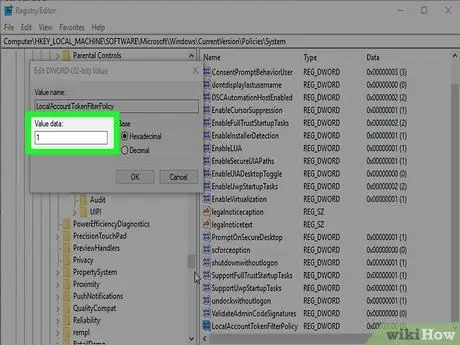
Step 9. Change the data value to "1"
Use the box under " value data " to change the value from "0" to "1".
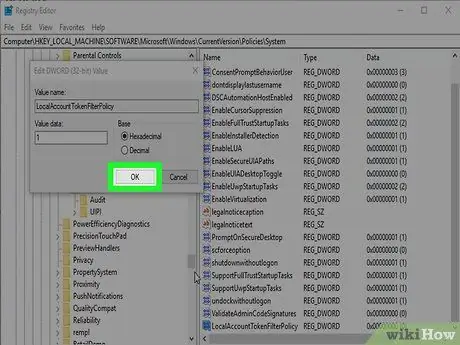
Step 10. Click Ok
Changes to the “DWORD” entry will be saved. Now, you can close the Registry Editor window.
Tips
- Before performing the steps in this article, you need to know the IP address of the target computer first.
- Type shutdown /? in the Command Prompt window to see a complete list of commands to shut down the computer.


