- Author Jason Gerald [email protected].
- Public 2023-12-16 10:50.
- Last modified 2025-01-23 12:04.
In Adobe Photoshop, you can rotate or flip an image by clicking the “Image” menu and selecting an option from the “Image Rotation” submenu. You can also rotate individual layers (and not the image as a whole) using Photoshop's transform tool (transform tool). Once you know what equipment to use, you can easily rotate or flip the image. This article will show you how.
Step
Method 1 of 2: Rotate or Flip the Entire Image
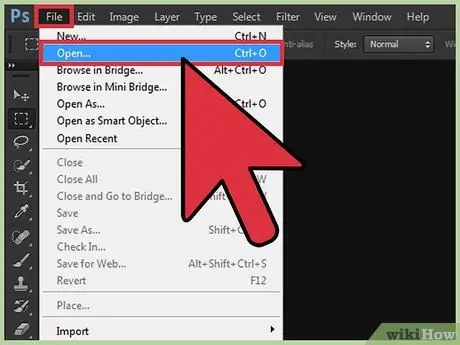
Step 1. Open the image in Photoshop
If you want to rotate or flip the image completely, click the “File” menu and select “Open”. Select the image you want to rotate and click the “Open” button again.
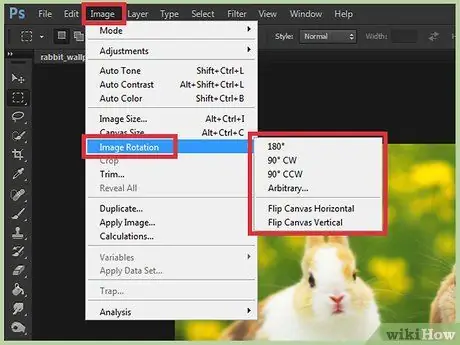
Step 2. Select the rotation option
Go to menu “Image” >> “Image Rotation” to see some rotation options.
- “180 degrees”: This option rotates the image by half a circle (180 degrees).
- “90 degrees CW”: This option rotates the image to the right (clockwise) by a quarter of a circle.
- “90 degrees CCW”: This option rotates the image to the left (counterclockwise) by a quarter of a circle.
- “Arbitrary”: This option allows you to set the desired rotation angle. You can type the angle (in degrees) and the direction of rotation (clockwise or counterclockwise).
- “Flip Canvas Horizontal”: This option will flip the entire image, as if it were displayed in front of a mirror (horizontally).
- “Flip Canvas Vertical”: This option will flip the entire image vertically.
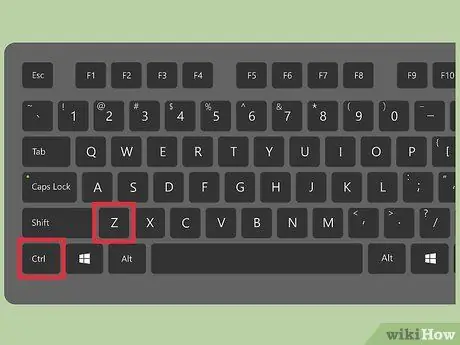
Step 3. Undo changes
If you don't like the selected flip or rotation option, press the Ctrl+Z (Windows) or Command+Z (Mac) key combination to undo the action.
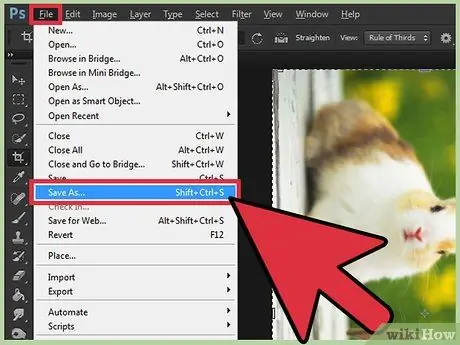
Step 4. Save the image
Go to the “File” menu and click “Save As”. After that, select the location to save the rotated image file.
Method 2 of 2: Rotate or Flip Layers
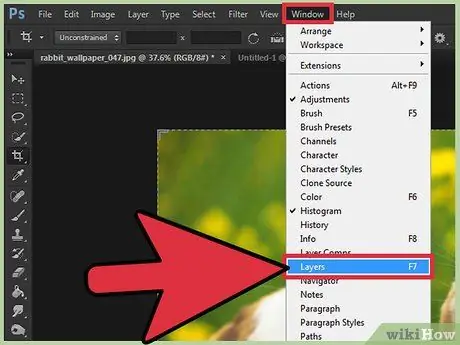
Step 1. Display the “Layers” panel
If you are working on a project that has layers, you should display the “Layers” panel on the screen. Open the "Window" menu, then select "Layer".
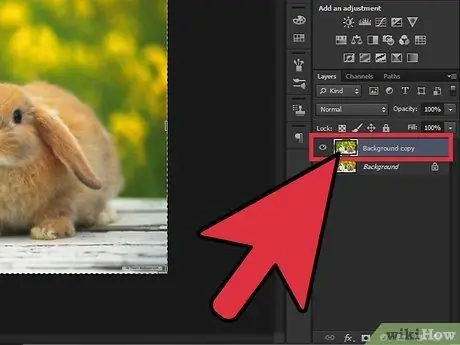
Step 2. Select the layer you want to rotate or flip
The “Layers” panel displays a list of all the layers present in the image, as well as a thumbnail icon showing each element loaded on the. To select a specific layer that you want to flip or rotate, simply click on the layer once.
- You can select multiple layers by holding down Ctrl (Win) or Command (Mac) while clicking each layer you want to select.
- To hide other layers when you modify the selected layer, click the eye icon (visibility icon) next to the layer snapshot. You can replay it later.
- If the layer you want to rotate/invert has a lock icon to the right of its name, it is locked and cannot be modified. Click the lock icon to unlock the layer before trying to make any modifications.
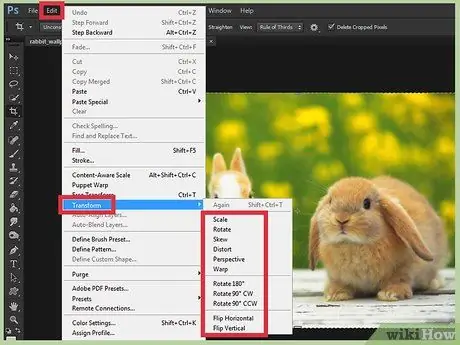
Step 3. Select the rotation and invert options
Go to the “Edit” menu and select “Transform” to see all the options.
- “Rotate”: This option allows you to enter the angle (in degrees) of rotation of the layer.
- “180 degrees”: This option rotates the image by half a circle (180 degrees).
- “90 degrees CW”: This option rotates the image to the right (clockwise) by a quarter of a circle.
- “90 degrees CCW”: This option rotates the image to the left (counterclockwise) by a quarter turn of the circle.
- “Flip Horizontal”: This option will flip the entire image, as if it were displayed in front of a mirror (horizontally).
- “Flip Vertical”: This option will flip the entire image vertically.
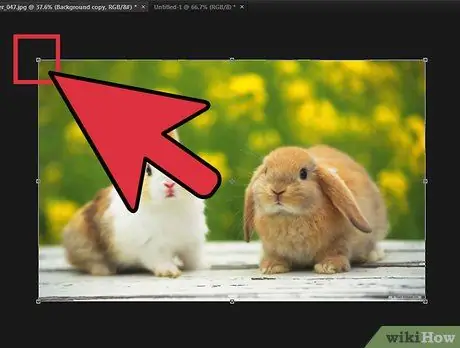
Step 4. Try the free transform tool
Having greater visual control over the rotation process will help you, especially if you have trouble imagining the angle and/or direction of rotation.
- Press Ctrl+T (Win) or Command+T (Mac) to draw a bounding box around the layer you want to rotate.
- Hover over the top right corner of the bounding box until a rotating arrow icon (curved arrow with a head at each end) appears.
- When the cursor changes to a rotation arrow, click and drag the mouse up or down to rotate the image. Do not drag the cursor before the rotation arrow is displayed. Otherwise, you can instead resize or bend the layer.
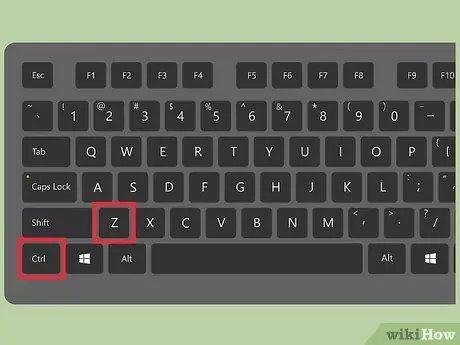
Step 5. Undo the changes you don't want to keep
Press Ctrl+Z (Win) or Command+Z (Mac) to undo the error.
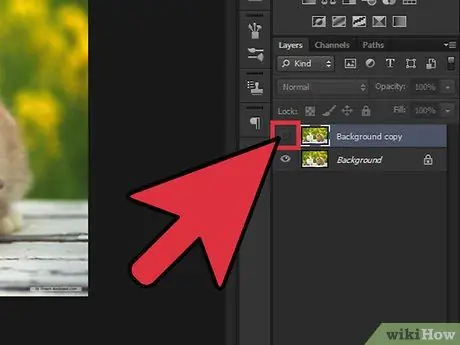
Step 6. Show hidden layers
If you hide another layer while doing the transformation, click the empty box to the left of the hidden layer's preview icon until the eye icon appears.
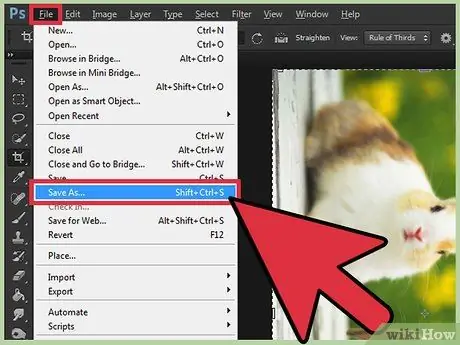
Step 7. Save changes
To save changes to the image, click the “File” menu, select “Save As”, and specify a location to save the file.
Tips
- If you want to experiment with transforming text or shapes in images or layers, read the article on how to rotate objects in Photoshop.
- To hide the layer when you modify the selected layer, click the eye icon (visibility icon) which is next to the layer preview icon. You can still show it back later.


