- Author Jason Gerald gerald@how-what-advice.com.
- Public 2024-01-19 22:11.
- Last modified 2025-01-23 12:04.
iTunes lets you convert songs to a variety of formats, such as AAC, MP3, WAV, AIFF, and Apple Lossless. Each audio format has its own advantages. Whichever format you choose, you can convert it easily via iTunes. iTunes also won't delete the original version of the song, just in case you change your mind. Read about how to convert songs, and the advantages of each, in the following article.
Step
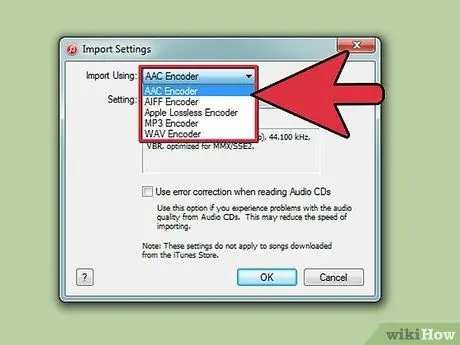
Step 1. Determine the song format you want
The song formats iTunes supports vary, as do the reasons for converting songs to those formats. When choosing a song format, keep the file size and sound quality in mind -- do you want to hear songs in prime quality, want to store as many songs as possible on your computer or iPhone, or both?
-
AAC:
As a modern version of MP3, this format offers a song size below MP3, but with better audio quality. This format is the most common song format for the iPhone or iPod, and is commonly used by Mac users. Not all music players support AAC, but it is a versatile format for Mac users.
-
AIFF:
This format has a large file size and excellent sound quality, just like WAV. However, songs in this format do not provide information such as song title, artist, etc. While you can still view the information in iTunes, if you open the AIFF file in another music player, you'll only see Track 1 etc. This format is more widely used by Mac users, than WAV.
-
Apple Lossless:
A high-quality song format that's slightly smaller than AIFF or WAV, but can only be played on Apple programs or devices.
-
MP3:
The song format is small in size with low quality, but can be played by any music player, including MP3 CD music players, or other music player programs (Windows Media Player, Zune, etc.).
-
WAV:
Large format songs with excellent quality, such as AIFF. WAV is used on Windows systems, but can also be played by Mac. Like AIFF, information about song titles, artists, and so on isn't included in the file, but iTunes records it for you.
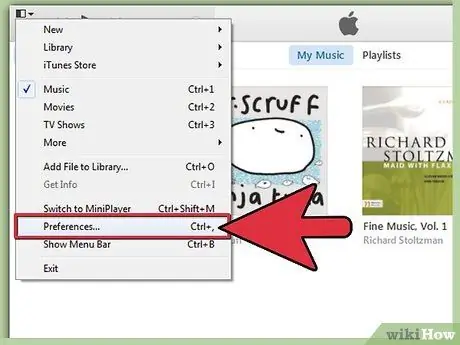
Step 2. Go to song settings in the Preferences menu
In iTunes for Windows, click Edit > Preferences, and in iTunes for Mac, click iTunes > Preferences. Once the Preferences window opens, click the General tab at the top of the window.
In the new version of iTunes, the Preferences menu is in the little black-and-white box in the upper-left corner of the iTunes screen
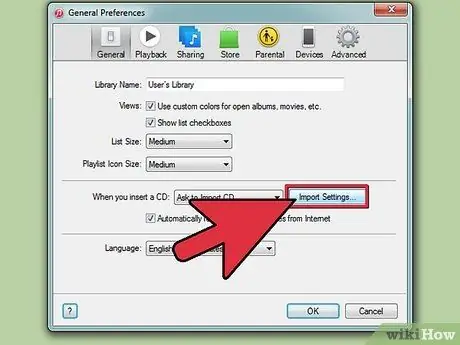
Step 3. Click Import Settings … to select the song format. In this option, you can select the song format iTunes will use when iTunes converts new songs in your library. This option also lets you convert songs already in your iTunes library. Select the format of your choice in the Import Using options. You can also adjust the file size or sound quality settings.
- Adjust the sound quality using the Settings menu. The higher the kbps, bit rate and kHz you choose, the better the song quality will be. However, the size of the song file will certainly swell.
- iTunes has several built-in settings, from iTunes Plus (high quality files with medium size) to Good Quality MP3 (small files with low quality). If in doubt, just choose Automatic or iTunes Plus.
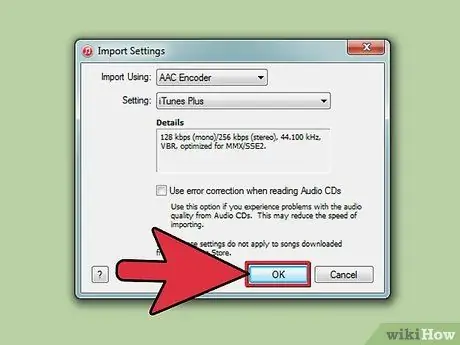
Step 4. Close the Preferences menu by clicking OK
Do not click Cancel, as your settings will not be saved. Now, the new songs you import into iTunes will be converted to the format of your choice, but you'll need to take an additional step to convert your old collection of songs.
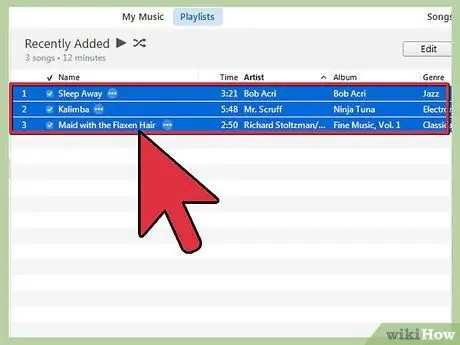
Step 5. Select the song you want to convert the format to
You can select as many songs as you want and convert them at once. Select the first song you want to convert by clicking on it, then scroll to the last song you want to convert. Press "Shift," then click the last song to select the entire song between the first and last song.
To select only specific songs, click each song, then hold down the Ctrl (Windows) or Cmd (Mac) key
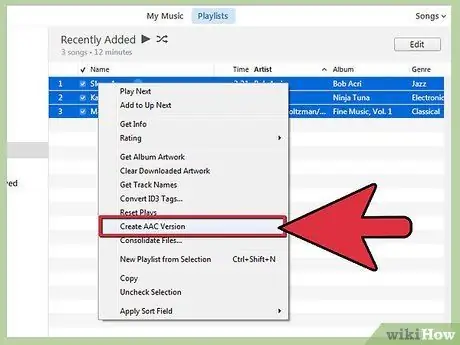
Step 6. Convert your old songs
Right-click on the song, then select the Create _ Version option (the empty box will fill in the format you chose in Import Settings -- for example, if you selected AAC, the option would be Create AAC Version). The conversion process will take a few minutes.
- Two versions of the song will be created by iTunes when you do the version conversion. Find out the version of the song by right-clicking the song and selecting Get Info.
- Whenever you change a setting in Import Settings, you can create a new version in iTunes.
Tips
- Keep in mind that once you convert a song, you'll have two versions of the song: the result of your conversion, and the original song.
- Use the latest iTunes version for best results. Download the latest version of iTunes, or check your iTunes version, at iTunes.com.
- If you convert a high quality song to low quality, your song will degrade in quality, but if you convert a low quality song to a high quality song, the quality of the song will not change.


