- Author Jason Gerald gerald@how-what-advice.com.
- Public 2023-12-16 10:50.
- Last modified 2025-01-23 12:04.
You can increase the exposure of a video by recording it from your phone and uploading it directly to YouTube. However, you will need the YouTube app before starting the upload process. The process itself is quite simple and can be done in a number of ways. Who knows your video could go viral!
Step
Before Starting
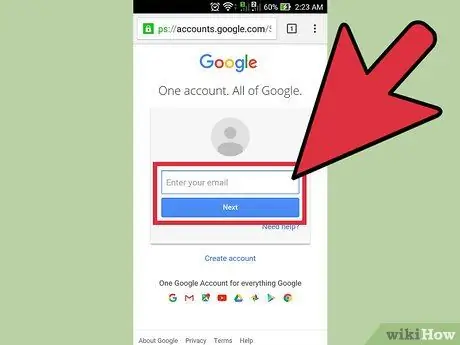
Step 1. Create a YouTube account
Since YouTube is owned by Google, you may already have a YouTube account without realizing it. If you have a Google account that you use for Gmail or other Google services, you already have a YouTube account.
Visit this link: https://www.youtube.com/account and create a new account if you don't already have one. Before creating an account, make sure you can't really sign in to your Google account
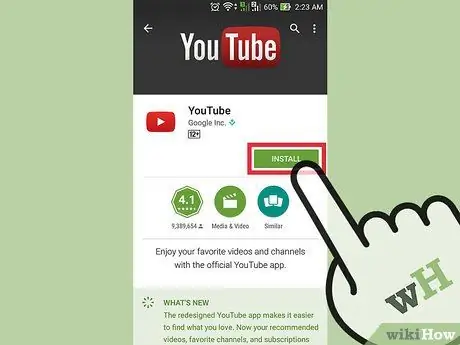
Step 2. Download and install the YouTube app
The best way to upload videos from your phone is to use the official YouTube app. In addition, this application can be used to watch videos from favorite channels via mobile devices.
-
For iPhone users:
Visit this link: https://itunes.apple.com/us/app/youtube/id544007664?mt=8 and download the YouTube app.
-
For Android device users:
Visit this link: https://play.google.com/store/apps/details?id=com.google.android.youtube&hl=en and download the YouTube app.
- Alternatively, go to the phone's app store feature and do a search for "YouTube by Google."
Method 1 of 3: Uploading Videos Directly from YouTube App
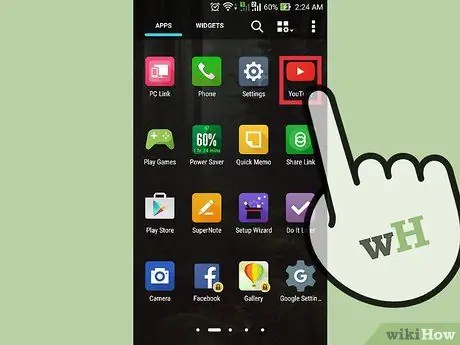
Step 1. Open the app and log in to the account
After opening the app for the first time, you will be asked to sign in to your Google account. You will also get a short tutorial on the basics of the application.
Again, the account used for Gmail or other Google services also functions as a YouTube account
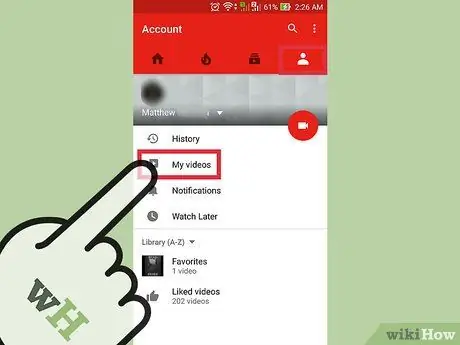
Step 2. Go to the account page
Tap the three horizontal lines icon in the top-left corner of the screen. In the drop-down menu, you can see the "Uploads" option. Touch the option to access the account page.
At the top of the screen, you can see the heading “[Account Name]'s Channel”
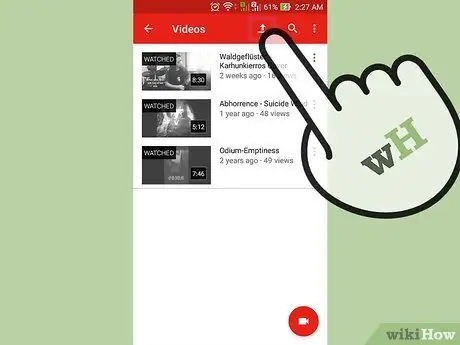
Step 3. Go to the upload page
Touch the arrow icon pointing up. This icon is the upload button that YouTube usually uses.
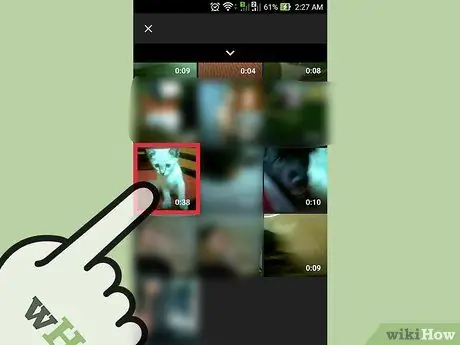
Step 4. Select videos
Find and select a video from the upload page. The available options differ for Android and iPhone devices.
-
For iPhone users:
Select a video from the “Camera Roll” folder. This option is the only option available.
-
For Android device users:
Select the video folder/source. Click the “Guide” button (three horizontal lines) in the upper left corner of the screen, then select “ recent ”, “ Videos ", or " Downloads ”.
- Folders " recent ” displays the latest videos on the phone. If you have recently recorded a video, you can easily find the new video in this folder.
-
“ Videos:
This folder displays all videos from various applications that play or record videos. These apps include GroupMe, Snapchat, and other apps.
-
“ Downloads:
This folder displays the videos you have uploaded from the internet. However, keep in mind that you must hold ownership of the video if you want to upload it to YouTube. Otherwise, the video you uploaded to YouTube will be deleted.
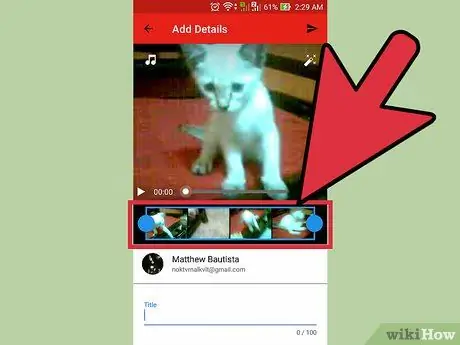
Step 5. Edit the video
The YouTube app includes a quick trimming feature. Drag the blue circles on one of the sides of the blue rectangle to cut the length of the video.
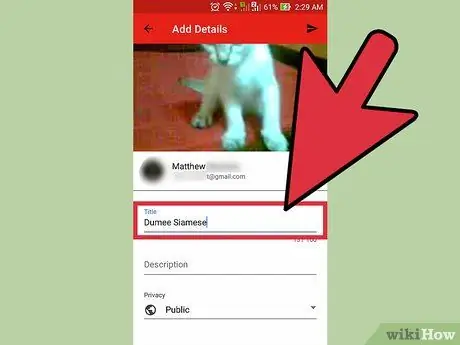
Step 6. Name the video
Try choosing a title that is relevant to the video content. This way, people can find your videos easily. Don't choose irrelevant titles to get more viewers. Apart from irritating viewers, choosing a title like this prevents the video from getting a lot of likes from YouTube users.
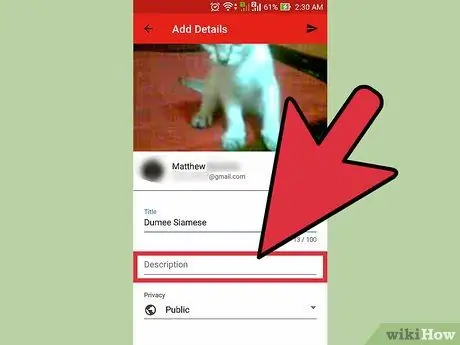
Step 7. Enter the video description
You don't need to include a lengthy description, but it's a good idea to at least let your audience know the content in the video. For example, if your video includes a fireworks display on Independence Day or New Year's Eve, state where the video was shot (or where the fireworks display took place). Try anticipating questions viewers might have and include answers to those questions in the video description segment.
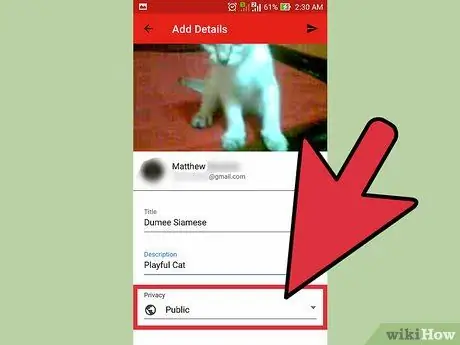
Step 8. Set video privacy
You can see three different privacy options under the "Privacy" section. You can change the privacy options later, even after the video is uploaded.
-
“ Private:
Only you can see the video. This option is useful if you only need to save the video. Apart from that, this option is also useful for testing how a video looks on YouTube before you publish it.
-
“ Unlisted:
“Only people who have the special link can watch the video. This option is useful if you only want to share the video with certain people, such as friends or family. However, keep in mind that they can also share the video link with other people.
-
“ Public:
Anyone can watch your videos by searching for them by title, or viewing them in the list of suggested videos.
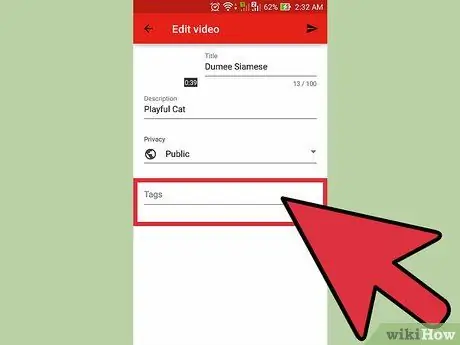
Step 9. Add a bookmark or hashtag
Bookmarks help YouTube determine the right time to show your video when someone searches for certain keywords. For example, if you put the "League of Legends" tag or hashtag on a video, there's a good chance that the video will be displayed when someone searches for League of Legends videos. Also, by adding bookmarks, your video has a greater chance of being suggested to people who are interested in the bookmarks you use.
Try using bookmarks that are relevant to the content. You can get spam notifications if you use the bookmarks carelessly
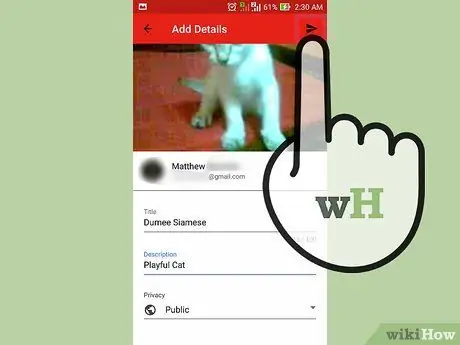
Step 10. Upload the video
If you are using an Android device, press the arrow icon pointing to the right. If you're using an iPhone, press the blue button pointing up.
Method 2 of 3: Using the Camera App (Android)
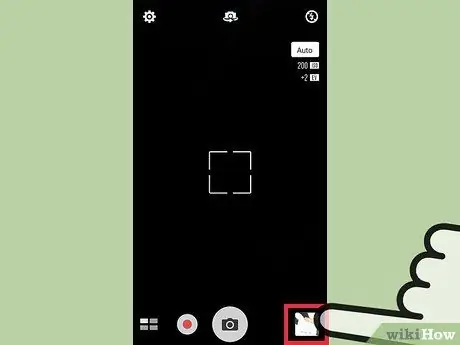
Step 1. Select a video from gallery
If you haven't recorded a video or don't know how to access the video, read the steps below.
- Touch the camera icon at the bottom of the home screen.
- Touch the video camera icon, then record a video.
- Click the square icon in the lower-right (or upper-left) corner of the screen to preview the video you just recorded.
- Swipe the screen to find the desired video.
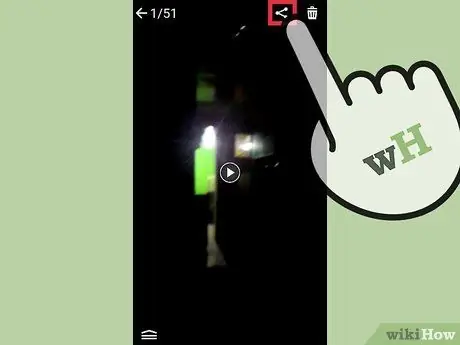
Step 2. Touch “Share”
Once you find the right video, tap the screen once to show more options. Tap the icon labeled "Share" after that.
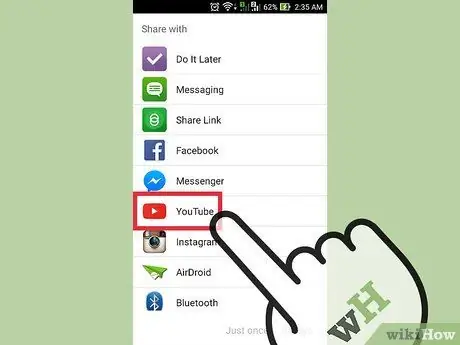
Step 3. Touch the “YouTube” option
You may need to click “More” to find the “YouTube” option, depending on your device and settings. Browse the list for the “YouTube” option.
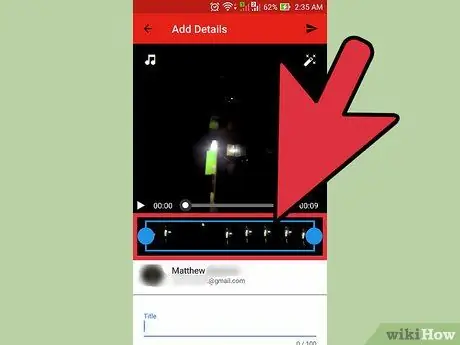
Step 4. Edit the video
The YouTube app includes a quick trimming feature. Drag the blue circles on one side of the blue rectangle to cut the length of the video.
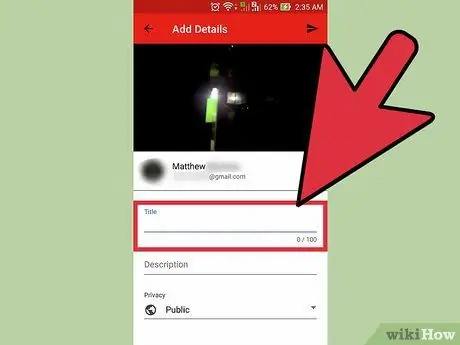
Step 5. Name the video
Try choosing a title that is relevant to the video content. This way, people can find your videos easily. Don't choose irrelevant titles to get more viewers. In addition to upsetting viewers, choosing a title like this prevents the video from getting many likes from YouTube users.
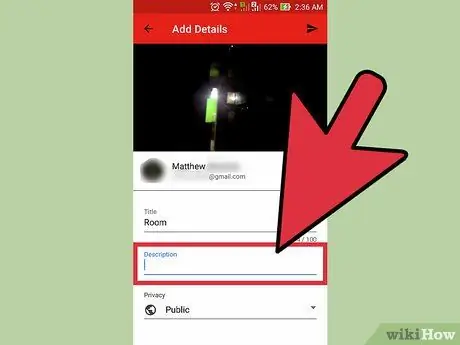
Step 6. Enter the video description
You don't need to include lengthy captions, but at least it's a good idea to let viewers know the content in the video. For example, if your video includes a fireworks display on Independence Day or New Year's Eve, state where the video was shot (or where the fireworks display took place). Try anticipating questions viewers might have and include answers to those questions in the video description segment.
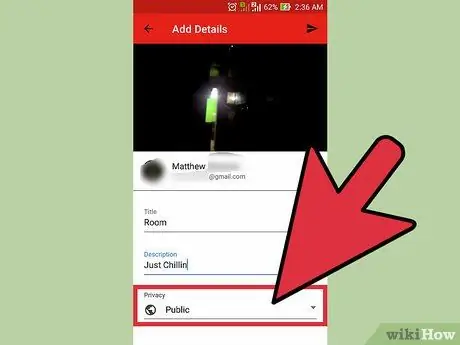
Step 7. Set video privacy
You can see three different privacy options under the "Privacy" section. You can change the privacy options later, even after the video is uploaded.
-
“ Private:
Only you can see the video. This option is useful if you only need to save the video. Apart from that, this option is also useful for testing how a video looks on YouTube before you publish it.
-
“ Unlisted:
“Only people who have the special link can watch the video. This option is useful if you only want to share the video with certain people, such as friends or family. However, keep in mind that they can also share the video link with other people.
-
“ Public:
Anyone can watch your videos by searching for them by title, or viewing them in the list of suggested videos.
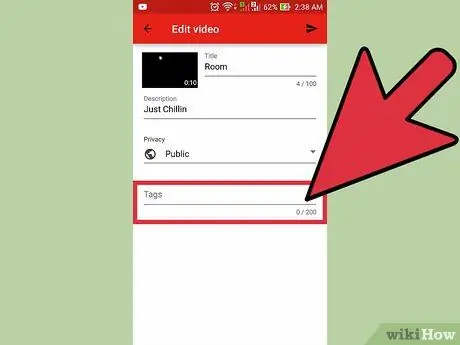
Step 8. Add a bookmark or hashtag
Bookmarks help YouTube determine the right time to show your video when someone searches for certain keywords. For example, if you put a "League of Legends" tag or hashtag on a video, there's a good chance that the video will be displayed when someone searches for League of Legends videos. Also, by adding bookmarks, your video has a greater chance of being suggested to people who are interested in the bookmarks you use
Try using bookmarks that are relevant to the content. You can get spam notifications if you use the bookmarks carelessly
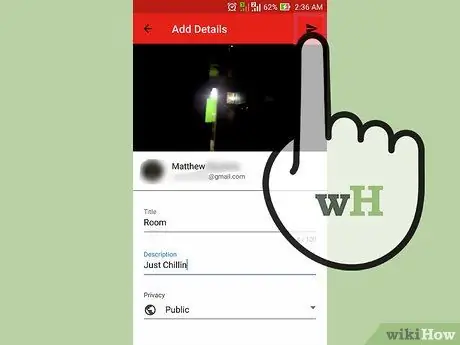
Step 9. Upload the video
Press the arrow icon pointing to the right to upload the video.
Method 3 of 3: Using the “Camera Roll” Folder (iPhone)
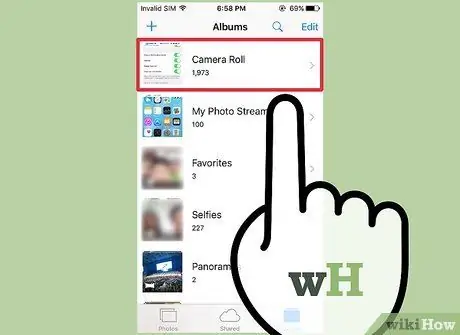
Step 1. Open “Camera Roll”
If you don't know how to use the iPhone's built-in camera app, search and read tutorials on how to use it.
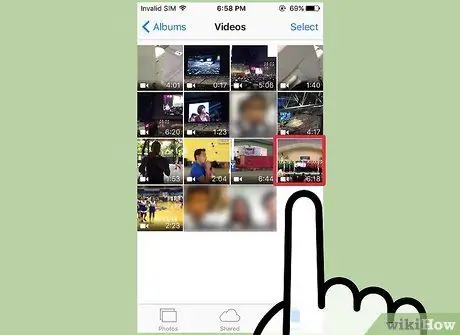
Step 2. Select the video
Touch the video you want to upload to select it.
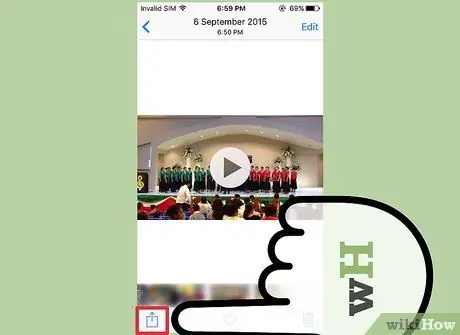
Step 3. Select the “Share” icon
Click the icon in the lower-left corner of the screen. You may need to touch the screen once to display the icon.
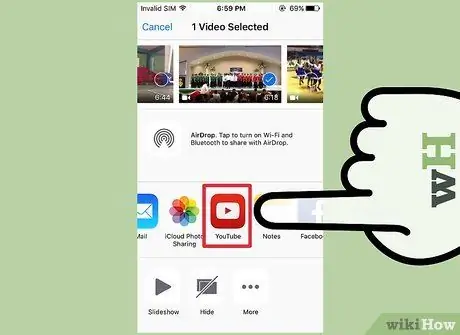
Step 4. Click “YouTube”
You may need to swipe left in the app list to find the YouTube icon, depending on how many apps are installed on your device.
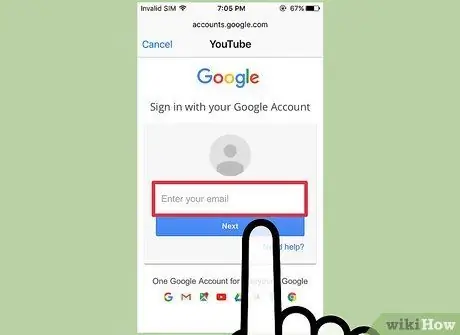
Step 5. Sign in to the account
You will be asked to enter your Google/YouTube account login information.
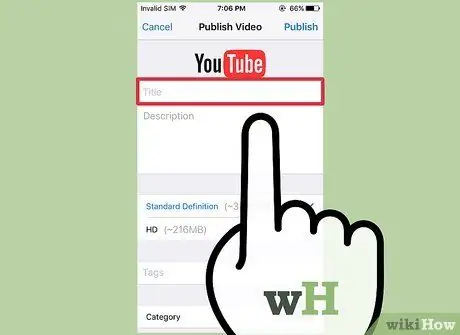
Step 6. Name the video
Try choosing a title that is relevant to the video content. This way, people can find your videos easily. Don't choose irrelevant titles to get more viewers. Apart from irritating viewers, choosing a title like this prevents the video from getting a lot of likes from YouTube users.
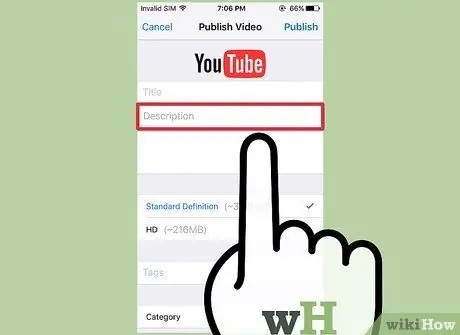
Step 7. Enter the video description
You don't need to include lengthy captions, but at least it's a good idea to let viewers know the content in the video. For example, if your video includes a fireworks display on Independence Day or New Year's Eve, state where the video was shot (or where the fireworks display took place). Try anticipating questions viewers might have and include answers to those questions in the video description segment.
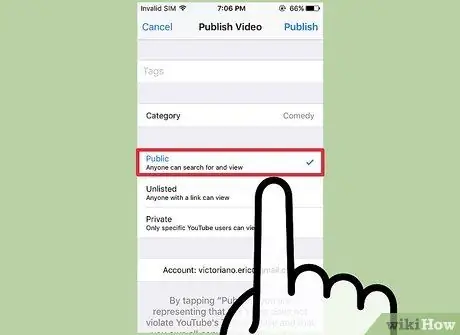
Step 8. Set video privacy
You can see three different privacy options under the "Privacy" section. You can change the privacy options later, even after the video is uploaded.
-
“ Private:
Only you can see the video. This option is useful if you only need to save the video. Apart from that, this option is also useful for testing how a video looks on YouTube before you publish it.
-
“ Unlisted:
“Only people who have the special link can watch the video. This option is useful if you only want to share the video with certain people, such as friends or family. However, keep in mind that they can also share the video link with other people.
-
“ Public:
Anyone can watch your videos by searching for them by title, or viewing them in the list of suggested videos.
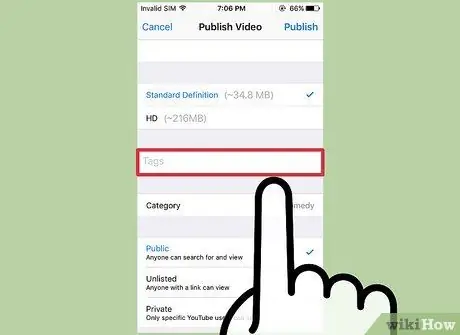
Step 9. Add a bookmark or hashtag
Bookmarks help YouTube determine the right time to show your video when someone searches for certain keywords. For example, if you put the "League of Legends" tag or hashtag on a video, there's a good chance that the video will be displayed when someone searches for League of Legends videos. Also, by adding bookmarks, your video has a greater chance of being suggested to people who are interested in the bookmarks you use.
Try using bookmarks that are relevant to the content. You can get spam notifications if you use the bookmarks carelessly
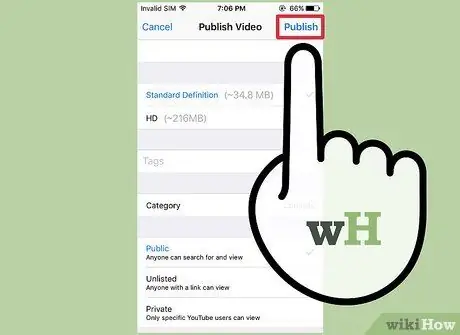
Step 10. Upload the video
Press the blue arrow icon pointing up to upload the video.


