- Author Jason Gerald [email protected].
- Public 2024-01-31 09:30.
- Last modified 2025-01-23 12:04.
Adobe Photoshop is a graphic editing application used in a variety of professions, including graphic design, photography, and web development. Even home computer users can use Photoshop to create artwork and adjust photos. The first time you use Photoshop, you will experience a learning curve because of the wide variety of tools and features that the program has. This wikiHow teaches you the basics of Adobe Photoshop-how to create images, use drawing and painting tools, play with color, and make various adjustments to images.
Step
Method 1 of 8: Creating a New Image
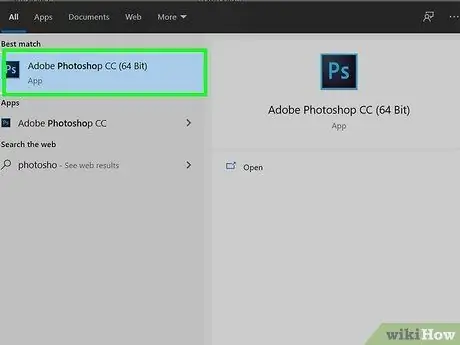
Step 1. Open Photoshop on the computer
You can find this application in the Windows “Start” menu or in the “Applications” folder on a Mac computer. Photoshop will display a welcome page once it opens.
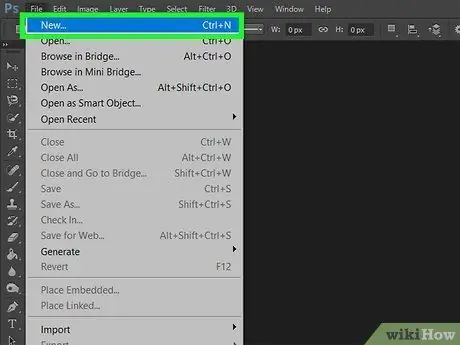
Step 2. Click Create new
This option is in the left pane. The “New Document” window will open and you can adjust the initial canvas size in that window.
- If you're using an older version of Adobe Photoshop that doesn't display or has a welcome page, click the “ File " and select " New ” to create a new image.
- If you want to open an existing image from your computer, select “ Open ” to browse files.
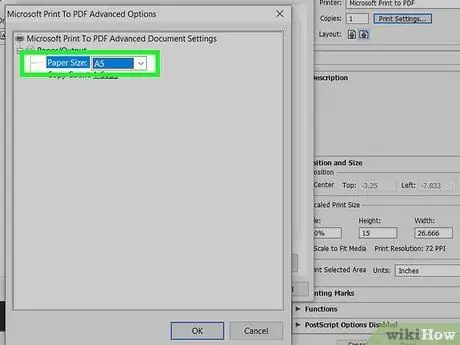
Step 3. Determine the dimensions of the created canvas
This canvas will be the work area and you will need to make it the size you want. It's a good idea to start with a blank document template or preset that you can browse through using the tabs at the top of the window. These templates are grouped by image type and contain the most common size and resolution options for different types of projects.
- For example, if you want to create an A5 sized image for printing, click the “ Print " and select " A5 ”.
- You can also manually adjust the dimensions and resolution of the image using the " Preset Details " panel on the right side.
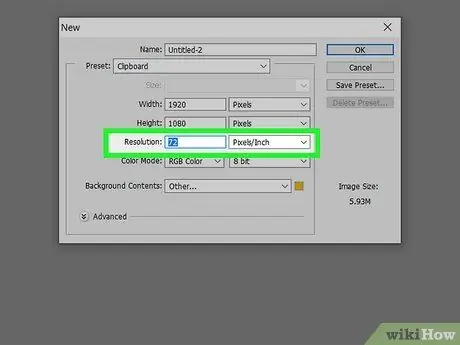
Step 4. Change the image resolution
Resolution determines the number of pixels in one square inch of the image. The more pixels in the area, the clearer the image details. If you choose a blank document template, keep the resolution the same, unless you really need to set it to a fixed amount. If you plan to print an image and have not previously selected a template from the “Print” category, increase the image resolution to at least “220 ppi” (or “300 ppi” for best results). The “300 ppi” option is Adobe's default/primary print resolution.
- The higher the number of pixels per inch (ppi), the larger the resulting file size. Large files require more processing power than the computer and take longer to download. Therefore, don't use the “300 ppi” option, unless you plan on printing the resulting image.
- The default web resolution is “72 ppi”. When creating an image to upload to the internet, focus on the dimensions (height and width), rather than the resolution (ppi). Increasing the resolution to an option above “72 ppi” for web-based images will not make any changes when the image is displayed in a web browser.
- Select the resolution you want to keep. You cannot increase the image resolution at a later time without reducing the image quality.
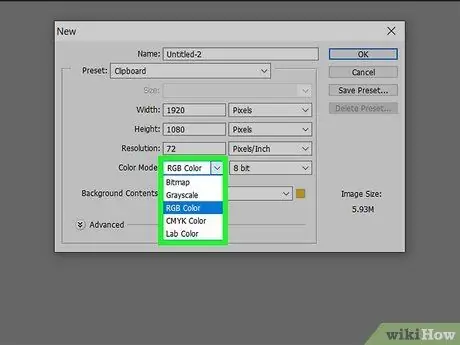
Step 5. Define the color mode of the image
Color mode determines color calculation and delivery. Select a template or preset to automatically define the color mode. However, you may need to change it, depending on the content you are creating. Color mode is a setting that you can still change after the image is created, without risk or serious consequences.
- ” RGB Color ” is the default color mode. This mode is suitable for images to be reviewed on a computer, as well as most printed documents.
- ” CMYK Color ” is another common color mode, but it is usually only used for printed documents. It's a good idea to create an image in RGB mode first, then convert it to CMYK mode before printing it because the computer will automatically display RGB colors.
- ” Grayscale ” is another fairly common option that fits its name. Instead of getting a variety of color options, you'll just use different shades of gray.
- In any color mode, the higher the number or the number of bits, the more colors can be displayed. However, increasing the number of bits will increase the file size so only use higher numbers if absolutely necessary.
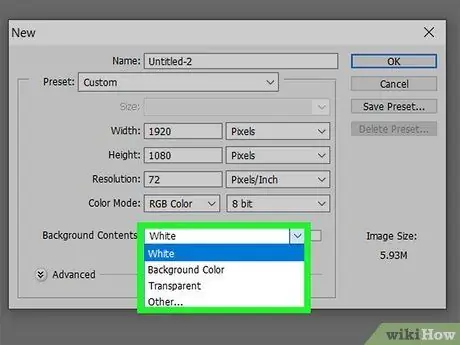
Step 6. Choose a background image
This option generally determines whether your initial canvas has a solid or transparent color.
- The white canvas, which is the default option for most projects, will make it easier for you to see the step or work being created.
- The transparent canvas makes it easy for you to apply effects and produce web images without a background (eg for icons or stickers).
- You can start the project with a transparent background, then color it with white. You can also create other image elements on separate layers above the background. The next time you remove the white background, you will get a transparent background and the result will be just as good.
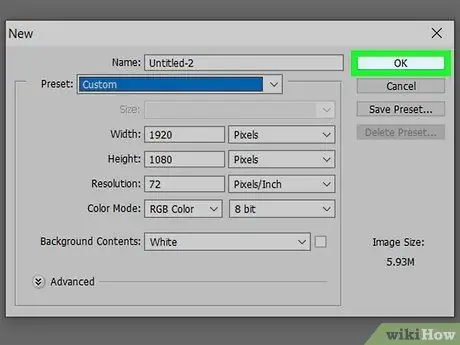
Step 7. Click Create to create an image
You will be taken to the Photoshop workspace and will be able to see the created canvas.
Method 2 of 8: Using Layers
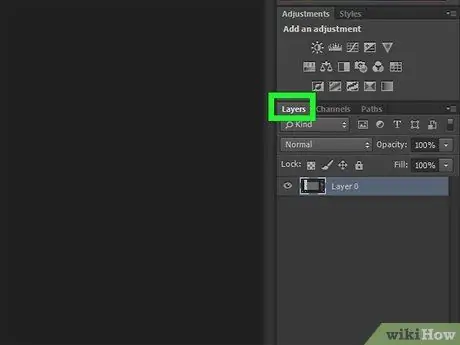
Step 1. Locate the “Layers” panel
If you don't find the panel named " Layers " in the lower right corner of the Photoshop window, press the " F7 ” on the keyboard to display it. Layers allow you to separate aspects or elements of an image, including filters and color changes, into separate editable parts. Editing on one layer will only affect separate layers (although layer modes can dictate the interactions between layers). Layers are placed in a stack to form the final image, and you can reorder, merge, or adjust each layer as needed.
When creating or opening a new image, you will have one “layer”- the “Background” layer. Observe the layer named " Background " in the " Layers " panel
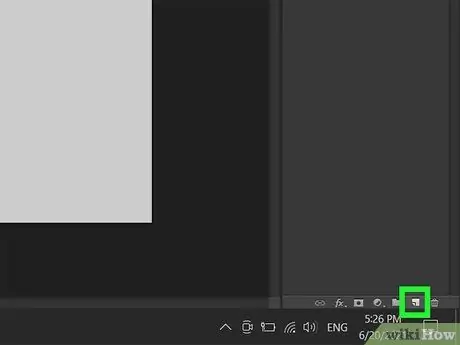
Step 2. Click the “New Layer” button to create a new layer
This button is marked by a small square icon with a plus sign in it, at the bottom of the “Layers” panel. Now, you will see a new layer named “Layer 1” above the “Background” layer.
- Another way to create a new layer is by clicking on the menu " Layers ", choose " New, and clicked “ Layers " When you create a new layer with this method, you will be asked to name the layer and specify a few parameters that will come in handy as you learn more about Photoshop.
- The third way to create a new layer is to press the button "Shift" + "Command" + "N" on a Mac computer, or "Shift" + "Control" + "N" on PC.
- You can show or hide layers by clicking the box marked by the eye icon next to the layer in question.
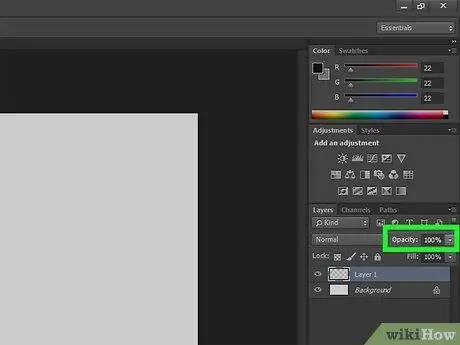
Step 3. Adjust the layer's opacity and fill
You can adjust the layer's opacity (how transparent all the elements on the layer are) using the “Opacity” and “Fill” drop-down menus in the “Layers” panel.
Both options provide the same effect, unless you have text or other objects and layer styles (eg stroke, shadow, or sparkle patterns) on the same layer. In this situation, the “Fill” option determines the opacity of the text/object, while the “Opacity” option only adjusts the opacity of the style or filter
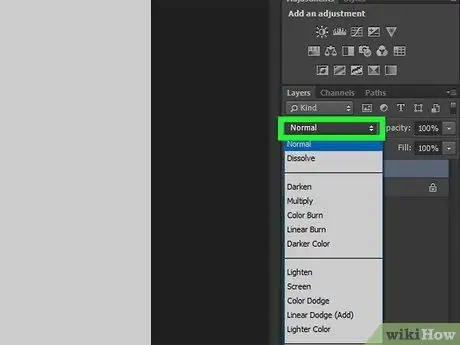
Step 4. Adjust the layer mode
By default, the selected mode is “Normal”, but you can choose other options from the menu to get different results. There are various mode options that apply different effects to each layer and ultimately determine the interaction of each layer with the layers below it.
Experiment with different layer modes to find out their function or effect. More detailed tutorials you can find and access from the internet
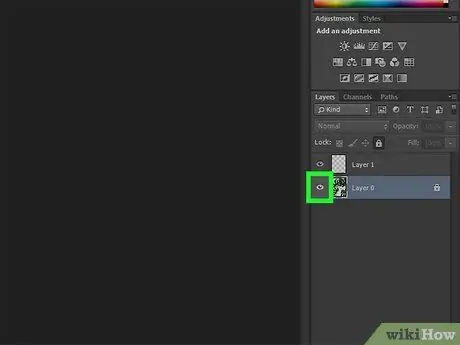
Step 5. Show or hide layers
You can see that each layer has an eyeball icon to the left of its name. Click the icon to hide the layer so you can only see the layers shown in the image.
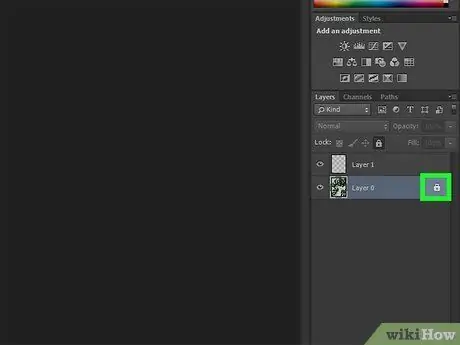
Step 6. Lock the layer
When you're done editing or arranging layers, you may need to lock them, either in whole or in part. That way, the layer won't be accidentally changed. To lock it, click the layer in the panel and select the lock icon.
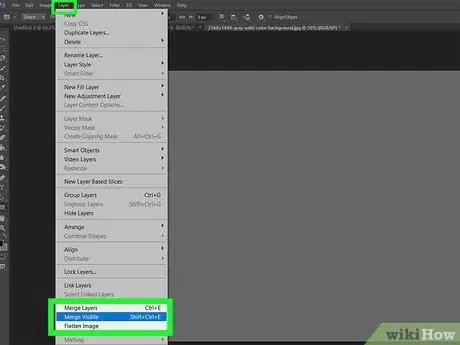
Step 7. Merge two or more layers
While working (and especially when finalizing an image), you may need to merge several layers into one. This merging cannot be undone so make sure you merge layers that don't need to be merged separately later.
- To merge multiple layers into one, hide the layers you don't want to merge first by clicking the eye icon on the appropriate layer. After that, click the menu " Merge " and select " Merge Visible " You can then bring back the other layers by clicking the eyeball icon in place.
- To merge all layers into one, click the menu " Layers " and select " Flatten Image " If you want to save the image in a web-compatible format (e.g.-j.webp" />
Method 3 of 8: Using the Selection Tool
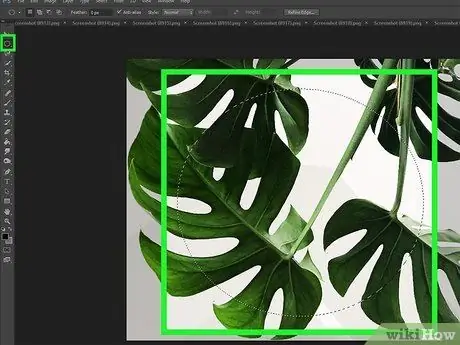
Step 1. Use the marquee tool to select an object with a square or circle frame
The toolbar on the left side of the workspace is the "storehouse" of tools you'll use in Photoshop. At the top of the bar, you can see a square icon formed by a dotted line. If you click and hold on the icon, you can see all the marquee tools (marquee tools). This tool allows you to select one or all parts of the image. After selecting something, you can copy, edit, or delete it as needed. You can tell which object has been selected when the object or part is surrounded by a “row of ants”. To deselect and delete the ant array, press the shortcut "Control" + "D" (PC) or "Command" + "D" (Mac). However, keep in mind that the selected object will depend on the currently active or selected layer.
- The marquee tool allows you to make selections in predefined shapes. " Rectangular marquee ” is the default option that has been selected, but you can also select “ Elliptical marquee ” for circular or circular selection area.
- This tool is used in the same way as when you select files on your computer by clicking and dragging the cursor. To keep the selection proportions, press and hold the “ Shift while making the selection.
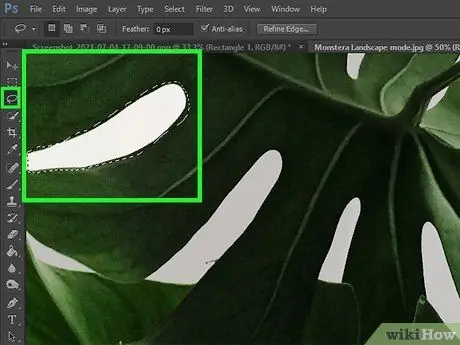
Step 2. Use the lasso tool to select freely
Shape-based selection tools are great for some objects, but what if you need to select areas or objects with odd or complicated shapes? Click and hold the lasso string icon on the toolbar to view the lasso selector options that allow you to select objects freely (freehand).
- The main lasso options allow you to click and drag the cursor around the object that needs to be selected. You need to drag the cursor as close to the frame or side of the object as possible because whatever you mark will become part of the selection.
- The polygon lasso option has a similar function, but requires you to create anchor points by clicking on specific areas, instead of clicking and dragging the cursor.
- The third option is the magnetic lasso option which helps you follow the sides of the selected object. Click and drag the cursor around the desired object as you would with the main or regular lasso equipment. When you're done, double-click the starting point so that the selection frame "magically" attaches to every corner or side of the object.
- These three lasso tools require you to close the frame or selection area after marking the area. Close the frame or area by clicking on the starting point (you can see a small circle next to the cursor). If you make a mistake, delete the reference point by pressing the backspace key.
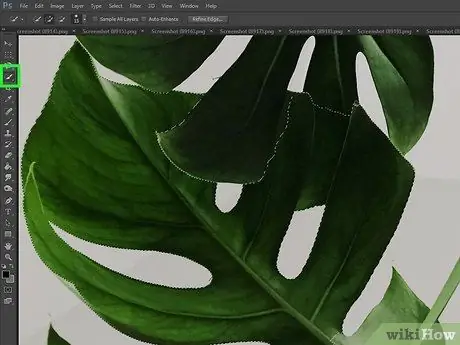
Step 3. Use the object selection tool to make a quick selection
Click and hold the icon to the bottom right of the lasso icon to view the object selection tools. These tools simplify the process of selecting a specific object with various parameters:
-
” Magic Wands:
” With this tool, you can select areas of consistent color in the image, without having to manually mark them. Click the area you want to select using this tool to select similar pixels (in this case, pixels of the same color). You can determine the equipment's selectivity for color by increasing or decreasing its tolerance level. This way, you can select a specific part or an object as a whole.
-
“ Object Selection:
” Select this tool to select objects easily. You can click the square or lasso marquee option in the toolbar at the top of the screen to define the shape of the frame or selection area, and then mark the outline of the object using that shape. When you lift your finger off the mouse, Photoshop will automatically select the inside of the object.
-
” Quick Selection:
This tool is probably the most common and useful selection tool for editing image areas. This equipment is a combination of magic wand tool and magnetic lasso equipment. Click and drag the cursor to select adjacent areas that you want to select from the image.
Method 4 of 8: Drawing and Painting
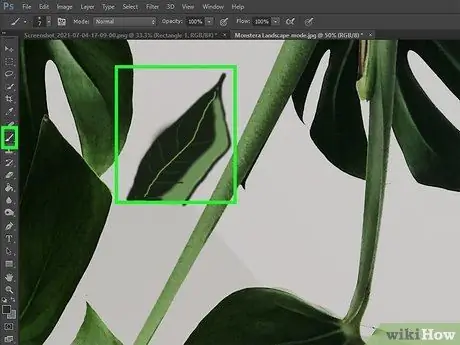
Step 1. Click the painting brush icon to select a brush type
It's in the left toolbar pane. Brushes are used to add pixels to an image (in other words, to paint or draw). You can use these tools to add extra elements to your photos, or paint a new picture from scratch. Brush options can be customized via the brush menu and come in a variety of templates or shape presets.
- You can download more brush presets or templates online or for a fee from various websites.
- Adjust the size, hardness, and opacity of the brush stroke using the tools shown at the top of the work area. Larger brushes can fill in larger areas, harder brushes produce more defined lines, while brushes with lower brush stroke opacity allow you to override colors and gain more control.
- Click the "panel" Color ” on the right side of the Photoshop window to view the color palette, then select the color you want to use.
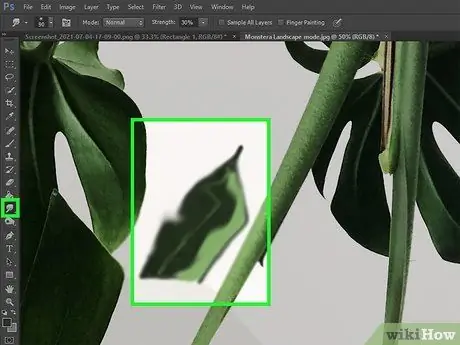
Step 2. Try blurring, sharpening, and “buffing” the colors in the image
You can find the tools for these procedures by clicking the downward-pointing finger icon. Click and hold the icon to see all the options. These tools affect all the pixels you add or draw with a brush, and can be used to achieve a variety of effects.
-
” Blur:
” This tool “releases” and blends the pixels so that anything you sweep or “swipe” using this tool will appear blurry or blurry. The degree of blurring of the result will depend on the strength or percentage you selected in the menu at the top of the Photoshop window.
-
” Sharpen:
” This tool is a return of the blur tool so it can tighten and merge the pixels in the image. However, use this tool as needed as it can give a grainy or too sharp result.
-
” Smudges:
” This tool will take the color you choose and expose that color to the areas that the cursor sweeps over.
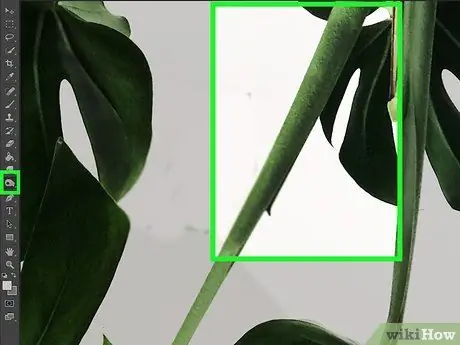
Step 3. Try dodge, burn, and sponge tools
The dodge tool can brighten the image, the burn tool darkens the image, while the sponge tool increases or decreases color saturation. This tool icon looks like a lollipop or a magnifying glass, depending on who you ask (eg a child or an adult). Click and hold the icon to see all the options. With these tools, you can brighten the exposed parts of the image and darken the areas that are not directly exposed to light.
- Since this tool affects the actual pixels in the image, try duplicating the layer and locking the original layer. That way, you won't spoil the original image. To duplicate a layer, right-click the layer and select " Duplicate Layer ”.
- You can change the type of hue changed by the dodge tool or burn tool, as well as the effect of the sponge tool using the options displayed in the menu at the top of the window. Try selecting highlight for the dodge tool and lowlight for the burn tool as these two options protect medium or middle hues (unless you want to change those hues too).
- You can also increase the brush size, as well as its intensity using the options displayed at the top of the screen.
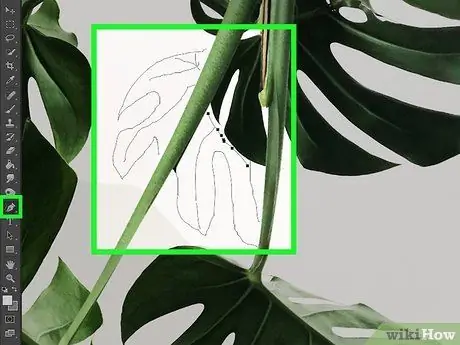
Step 4. Use the pen tool to create a more precise drawing
This tool is Photoshop's more advanced tool because it is used to create paths (paths), instead of painting. Click and hold the pen icon on the toolbar to view all available pen tools, then click the desired option.
- To use the pen tool, click the mouse at any point on the desired line to create a segment. A reference point or marker will be added to each area you click. When you're done, click the first reference point or guide to close the path. You can then drag the reference points to change the shape of the line and create curves.
- To gain more control over curved lines, use the “ Curvature pen ”.
- To draw a path without manually placing reference points or markers, use the “ freehand pen ”.
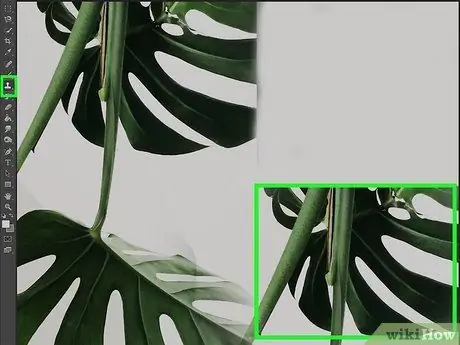
Step 5. Experiment with the clone stamp tool
The icon looks like a stamp on the left pane. This tool is used to take a certain part of the image and copy it in another part. You can use it to solve problems like blemishes, remove annoying strands of hair, or something like that. Just select the equipment, press the button “ Alt ” while clicking the area you want to copy, then click the area you want to cover.
- Observe the image carefully because the copied area will move proportionally to the cursor movement as you cover areas or parts that need to be changed or corrected.
- Another step you can follow to cover or disguise blemishes or imperfections in an image is to use the healing brush tool whose icon looks like a band-aid.
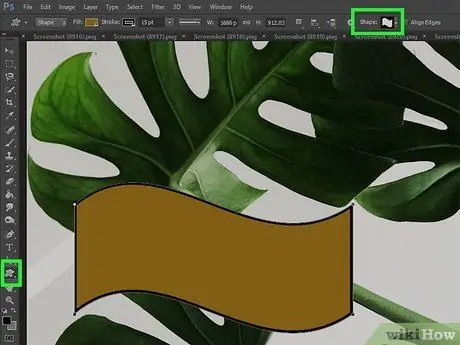
Step 6. Click and hold the rectangle tool icon to draw with the shape
All the shape options that you can draw are displayed. You can use the color panel to choose the color of a shape before drawing it, or fill the shape with a color or gradient afterwards.
- To draw with shapes, select the desired shape from the tools panel, then click and drag the cursor on the canvas.
- To perfectly draw a square, circle, or other shape, press and hold the “ Shift ” while clicking and dragging the cursor.
Method 5 of 8: Choosing Colors
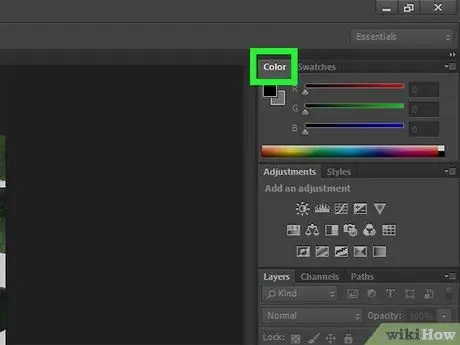
Step 1. Click the color selection window to select a color from the palette
You can click the tab Color ” in the upper right corner of the workspace to open it. To change color options, simply click the color you want to change or use. To align the colors, double-click the color on the two overlapping rectangles in the upper-left corner of the palette.
Stacked rectangles on the palette display the color selected as the foreground color and the background color. To change the background color, double-click the currently active background color
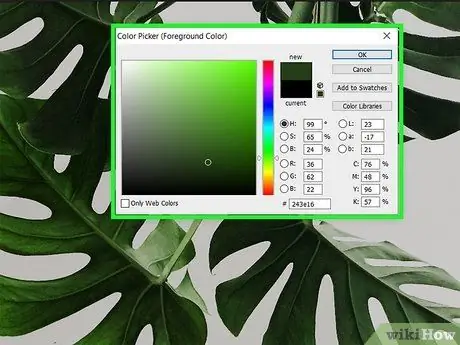
Step 2. Double-click the selected color to align the hue
If you want to use a specific color, start with an existing color and adjust the parameters until the color display feels appropriate. If you know the hex code of the color you want to use, you can enter it in the column provided.
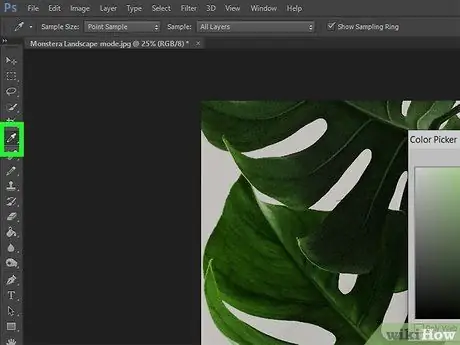
Step 3. Use the eyedropper tool to select a color that is already in the image
If you want to draw or paint with a color that's already in the image, click the eyedropper tool icon on the toolbar, then click the color you want. Automatically, the color will be set as the foreground color. However, the precision of color selection may not be high so you will need to enlarge the image in order to control or select the appropriate colored pixels.
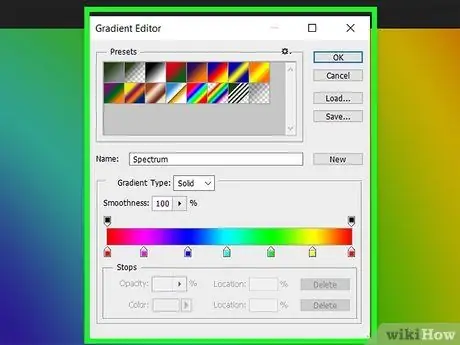
Step 4. Click the gradient tool icon to apply a gradient pattern
This icon looks like a faded gray square on the toolbar. With this tool, you can fill shapes with color gradients or fade colors on layers or the inside of objects.
To use this tool, select an option at the top of the screen, then click the start point and end point of the gradient. The gradient pattern will be determined by the location of the line you're drawing, as well as its length. For example, shorter lines make color gradient transitions shorter. Experiment to find out how to get the gradient you want or need
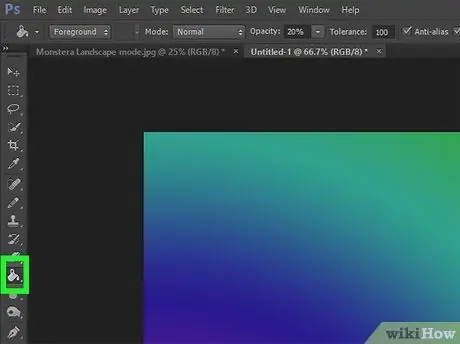
Step 5. Use the paint bucket tool to fill objects and layers with color
To access this tool, click and hold the gradient tool icon and select “ Paint Bucket tool After that, click on the object or layer that you want to fill with the selected color.
As with other tools, the paint bucket tool only works on the selected or active layer. If you want to change the background color, make sure you select the background layer before filling it with color
Method 6 of 8: Adding Text
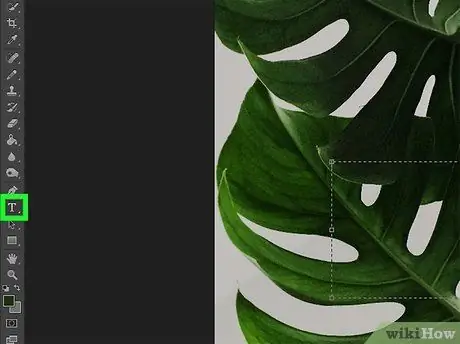
Step 1. Click the T button to use the text tool
It's in the toolbar on the left side of the window. This tool serves to add text on a new layer so you don't have to bother creating layers yourself. After selecting this tool, click and drag the cursor on the canvas to create a text field, just like when you use the marquee tool or shape tool. Create a new column or text layer for each line of text you want to use because that way, you have more control over spacing and spacing between lines.
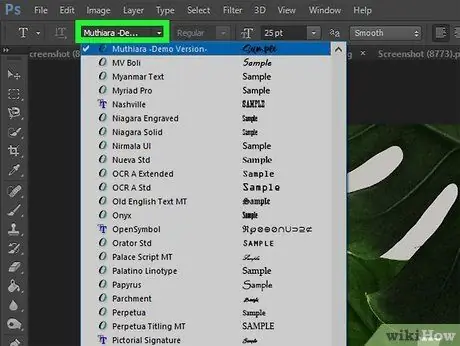
Step 2. Choose a font
The text options are displayed at the top of the Photoshop window. You can choose the font type, text size, font thickness, and text spacing, as well as the color.
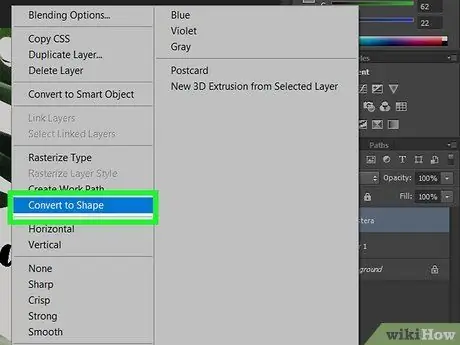
Step 3. Convert the text to a path or path
You can change the text into a path or path if you want to distort the shape and size of the text. This procedure converts each letter into a shape. To convert text to a path, right click the layer containing the text and select “ Convert to shape ”.
Method 7 of 8: Making Adjustments to the Image
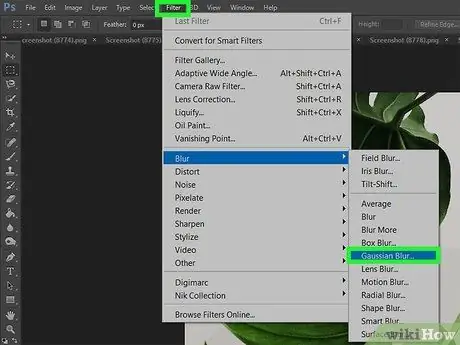
Step 1. Click the Filters menu to view and select filters
You can use filters on the visible layer or selection to get a variety of effects. When selecting a filter, you can see a menu with various parameters that allow you to control the appearance or effect of the image. Filters can only be applied to the currently active layer or selection so make sure you have selected the layer or made a selection first before applying the filter.
You can use filters " Gaussian blur ” to significantly blend the pixels on the layer. Filters " Add noise ”, “ Clouds ", and " Texture ” can give texture to an image. Meanwhile, other filters can be used to give dimensions or distort the image. You will need to experiment to find the right filter for your project.
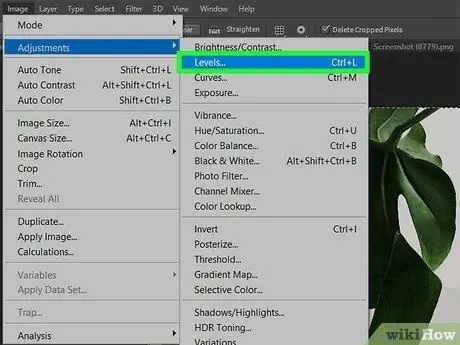
Step 2. Adjust the overall color levels using the “Levels” panel
This panel allows you to control an image's brightness, color balance, and contrast by specifically specifying the absolute white level and absolute black level of the image. To open this setting, click the menu “ Image ", choose " Adjustments, and click " Levels ”.
- The “Levels” panel includes several templates or presets that you can try, and these options can be a great starting point. For example, select " Increase Contrast ” to increase the level of color contrast in the image.
- You can also adjust the contrast level, color balance, color saturation, brightness, and other aspects separately in the menu “ Image ” > “ Adjustments ”.
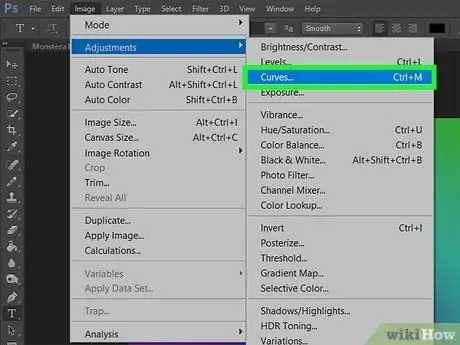
Step 3. Use the “Curves” panel to adjust the hue of the image
To access this panel, click the menu “ Image ", choose " Adjustments, and click " Curves " You will see a line running diagonally inside the box. The horizontal scale represents the image input and the vertical scale represents the image output. Click a line to create a reference point or marker, then drag the points to change the color hue of the image. This panel gives you more control over the contrast level of the image than the “Contrast” menu.
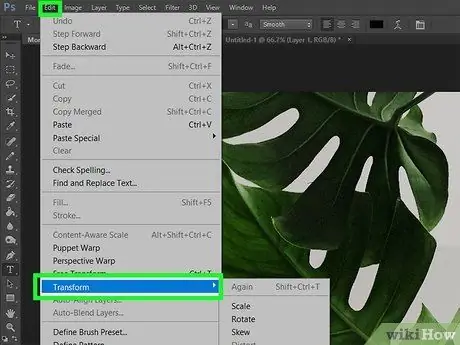
Step 4. Perform a transformation on the selected object
You can use the “Transform” tool to resize, rotate, skew, stretch, or bend a selected area, layer, or set of layers. Click the menu " Edit " and select " Transform ” to see all transformation options. Choose the most suitable option for you. Experiment with the available options or search the internet for tutorials.
Press and hold the button " Shift ” if you want to keep the proportions of objects, selection areas, or layers when using the “Transform” tool.
Method 8 of 8: Saving Files
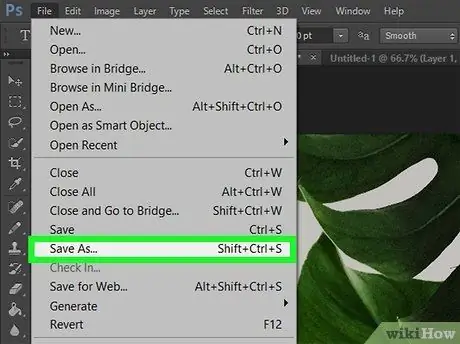
Step 1. Click the File menu and select Save As to save the work
Start saving jobs from the start of the work/project creation process.
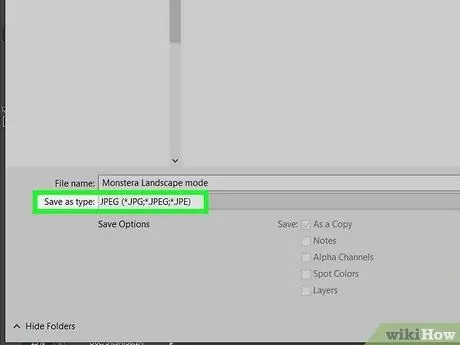
Step 2. Select a file format from the drop-down menu
The options selected will depend on the purpose for which the image was created:
- If you still need to edit the file, save the image in Photoshop's default format (. PSD). With this format, all editable elements are preserved, including each layer.
- If you have finished creating the image and want to upload it to the internet or use it in another application, you can choose a different file format from the menu. The most common options include “ JPEG" and " PNG ”, but different applications, different requirements. When you save an image in one of these formats, you'll be asked to "flatten" the layers in the document first. Don't do this until you've finished creating the image (or at least until you've saved a PSD version of the image that you can continue or edit at a later time).
- Save image as file " GIF ” if the image has a transparent background. If you use a lot of colors in the image, selecting the “GIF” format will reduce the image quality because this format only supports 256 colors.
- You also have the option to save the work or image as a PDF file. This option is useful for images that you will be printing to plain paper.
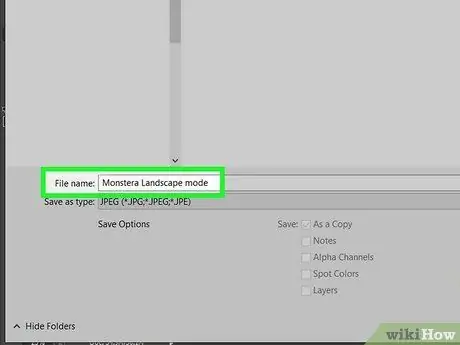
Step 3. Name the file and select the location to save the file
You can also save the file as a copy (“ As a copy ”) if you don't want to overwrite the current or current version of the file.
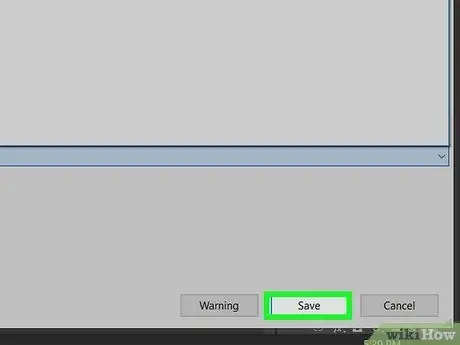
Step 4. Click Save
After saving the image for the first time, you can save it again by clicking the " File " and choose " Save ”.


