- Author Jason Gerald gerald@how-what-advice.com.
- Public 2023-12-16 10:50.
- Last modified 2025-01-23 12:04.
Locking your computer is a good way to protect your computer from unwanted people when you have to temporarily leave your computer. To protect your computer, you can lock your computer by setting a password on the computer. This way, other people will not be able to access your computer without your knowledge. After that, you can lock your computer using a keyboard shortcut by pressing Win+L (for Windows) or Ctrl+⇧ Shift+Power (for Mac). Note that this method does not completely protect the computer. The steps listed in this method should only be used to prevent others from accessing your computer when you leave your computer turned on.
Step
Method 1 of 2: For Windows
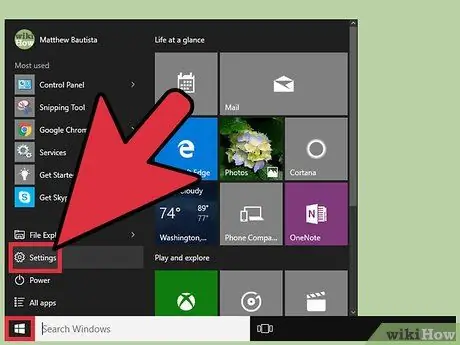
Step 1. Open the Settings window in Windows
Press the Win key and select the gear-shaped “Settings” icon.
If you are using an older version of Windows, open a Control Panel window by pressing Win and selecting the “Control Panel” option. If you can't see the option, type "Control Panel" in the search bar and select Control Panel in the list of search results
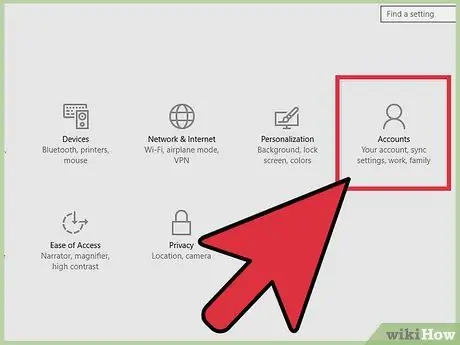
Step 2. Click the Accounts button
It's on the right side of the Settings page. Clicking on it will open a list of Account options.
- If you are using an older version of Windows, select the “User Accounts” option in the Control Panel window.
- Windows 10 and Windows 8 require you to create an account password when creating a Windows account. If you are using an older version of Windows, you can click the “Make Changes to Your User Account” option and select the “Create a password” option next to the account profile you are using.
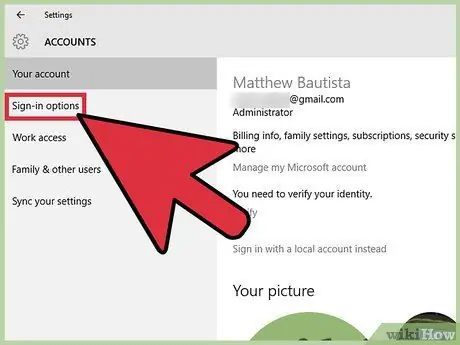
Step 3. Click the “Sign-in Options” option
It's on the left side of the window. Clicking on it will open a page with various options.
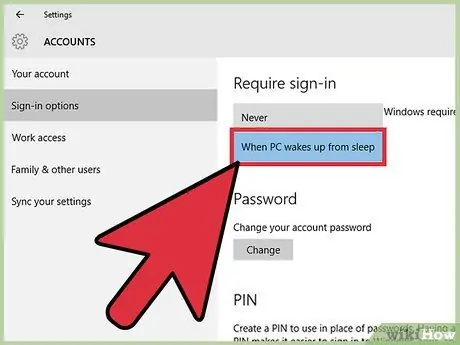
Step 4. Select the “When PC wakes up from sleep” option in the “Require Sign-in” drop-down menu
It's at the top of the page.
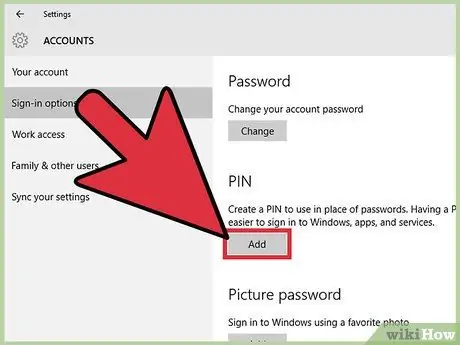
Step 5. Create a PIN (optional)
Click the “Add” button in the “PIN” section. After entering the account password, you can enter the desired PIN number. You must re-enter the PIN number to provide confirmation.
- The PIN only consists of numbers.
- The PIN will be used to replace the password when you log in to your Windows account or open your computer.
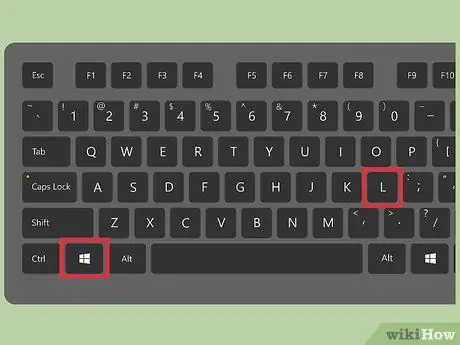
Step 6. Press Win+L key
Pressing both buttons will lock the screen. You must enter your account password or PIN to unlock it.
- The computer will lock automatically when it enters Sleep mode. To set the time it takes for the computer to enter the mode, go to “Settings > System > Power and Sleep”. After that, select the desired time range on the “Screen” drop-down menu. When using a laptop, you must set the desired time range in the " plugged in " and " on battery " sections.
- The computer will also lock when it enters Sleep mode. You can set the time it takes for the computer to enter Sleep mode by going to “Settings > System > Power and Sleep”. After that, select the desired time on the “Sleep” drop-down menu.
Method 2 of 2: For Mac
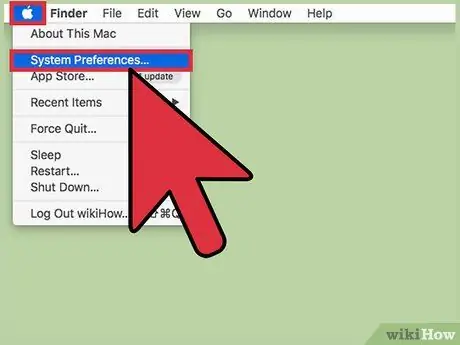
Step 1. Open the “System Preferences” window
Open the “Apple” menu at the top left of the screen and select the “System Preferences” option.
- You can also open the window in the launchpad or the quick launch bar at the bottom of the screen.
- If you are using the latest version of MacOS or OSX, you will need to create a password when setting up your computer for the first time. If you're using an older version of MacoS or OSX, you can create a password by going to the “Accounts” page in the “System Preferences” window and selecting the “Change Password” option next to the account.
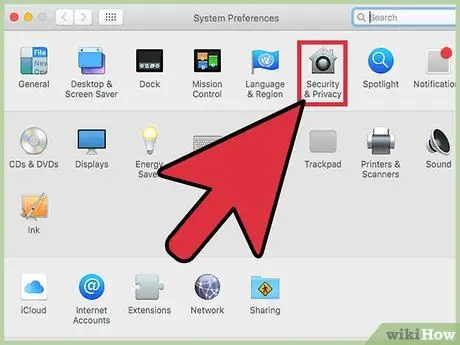
Step 2. Click the “Security and Privacy” icon
This icon is in the top row of application icons.
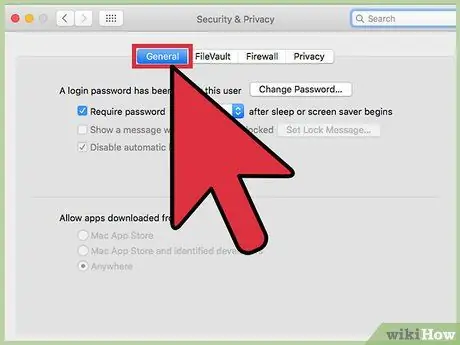
Step 3. Click the “General” tab
Several tabs, including the General tab, can be found at the top of the window.
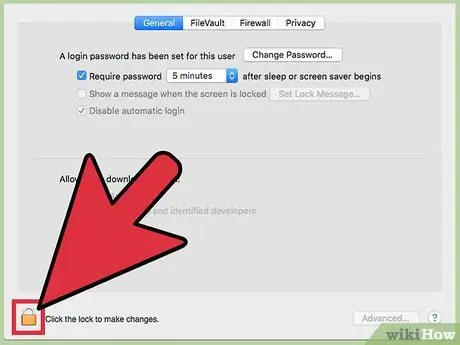
Step 4. Click the “Lock” icon in the form of a padlock
It's in the lower-left side of the window. You must enter your password when you click on the icon. After entering the password, you can change the settings available in the window.
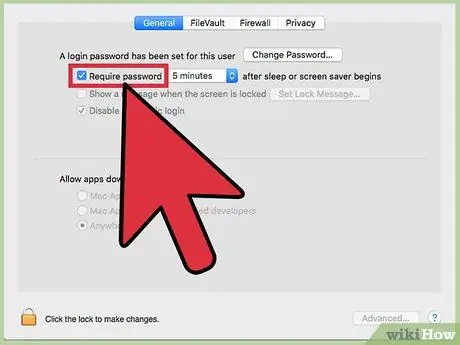
Step 5. Check the box “Require Password after sleep or screensaver begins”
This setting requires the user to enter a password when the computer has not been used for a predetermined amount of time, enters Sleep mode, or displays a screensaver.
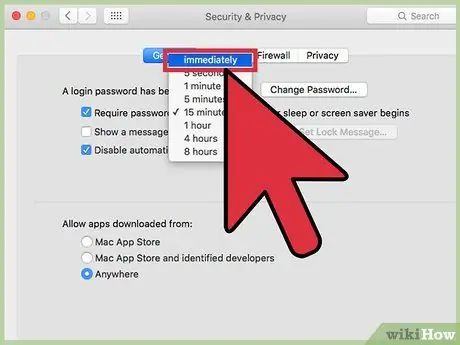
Step 6. Select the “Immediately” option on the drop-down menu
This drop-down menu is next to the Require Password after sleep or screensaver begins box. By selecting the Immediately option, the user must enter a password when the computer enters Sleep mode or displays the screensaver.
You can also select another time range available in the window. If the computer has not been used for a specified amount of time, you will need to re-enter the password to unlock it. By selecting another time range, you can quickly wake up the computer from Sleep mode without having to enter a password. However, the “Immediately” option is the only option that can securely lock the computer at your command
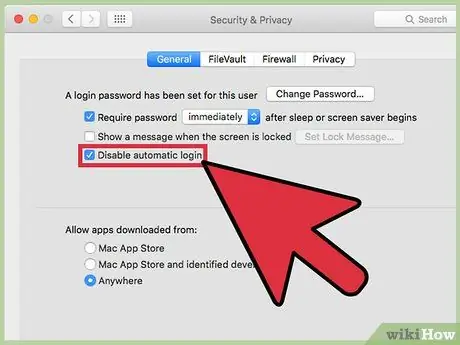
Step 7. Select the “Disable Automatic Login” option (for OSX version 10.9 or earlier)
The Automatic Login option allows users to access the computer without having to enter a password when booting or starting the computer from Sleep mode. By disabling the option, the user must enter the password when the screen is locked or the computer is turned on from Sleep mode.
- This feature is removed for Administrator accounts in OSX version 10.10 and later versions of OSX.
- In addition, you can also click the Lock icon again to lock the changes that have been made. However, you can still save your changes without clicking the icon.
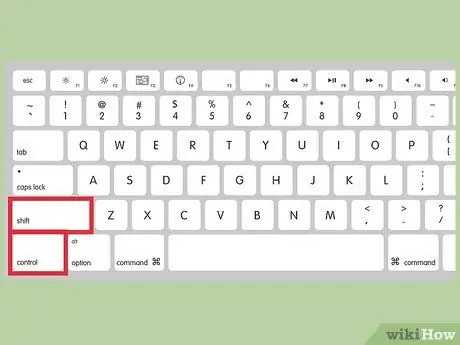
Step 8. Press Ctrl+⇧ Shift+Power
Pressing these keys will lock the computer screen without putting the computer into Sleep mode. You must enter a password to open it.
If your Mac has a DVD-ROM or CD-ROM, you can press Ctrl+⇧ Shift+⏏ Eject to lock the computer screen
Tips
- Press any keyboard key or move the mouse to turn on the screen and open the computer.
- Use a secure password to prevent the computer from opening easily.
- If using a Mac, you can use “Hot Corners” to activate the screensaver. This can be used to lock the computer screen if you have set up your Mac according to the steps listed above. Click the “Desktop & Screensaver” option in the System Preferences window and go to “Screen Saver > Hot Corners”. Specify the screen angle you want to use to activate the screensaver and select the Start screen saver option in the drop-down menu. After that, when moving the cursor to the selected corner of the screen, the screensaver will be activated.


