- Author Jason Gerald gerald@how-what-advice.com.
- Public 2024-02-01 14:11.
- Last modified 2025-01-23 12:04.
Playing games from a thumb drive is more advantageous because all the games can be stored in the same place, load faster, don't get corrupted quickly, and are easy to carry. This article is only about the Wii, not including the Wii U. The steps below can be done in 20-30 minutes if running smoothly.
Step
Part 1 of 4: Preparation
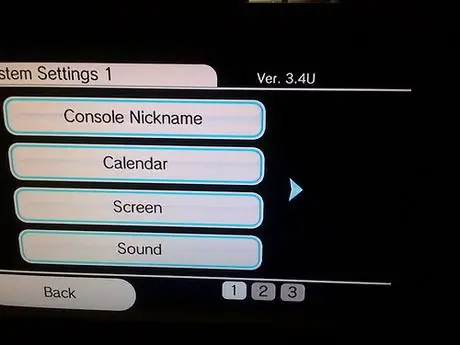
Step 1. Check your Wii system version:
- Open "System Settings" and look at the top right.
- If the version listed is not 4.3U, upgrade your Wii. The image above shows an example of a Wii that needs updating.
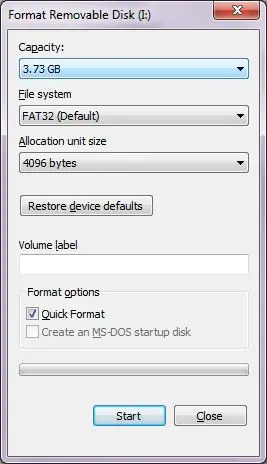
Step 2. Format your SD card as FAT32 (make a copy of the data before starting as this process will erase all existing data
)
Step 3. Format your flash drive as FAT32, same as the previous step
-
Create a folder called "wbfs" (lowercase) on the flash drive.

Wbfs folder
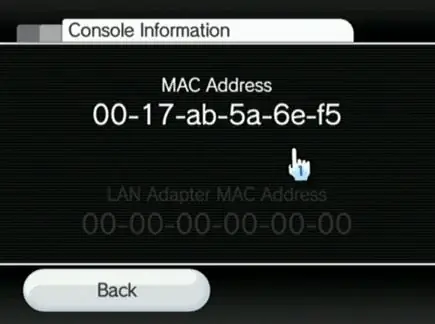
Step 4. Find your Wii's MAC address:
- Go to the second page on "System Settings".
- Select "Internet."
- Make a note of the available MAC addresses for later use.
Part 2 of 4: Getting Homebrew Channel
Step 1. Visit
- Choose version 4.3U
- Enter the previously recorded MAC address.
- Don't touch the HackMii box.
-
Complete the available CAPTCHAs and choose cut the red [or blue] wire.

LetterBomb2
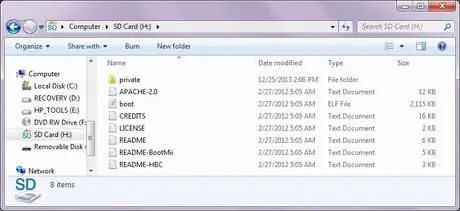
Step 2. Extract the LetterBomb.zip file to the root folder of the SD card (usually F:
/ or E:/). The contents of the card will be like the image above.
Step 3. Add and find Letterbomb:
- Turn off your Wii.
- Insert the SD card into the Wii.
- Restart the Wii.
- Click the envelope at the bottom right of the screen to open the message.
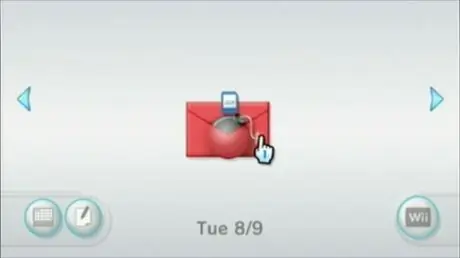
Step 4. Open the message that looks like a red envelope containing a bomb (there may be a message on the previous page; press (-) until the message is visible)
- Wait until the message "Press (1) to continue." appears on the screen and press (1).
- Press (A) to open the next pane (make sure Homebrew Channel can be installed).
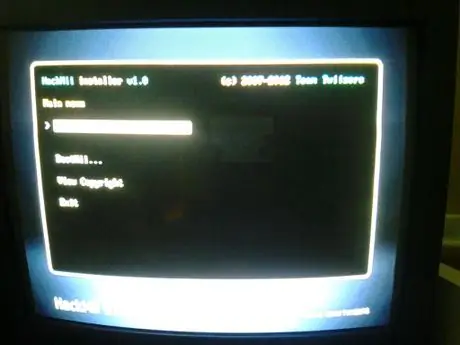
Step 5. Press up on the D-pad three times until "Install The Homebrew Channel" is selected
Press (A).
- Press up and select "Yes, continue" and press (A).
- Wait for the installation to complete and press (A) to select "Continue."
- Press down until "Exit" is selected and press (A).
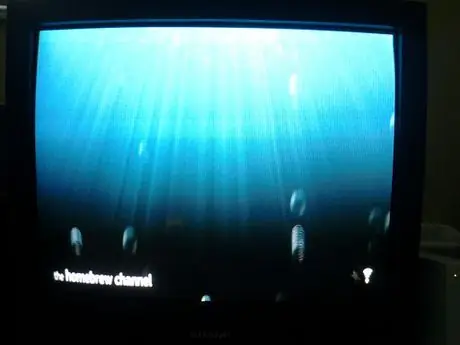
Step 6. Homebrew Channel will open
Step 7. Remove the SD card from the Wii and insert it into the computer
Reformat the SD card for use in the next step
Part 3 of 4: Setting Up the Wii
The Trucha bug must be enabled on the Wii. Since this step is the most difficult, follow the instructions below as carefully as possible.
Step 1. Wii must be connected to the internet !
Step 2. Download the following files:
drive.google.com/file/d/0B3k3BjZD2YfiQjFRaWpWUGJqV2c/edit?usp=sharing. When opened the file will extract its contents automatically into the root directory of the SD card.
-
Once done the SD card will have the following three folders: "apps", "config", and "wad".

D3YfI 1
Step 3. Open the Trucha bug channel:
- Turn off the Wii.
- Put the SD card back into the Wii.
- Turn on the Wii.
- Open the Homebrew Channel from the main menu.
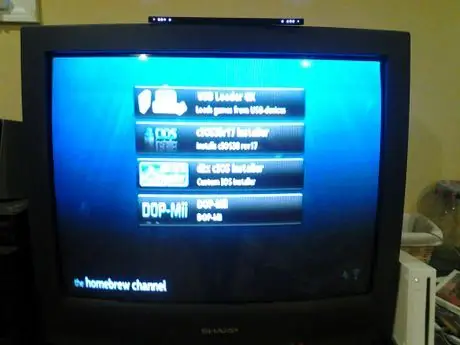
Step 4. Pay attention to the three available options (NOT four, one of the four options in the image is no longer needed
) If you see three small buttons in the same row, press (2) to make them bigger as shown in the image.
Step 5. Select and open "DOP-Mii"
- Press (A) to continue.
-
At this step your screen should look like the following. Select the second option ("Install IOS36 (v3351) w/FakeSign") and press (A).

DOP Mii - Press (A) again to proceed to the next panel.
- Press (A) to select "Yes".
- Press (B) to select "No" in the "FakeSign (Trucha)" option.
- Press (A) to select "Yes" for the other two options.
- Make sure "Download from NUS" is selected and press (A) again.
- If something goes wrong, the problem is with the internet connection or you accidentally pressed (A) while selecting FakeSign. Go back to the menu and repeat the steps above after checking the internet connection.
- Press any key to return to the menu.
- Press the (⌂) (Home) button to close Homebrew.
Step 6. Open "d2x cIOS Installer" by selecting "load"
- Press any key to continue.`
-
Press down until the ">" character on the left is next to "Select cIOS slot".

D2x cIOS select 249 - Press left and/or right to change the number to 249.
- Press (A).
- Press (A) on the next screen (the number 249 in the table will flash).
- Wait for it to finish.
- Same as above, if this step is problematic it means there is a problem with your internet connection.
-
If everything goes well, the number 249 will glow green. Press (B).

D2x cIOS 249 Green
Step 7. Repeat the above steps to replace 249 with 250
Part 4 of 4: Setting Up and Using USB Loader GX
Once the Wii is ready, the next step is to prepare the loader (the channel used to run the game)!

Step 1. Connect the flash drive or hard disk to the USB port closest to the Wii side
(Red)
Step 2. Open "USB Loader GX" by selecting "Load" in the Homebrew channel
Step 3. Transferring the game from disk to hard disk:
- Insert the disc (try Wii Sports first; the game is easy and the file size is not large).
- Select "Install."
- Select "OK."
-
Wait for it to finish. You will see the process stop at 0%, but this is common and you just have to keep waiting.

USB Launcher install - Select "OK."
- Repeat the same steps for the other games until you have enough or the hard disk is full.
Step 4. The copied game doesn't look beautiful or usable at first because it doesn't have a cover yet
Press (1) to provide covers for available games.
- Fill all the boxes.
- Select "OK."
-
Wait.

Wii Sports with Cover
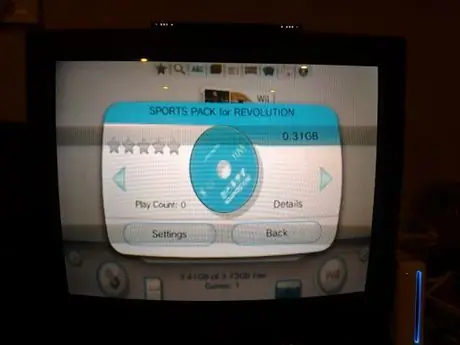
Step 5. Try playing the game
Choose an available game and press the rotating disc image. The game will load as usual but in less time. If the game doesn't open, it means that something is wrong.
Step 6. Keep trying the features provided by USB Loader GX
This program has many other functions which are not enough to list in this article. Homebrew also has useful features that can be used when adding apps.

Step 7. (Optional) You can clean the SD card by deleting additional apps in the "apps" folder (as in the picture)
Step 8. Finally:
Wii Backup Manager is a useful program for tidying up games on your computer or Wii, or when adding files from your computer to your hard disk.
Warning
- Do not turn off the Wii without instructions.
- Follow the instructions carefully.
- There's a very small chance the Wii will crash; especially if you don't follow the two warnings above.
- While the steps above are commonly used to hijack Wii games downloaded from the internet, installing games onto a flash drive using the Wii Backup Manager should only be done to make copies of games you already own. Software piracy is illegal in most countries.
- Installing games this way will void the Wii's warranty.


