- Author Jason Gerald gerald@how-what-advice.com.
- Public 2023-12-16 10:50.
- Last modified 2025-01-23 12:04.
To free up storage space on your computer, you can delete files that you no longer use, such as temporary files or prefetch. Temporary files are files that are created when Windows unnaturally shuts down, and can be safely deleted. Meanwhile, prefetch files are created when a program is run for the first time. It is recommended that you do not delete the file unless your computer is infected with a virus/malware, or if you are an advanced computer user.
Step
Method 1 of 2: Deleting Temporary Files
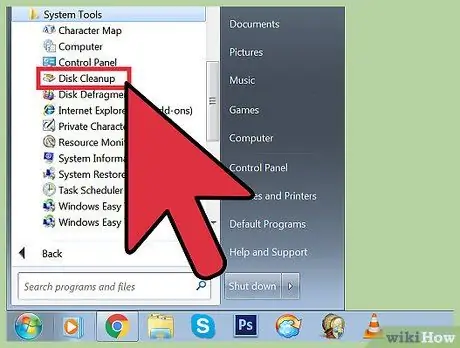
Step 1. Open Disk Cleanup
This application, which is available by default since Windows Vista, allows you to delete temporary files and prefetch.
-
Follow one of the methods below to open Disk Cleanup:
- Click Start > All Programs > Accessories > System Tools > Disk Cleanup.
- Press Windows key+R, then enter “%windir%\system32\cleanmgr.exe” (without the quotes) in the Open field of the Run dialog box.
-
Select the drive you want to clean. Generally, Disk Cleanup is used to clean the system drive (C:, or another system drive according to the settings). After selecting a drive, Disk Cleanup will scan the drive for various types of temporary files. You will see a list of temporary file types that can be deleted after the scan is complete.
- You may find the Clean up System Files option in the Disk Cleanup window. This option to perform a more thorough system cleanup can only be used by administrators. The Clean up System Files option can reach the deepest parts of the operating system, such as the outdated Windows Update catalog.
- Check the Temporary Internet Files and Temporary Files options, then click OK.
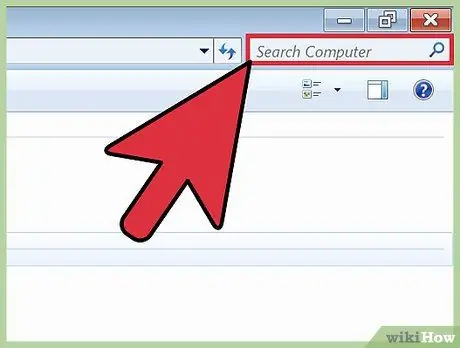
Step 2. Open a Computer or This PC window, then look for a file with the "*.temp" extension on drive C:
. Files with the extension TEMP are temporary files. An asterisk in a search keyword instructs the computer to search for all files with that extension.
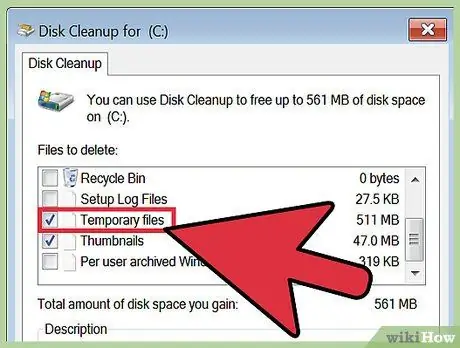
Step 3. Look for Free up disk space in Control Panel, then click the Free up disk space by deleting unnecessary files link
Check the Temporary files check box, then click OK.
Method 2 of 2: Deleting Prefetch Files
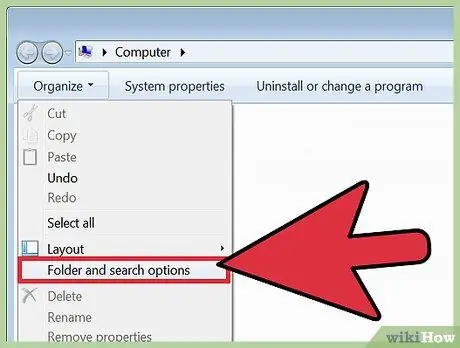
Step 1. Open Windows Explorer, then click Organize and select Folder and Search Options
On the View tab, select the Show hidden files, folders, and drives option, then click Apply. To close the Folder Options window, click OK.
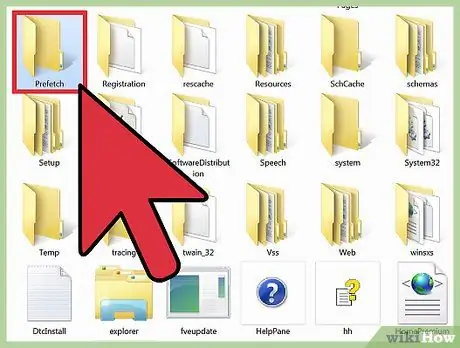
Step 2. Open your system drive
Generally, the system drive has the drive letter C:, unless you change it yourself. After the contents of the system drive appear, go to the Windows > Prefetch folder, and delete the files with the PF extension you want.
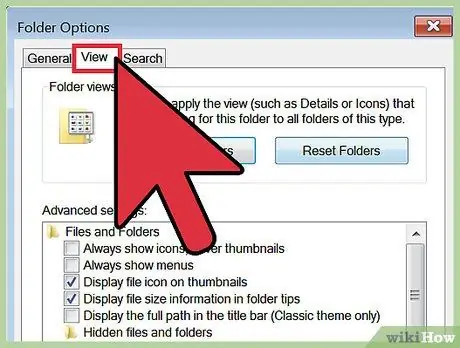
Step 3. Reopen Windows Explorer, then click Organize and select Folder and Search Options
After that, click the View tab.
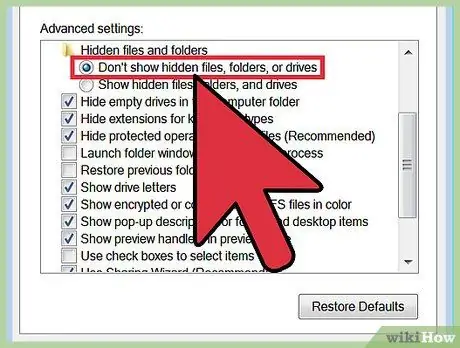
Step 4. Select the Don't show hidden files, folders or drives option, then click Apply
To close the Folder Options window, click OK.
Tips
- Clean the Recycle Bin to permanently delete temporary files.
- Deleting prefetch files can damage or slow down computer performance. Avoid deleting the prefetch file, unless you are an advanced computer user.


