- Author Jason Gerald gerald@how-what-advice.com.
- Public 2024-01-19 22:11.
- Last modified 2025-01-23 12:04.
Wire weaving or wire tying is a technique of bending wire around natural stone, sea glass, shells, amber (a kind of resin), or other beads to make jewelry. With woven wire crafts, you can make rings, pendants, necklaces, and other similar types of beautiful jewelry. Another plus, to make woven wire crafts, you don't need complicated tools to drill and make holes in the rock. With just a few simple tools and supplies, you can quickly make your own woven wire jewelry!
Step
Part 1 of 4: Determining Materials for Making Woven Wire Jewelry
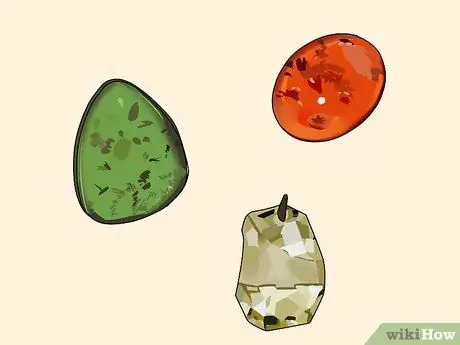
Step 1. Select the stone
Maybe you come across beautiful sea glass while strolling on the beach, or maybe you have a very beautiful semiprecious stone, and both make beautiful woven wire art. Symmetrical shapes can make woven wire jewelry look more professional, but sometimes a unique shape can actually accentuate the stone in the middle of the woven wire.
For example, we will use polished cobblestone beads. However, the principle of woven wire that will be explained can be applied to any shaped stone
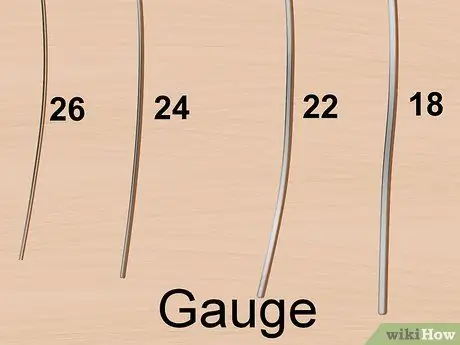
Step 2. Decide what wire will best fit your stone
There are many types of wire, both in terms of material and thickness, which are commonly referred to as gauge wire. Larger, heavier stones will require a thicker wire gauge. All of the wires used in this example have a gauge of 20 or 22. The sizes are often recommended for beginners.
- The smaller the wire gauge, the thicker the diameter. For example, 8 gauge wire is very thick, while 26 gauge wire is very thin.
- You can consider using copper jewelry wire in the manufacture of woven wire crafts for the first time. Copper has a beautiful color that will complement any type of stone. In addition, the price is also relatively cheap.
- Once you feel confident in your weaving skills, you can use fine silver wire, sterling silver, gold-plated wire, or gold-filled jewelry wire.
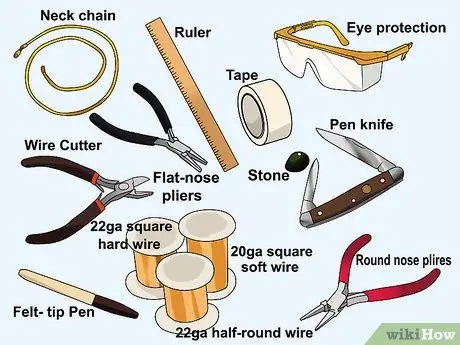
Step 3. Gather supplies for weaving the wire
In this woven wire example, the fixtures are polished cobblestone beads as the jewelry core, as well as inexpensive brass wire to tie them together. Most of these supplies are usually available at your local hardware store, craft store, or online marketplace. For this project you will need:
- 20 gauge square soft wire (1 meter)
- Hemispherical hard wire 22 gauge (30 cm)
- 22 gauge square hard wire (10 cm)
- Rock (faceted stone with a flat top)
- Protective glasses
- Whiteboard marker
- Flat tipped pliers
- Necklace chain (or other fastener)
- Folding knife (or similar thin knife)
- Round tip pliers
- Ruler
- duct tape
- wire cutter
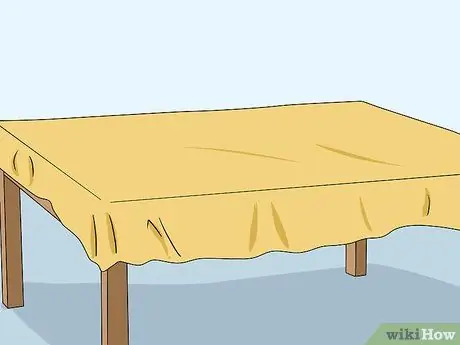
Step 4. Prepare the work area
Remove any objects that might get in the way and complicate the weaving of the wire. Prepare a large area. When cutting or bending long wire, you don't want to accidentally bump something with the ends.
Consider using a dedicated workbench, crafting table, or spreading a rag in your work area. When shaping and cutting metal wire, sharp pieces may lash or splinter. A rag mat will make the cleaning process easier when you're done
Part 2 of 4: Forming a Wire Frame for Stone Jewelry
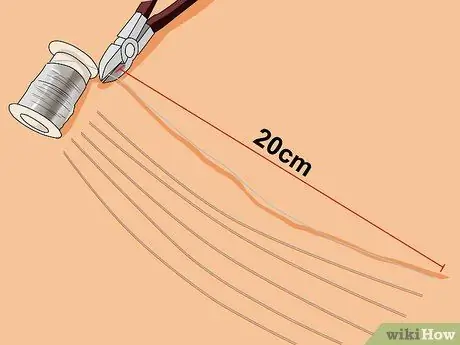
Step 1. Cut some wire to make a frame of the same length
Take a 20 gauge square soft wire and cut 6 pieces 20 cm long. For larger or wider stones, you may have to cut the longer wire. The middle frame for this kind of woven wire should be:
- Long enough to go around the outer ring of the rock.
- Thick enough to hold rocks. Heavy/large stones will probably require more than 6 pieces of wire.
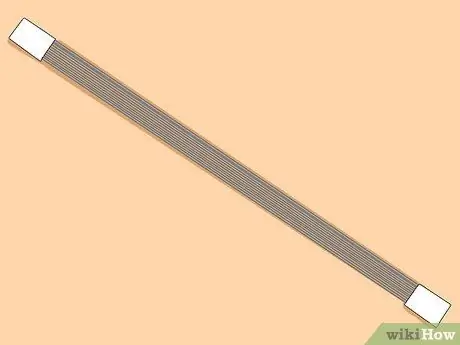
Step 2. Gather the freshly cut wire
Line up the wires and hold them together tightly, making sure they are all parallel to each other. Then, use tape to hold the ends together. This will keep the wire in position as you work through it.
Depending on the contours of the stone, a semi-circular wire frame may be more appropriate. In this example, the wire frame has been flattened to better hold the stone beads
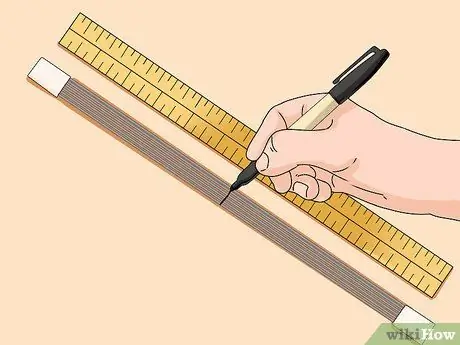
Step 3. Draw a line to mark the center of the wire bundle
Lay the wire bundle flat on the workbench and find its center point with a ruler. After that, mark this point with a marker.
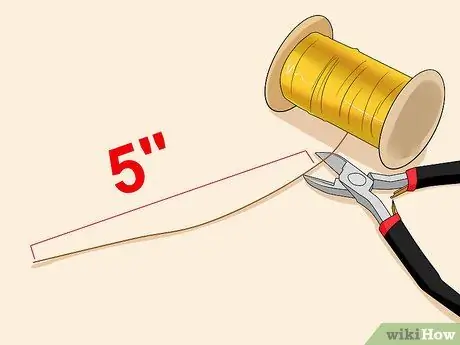
Step 4. Cut the first tie wire
This wire will be used to decoratively tie the midpoint of the bundle you just created. Use a wire-cutting tool to cut a 22-inch-long hemispherical hard wire.
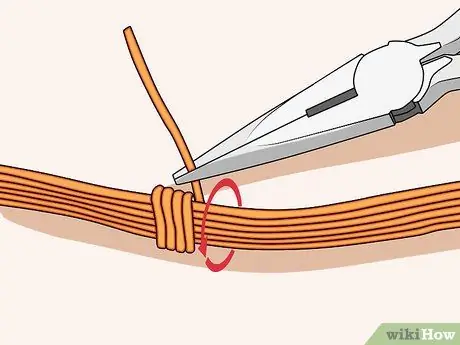
Step 5. Tie the 6 wire bundle at the center point
Use flat-tipped pliers to hold the 22 gauge wire you cut, then bend the wire around the bundle. Each time you finish wrapping, pull the wire tight while holding the bundle with your free hand. The bundles must be tied so that there are no gaps between each other, and the width of the binding wire must be the same on both sides, counting from the midpoint.
- Pinch the wire near the end with pliers to make it easier to shape.
- Once the middle node has been created, the mark at the midpoint of the bundle will no longer be visible.
- This bundle will later become the base of the weave.
- The bond width on the bundle should be about 5 mm for a 12 carat stone, as we are using in this example.
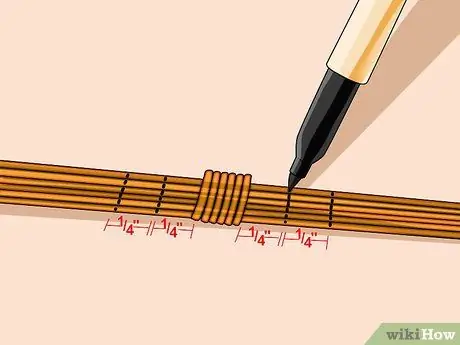
Step 6. Mark the next bonding point on the 6 wire bundle
Use a ruler and marker to draw a line 5 mm long from each edge of the center knot. After that, make another 5 mm mark outward from each previous mark.
These two marks on each side will determine the width of the next bond
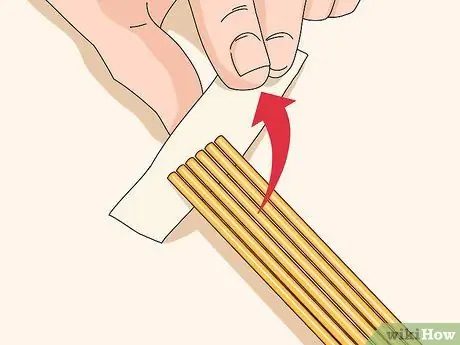
Step 7. Remove the tape from the end of the bundle
Once the middle knot is finished and the lines have been drawn on the wire bundle, you can remove the tape as it is no longer needed to tie the bundle.
Part 3 of 4: Making a Stand for Stone
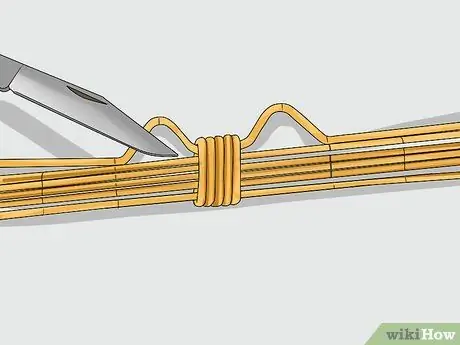
Step 1. Bend the wire to make a stand for the stone
Slide the penknife between the bottom of the top wire and the wire just below it. Then, use a knife to pry out the top wire until it forms an upside-down V. This V shape should point out of the other wire. Repeat the process until you have 4 V's on each side of the top and bottom of the middle knot.
- The four V shapes at the center knot will create a solid base for the stone. But in the following example, these stone beads are small and light, so only two Vs are needed.
- Each outermost wire must have two V's on each side of the middle knot.
- Each V starts at the end of the knot, leading out of the main bundle, until the end aligns with the first 5 mm mark. Then, bend the wire until it meets the second 5 mm.
- After making the V mount, allow the rest of the wire to extend back and align with the main bundle.
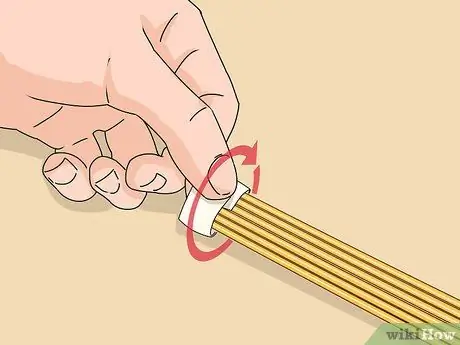
Step 2. Tape the ends of the bundle back
This will ensure the V arch stays outside the bundle to create the most stable mount for the stone. In addition, the tape will also hold the wire bundle together the next time you make the knot.
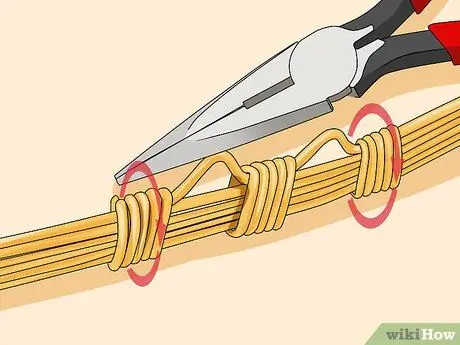
Step 3. Tie the 6-wire bundle with 22 gauge semi-round hard wire
Tie the wire around the bundle with pliers starting at the outermost part of the V, where the V shape returns flat and parallel to the rest of the wire in the bundle. Perform this step on both sides of the wire bundle.
When tying the second and third knots, make sure they are tight, neat, and of the same length. A few turns on either side is enough for this
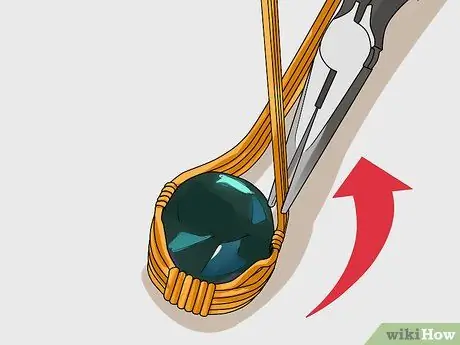
Step 4. Finish making the stone stand and wire frame
Take the pliers and, carefully and firmly, bend the 6-wire bundle around the stone until it covers the edges. Let the two sides of the bundle cross at the top center of the stone.
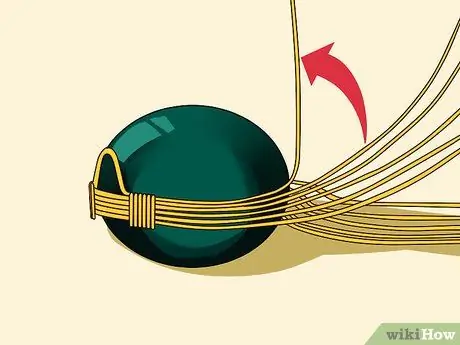
Step 5. Prepare the front stand for the stone
Bend one of the outer wires of the bundle from one side with flat-tipped pliers. Shape the wire so that it sticks up and away from the bundle.
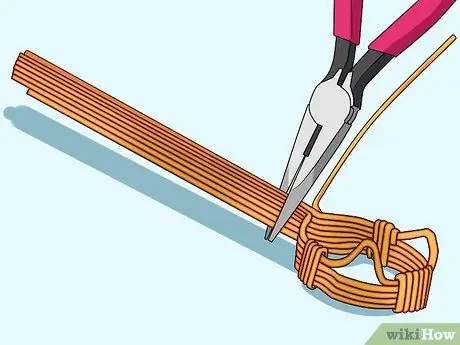
Step 6. Join the two ends of the wire frame
When the two sides of the wireframe meet at the top, align them so that each wire is facing each other in opposite directions from the first center node. The middle knot will be the bottom of the design and these joined ends will form the top.
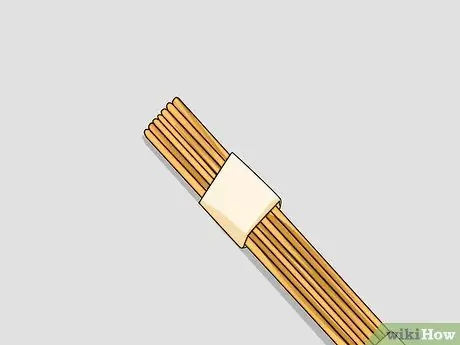
Step 7. Tape all the wire
This will prevent the wire from bending from the shape it was designed for when you made the final bond. Glue the ends of the 6 wire bundle.
Part 4 of 4: Finishing the Woven Wire on Stone Jewelry
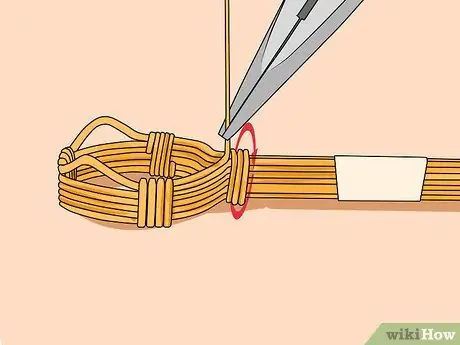
Step 1. Make the final knot at the top of the design
Select the top or bottom wire from the bundle and tie all the wires together in a knot that tightly wraps around the top of the design. A few turns of 22 gauge square hard wire at the top will suffice for this.
When you're done, unscrew the tape
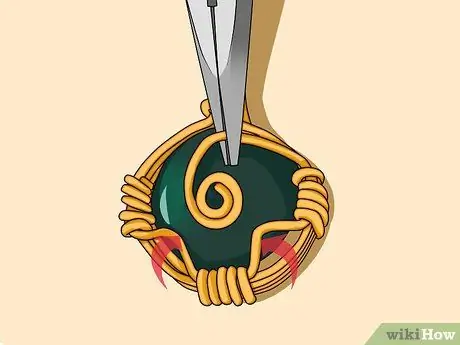
Step 2. Place the stones inside the wire woven design
Use the pliers to bend the front and back of the V to secure the pedestal where the stone is. Once the stone is in place, take the last wire that is pointing away from the bundle and wrap it around the stone in a spiral design to secure it even more.
- The spiral design will give your jewelry a professional woven feel.
- If the stone looks loose in the V shape and front, just take one wire from the bundle and add a spiral loop to the back for extra support.
- To add a personal touch, make a wavy or spiral loop at the top of the woven wire design if any wire is left.
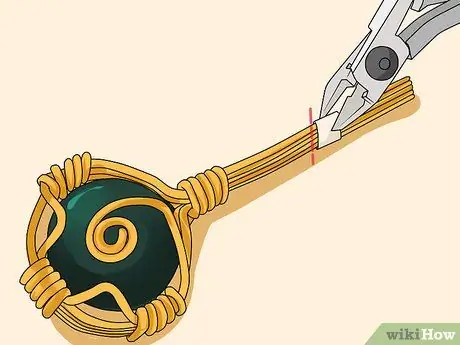
Step 3. Cut the remaining wire
Remember, when cutting the rest of the wire, you need to leave enough length at the top to form a loop. You will need this loop to attach a necklace chain or some other type of fastener, such as a small leather cord.
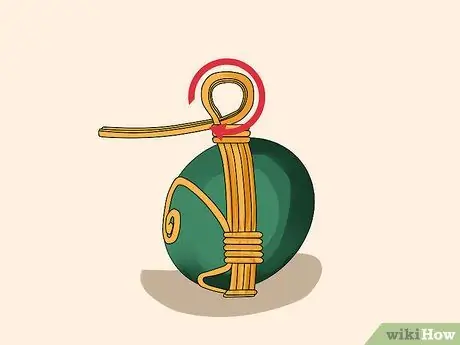
Step 4. Bend a wire or two across the top of the design to make a loop
This O shape will be the hole for attaching the necklace chain. You can make holes with one or two wires, depending on the size of the wire used.
Tips
- You can hide the unsightly ends of the wire by letting the ties face inward, toward the stone.
- Some types of wire have a polishing agent on their surface. This material can discolor your hands, but you can clean the wire easily. Just wipe with a clean cloth or tissue paper that has been moistened with alcohol.


