- Author Jason Gerald gerald@how-what-advice.com.
- Public 2024-01-19 22:11.
- Last modified 2025-01-23 12:04.
3D snowflakes look beautiful hanging on a window or on a wall. Fun for kids or adults, snowflakes are easy to make. Some people love it for Christmas, but you might like it any time!
Step
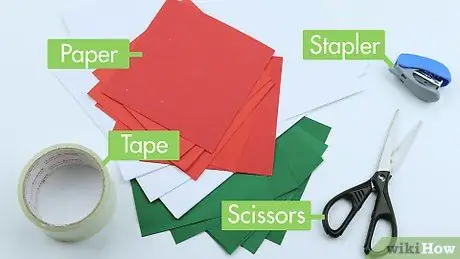
Step 1. Gather the ingredients
You will need 6 sheets of paper (white coffee paper will do, although you can use a more complicated type), scissors, clear tape, and staples.
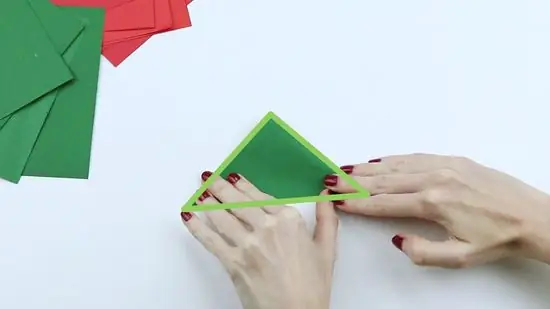
Step 2. Fold each of the 6 sheets of paper in half, diagonally
If the paper you're using doesn't form a perfect triangle, cut the ends of the rectangle that stick out and make the edges perfectly straight. You should now have a square folded into a triangle. Fold the triangle in half, to indicate where the folded "base" of the triangle is.
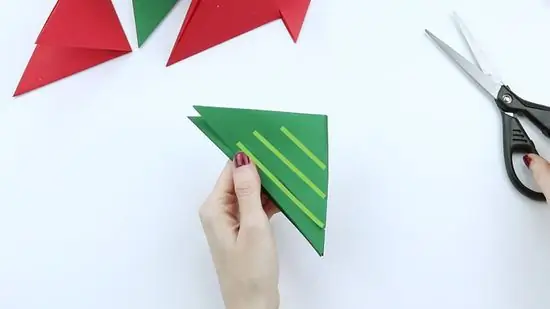
Step 3. Cut 3 lines on the triangle
Position the scissors along the bottom crease, and parallel to one end leading up (your cut should be diagonal). Cut almost all the way to the other side, but not all of it. Keep approximately the same distance between each piece. (This may not be suitable for thicker paper, as the number of layers makes it difficult to cut.) When you unfold the triangle into a larger triangle, it should look like the photo on the right.
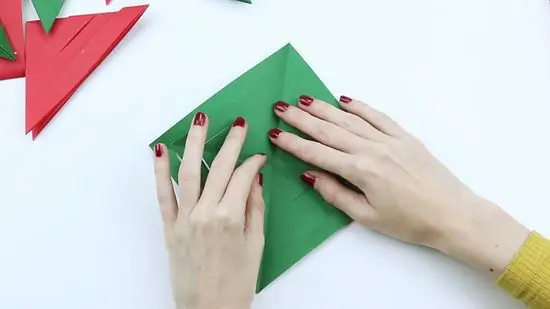
Step 4. Unfold the triangle once again
Turn the paper so that one end of the square is toward you. The paper should look like in the image.
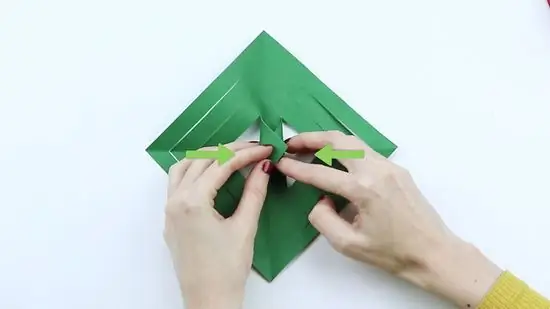
Step 5. Keeping the diamond shape paper facing up, roll the two innermost pieces of paper together to form a tube
Tape these two parts together. You should see a triangular shape on both sides of the roll.
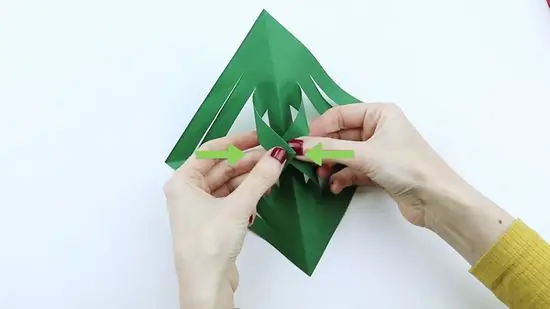
Step 6. Flip the diamond shape over to the other side
Take the next two pieces of paper and pull them together in opposite directions from the tube and tape together as before.
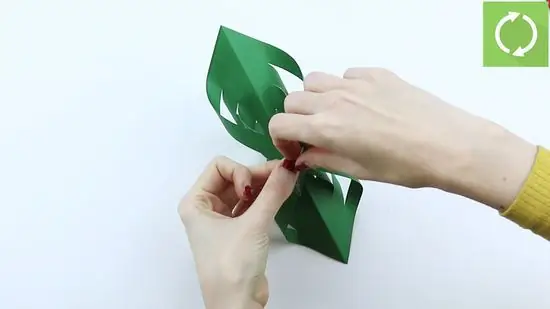
Step 7. Continue to turn the paper and join the two halves of the pieces together in alternating/opposite directions in the same way until all the pieces of paper are joined together
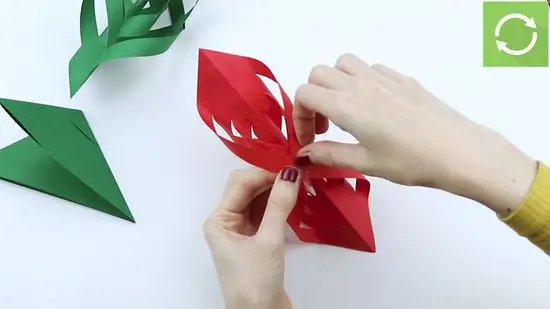
Step 8. Repeat Steps 3 - 7 for another 5 sheets of paper
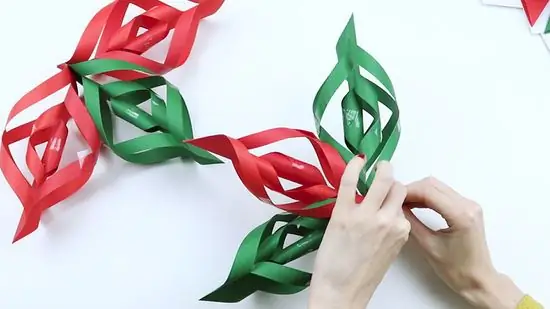
Step 9. Join the 3 perfectly rolled pieces together at one end and staple together using the other hand
Do the same with the other 3 pieces. You will now have 2 sections consisting of 3 strands or "arms" each. (For smaller snowflakes, it's easier to use double-sided tape or white glue instead of staples.)
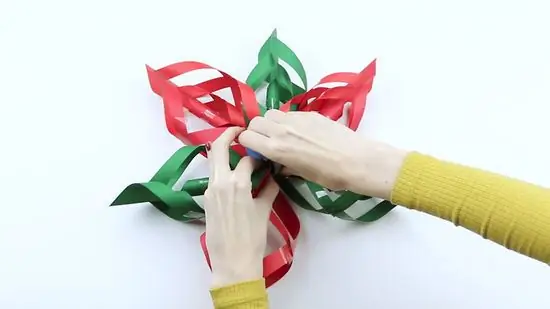
Step 10. Staple the two new sections together in the middle
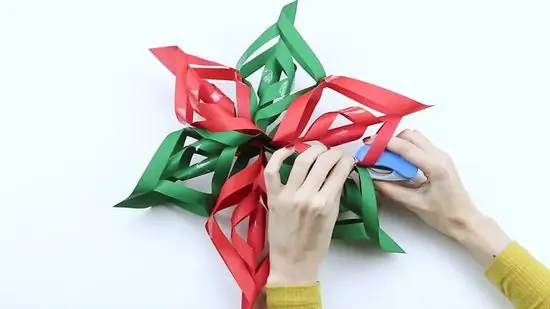
Step 11. Staple where each of the 6 arms meets
This is to ensure the shape of the snowflake stays in place. See the image above for the finished snowflake.
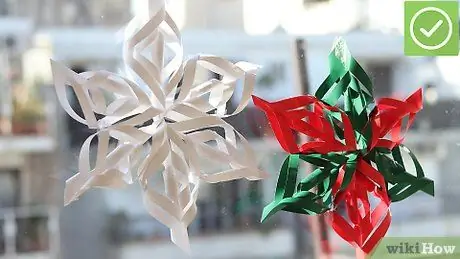
Step 12. Done
Tips
- Work slowly and in balance. In a hurry it's possible to lead to a shattered snowflake, or have your hand cut off by a pair of scissors.
- You can also put these snowflakes on lollipop sticks or kebab sticks to make windmills for celebrations like July 4th or birthdays etc. But you'll also need something to attach the stick to the snowflake like nails or swivel bolts or screws to make it spin or you can just put it on the stick.
- If you want a "perfect" snowflake, make sure the lines you cut are the same for each square.
- You can vary the color of the paper if you want to match the Christmas color theme - red or green for example. Gift wrapping paper left over from the holidays works well too - just remember that one side of the paper should be plain white while the other side should be colorful. You can also use foil or glitter paper.
- If you want a more attractive look, use glue dots. Glue dots peel off when the special paper comes. Glue dots can be found at Walmart, Target and other places that have a craft section. The price can range from $2-$10 depending on the quantity and size of the teats.
- If you want larger snowflakes, use larger paper. You will probably have to cut more lines; find out by how big your paper size is. Don't try to enlarge your snowflake until you are comfortable with the recommended paper size method of making snowflakes first.
- You don't have to be an artist to do this. Try!
- Be patient. This is not a craft to rush but it is challenging so proceed slowly and carefully.
- If you want to "give up" your snowflake, place some liquid glitter on the snowflake along various parts of the paper outline. Just remember, that these don't store properly (perishes easily) and you might throw them away.
- Use a glue stick if possible because it looks best. If the glue doesn't stick hold the ends together with the paper clips to dry (2-7 minutes)
- See "Sources and Citations" below for a 2-dimensional cock snowflake pattern for younger (and impatient) kids.


