- Author Jason Gerald [email protected].
- Public 2023-12-16 10:50.
- Last modified 2025-01-23 12:04.
Using Adobe Photoshop to create collages is very easy, even for those who have never used Photoshop. Once you've arranged your collage the way you want it, you can print it right away or add artistic effects with the help of Photoshop, which has a lot of features.
Notes: If you are using a Mac, use command instead of Ctrl for all the steps below.
Step
Part 1 of 3: Organizing Documents
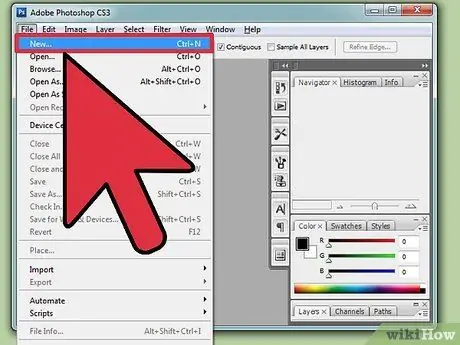
Step 1. Open a new document
Open Photoshop and use the File → New menu in the top menu. Enter the following information in the popup window, then click OK:
- Width and height: Choose the A4 paper type if you want to print on plain paper, or set it to 3000 pixels wide x 2000 pixels high for a landscape collage - or set the size to your liking.
- Resolution: Enter 300, or 200 if using a slow computer. Change the number to small if the collage is slow to open or edit, or change the number to large if the image looks broken.
- Color mode: "RGB color"
- Background content: Select "Transparent" if you are going to add your own background image. Otherwise, select "White" or "Black".
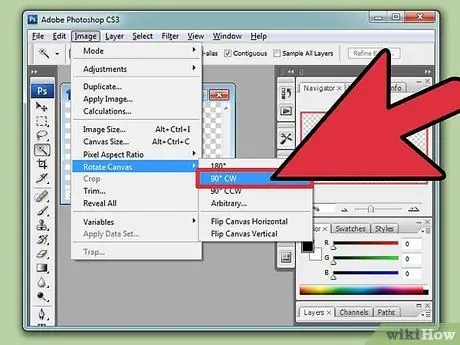
Step 2. Make the document landscape
Generally collages look good in landscape positions. In the top menu, use Image → Rotate Canvas → 90 degrees to rotate the document 90 degrees.
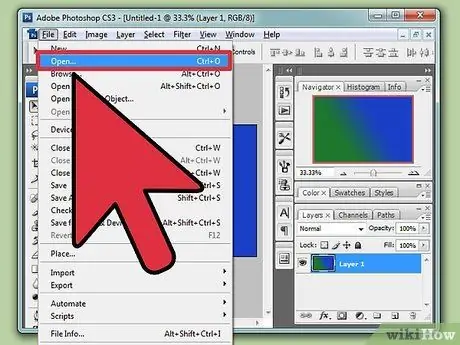
Step 3. Insert the background image
If you want to insert a background image into your document, you can select an existing image on your computer. Open the image by using the File → Open menu in the top menu. Drag images into your collage, or use the menus:
- Click the background image and press Ctrl+A to select it.
- Press Ctrl+C to copy the image.
- Click the collage window (titled "Untitled 1" unless you've saved it)
- Press Ctrl+Shift+N to create a new layer.
- Find the Layers panel and click "Layer 1". Type in a new name: "Background".
- Press Ctrl+V to paste the copied image into the background image.
- Adjust the background image as desired. Use the slider at the top of the Layers panel to adjust the layer transparency. Use the Ctrl+T key combination to resize or rotate the image.
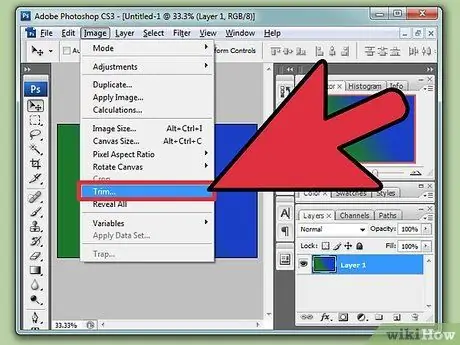
Step 4. Cut the background
If a background image has already been pasted, use this step to remove excess parts around the image. Go to Image → Trim in the top menu bar. Check the boxes labeled "Transparent pixels", "Top", "Right", "Bottom", and "Left". Click OK.
Step 5. Add a frame
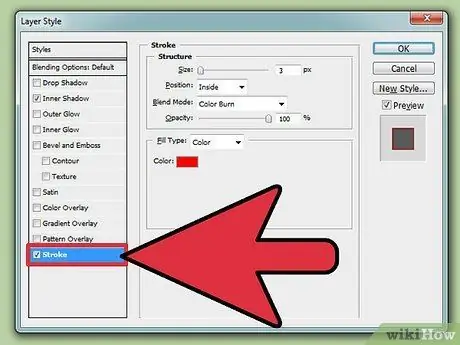
If you want to add a frame, double-click the layer name "Background". In the popup window, make the following changes:
- Click "Stroke" and check the box next to it.
- Change the position to "Inside".
- Change the size and color as you like.
- Check "Inner shadow" if you want to add a shadow inside the frame.
- Click OK when finished.
Step 6. Save your document
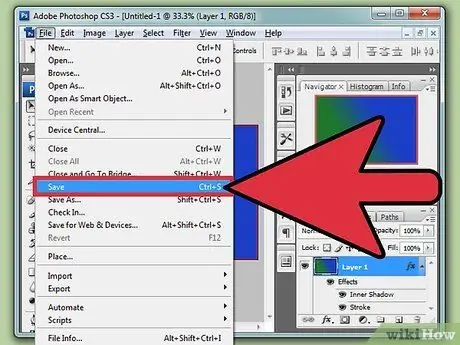
Go to File → Save and name your document "Photoshop collage", or another easy-to-remember name. Save documents periodically as you work on them so that your work doesn't get lost accidentally.
Part 2 of 3: Making Collages
Step 1. Insert the image
Now you can start inserting pictures. Use File → Open to open the image you want to insert. A new window will open every time you open an image. Transfer the images to your collage in the following ways:
- Drag the image directly into the collage document, without opening it, or open the image and drag it to the collage document. Name the new layer something descriptive. (To select more than one image at a time, hold down Ctrl.)
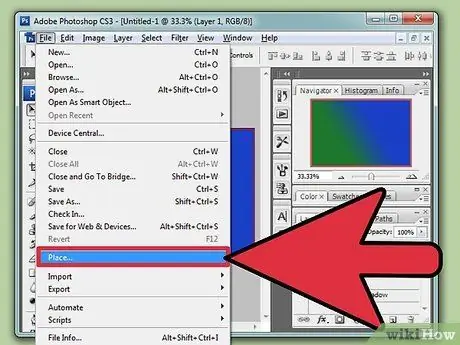
- Or open the image from File → Place Embedded (or just Place in older versions).
- Or open the image and use the copy-paste function to move it to the collage document. See more information on background image insertion above.
- If you only want to insert a portion of the image, use the "Rectangular marquee tool" at the top of the Tools panel. Drag the part of the image you want to capture, then copy and paste as described above.
Step 2. Cut the parts
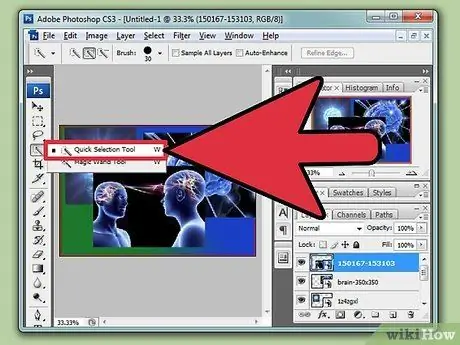
If you want to cut a part other than the rectangular shape, use the "Lasso tool" in the Tools window. Draw the section you want to delete, then press Delete to delete it. If you want to go faster with less precision, use the "Quick selection tool" by pressing the W key.
- Use Ctrl+Alt+Z to undo the error (undo).
- Use a magnifying glass to enlarge the view before selecting areas in more detail.
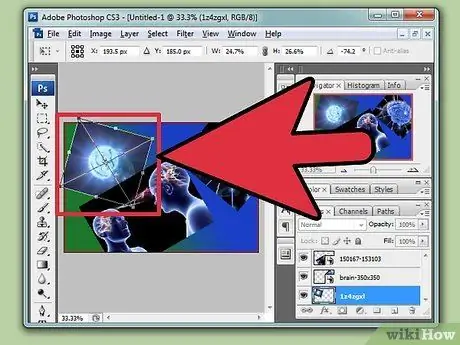
Step 3. Edit the image
Select the image in the "Photoshop Collage" document by clicking on the image name in the Layers panel. Press Ctrl+T to switch to Transform mode. Now you can edit the image as follows:
- To resize the image, drag the corner of the image. Press and hold down the Shift key to ensure that the changed image remains the same ratio and is not distorted.
- To rotate the image, place the cursor in the corner of the image until the cursor changes to two arrows. Click and hold, then drag the image to rotate it.
- To move an image, click and hold any part of the image and drag.
- When you're finished editing the image, press Enter or click the check mark near the top right corner.
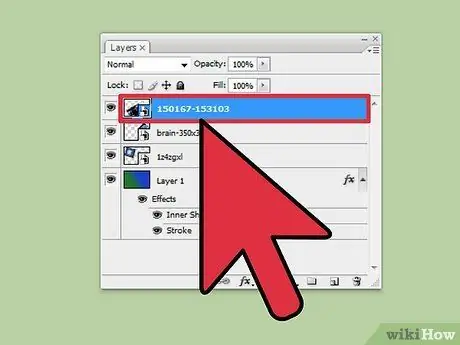
Step 4. Stack the images
The layer at the top of the Layers palette is the layer above the rest of the image. Click and drag the layer names in the layer order to change which image sits on top of the other.
Make sure the "Background" layer is always at the bottom. Layers below the "Background" layer will not be visible
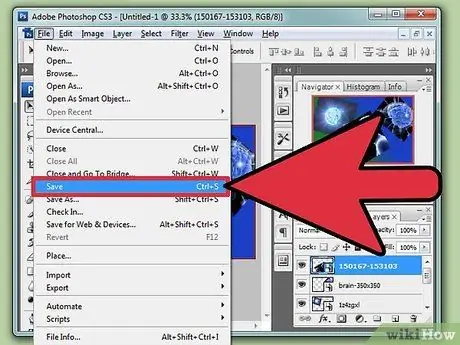
Step 5. Save the document and print
Save document changes with the File → Save menu, then print with the File → Print menu. If you think your collage needs further editing, read the instructions below, and print when you're done.
Use File → Save As to change the document format. Choose PDF if you want to print your collage professionally. Select JPEG if you want the collage to be opened in another image opener application
Part 3 of 3: Adding Extra Effects
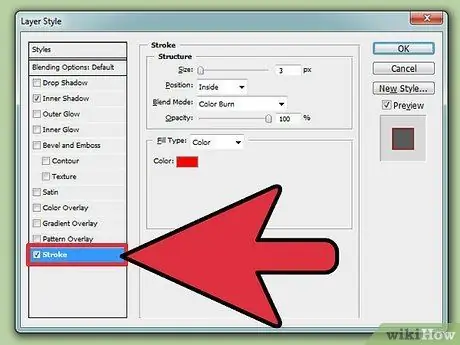
Step 1. Change the layer style
Double-click the line in the Layers panel to open the Layer Styles window for the selected layer. Add a frame with "Stroke" or a shadow with "Drop shadow", or try other options.
Do not double click the name of the layer you want to change because what will happen is that you will rename the selected layer. Click the blank next to the layer name
Step 2. Add an adjustment layer
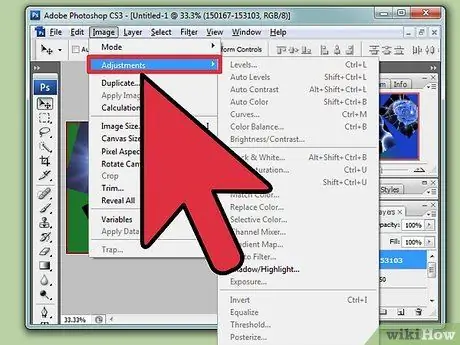
Use the menu Image → Adjustments or "Adjustments panel tools". You can set many things here and press Ctrl+Alt+Z to undo the previous action (undo). You can adjust image brightness, color balance, image sharpness, and many other settings.
By default, any adjustment layers you add will be applied to all layers in your document (in this case, all the images in the collage). This can be changed by right-clicking the adjustment layer in the Layers panel and selecting "Create Clipping Mask". The adjustment layer will only apply to the layer directly below it
Step 3. Add artistic effects
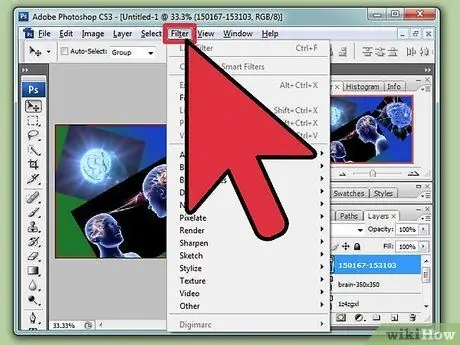
Go to Filter in the top menu and try the various options. Try the options in the Artistic, Brush-stroke, Distort, Sketch, Stylize, or Texture menus.
To make an image look blurry, use the Noise, Pixelate, Render, Sharpen, or Blur filters
Step 4. Add text
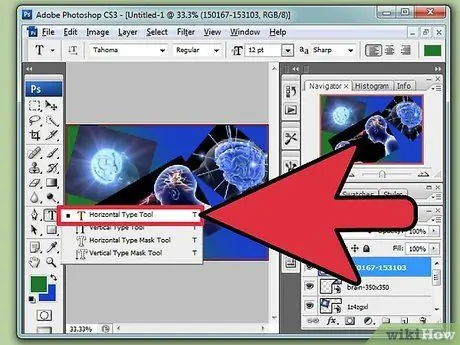
Press T, or click the T symbol in the Tools panel. Place the cursor over the image to create a text box. Type the text you want to write. Adjust the font size and appearance by highlighting the text you want to adjust and changing the settings in the toolbar above. Move the text box by dragging the dots on the edge of the box.
- There is no spell check in Photoshop. To check spelling, copy and paste the text into a text processing program (such as Microsoft Word) or an online spell checker.
- When you're done, click the black cursor in the Tools bar to return to the default mode.
Tips
- If you make a mistake, press Ctrl+Alt+Z to undo the mistake (undo), or use Edit → Undo in the top menu.
- Photoshop can only open certain types of files. If the image doesn't open, find the image file on your computer and double-click it to open it in another program. Use File → Save As to save the image file in JPEG, PNG, or BMP format, then open the new file in Photoshop. If you can't, look for a file format converter online.
- To make the document look fit on the screen, press Ctrl+0 (zero).
- Change the color image to black and white with Ctrl+Shift+U.


