- Author Jason Gerald [email protected].
- Public 2024-01-19 22:11.
- Last modified 2025-06-01 06:05.
Coloring nails by combining several solid colors (otherwise known as color blocking) involves the process of drawing neat geometric shapes on each nail using colorful nail polishes. If you use strong, contrasting colors, your nails will look cool, modern and very eye-catching. The color blocking technique is actually pretty easy, but you'll need a little practice to get shapes that look sharp and neat.
Step
Method 1 of 2: Preparing the Base for Nail Polish
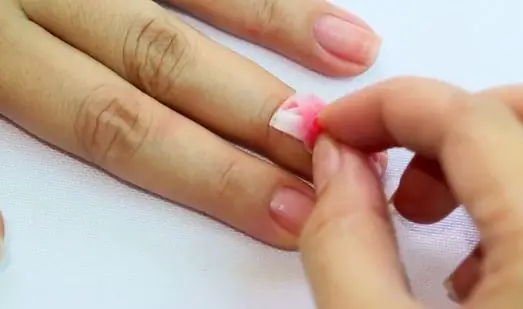
Step 1. Remove any nail polish that is now on your nails
Use a small amount of nail polish remover on a cotton swab to clean it. If necessary, trim and file your nails first to get the shape you want. Then, paint all the nails with a clear base coat.
-
The base coat will make the surface of the nails smooth making it ideal for applying nail polish while protecting the nails from being stained by strong colors.

Image - A base coat that dries quickly and also acts as a top coat can be a good choice.
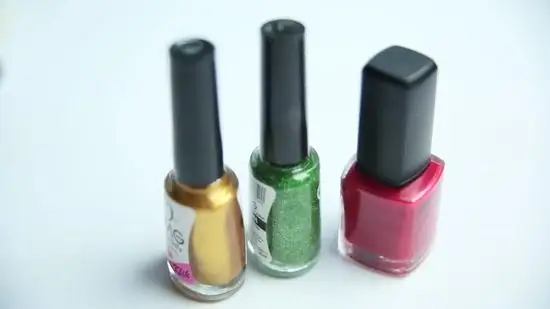
Step 2. Choose three contrasting nail polish colors
The bolder your color choice, the more striking your nails will be! You also need to make sure that at least two of the nail polishes you choose are thick enough, so that when you apply the color, you won't see the base coat underneath.
- If you want to add a "wow" factor to the look of your nails, consider incorporating a shimmering silver or gold color into your color choices.
- Good color combinations include: pink, silver and red; pink, yellow and blue; gold, green and red; or white, red and purple. But it's really a matter of taste!
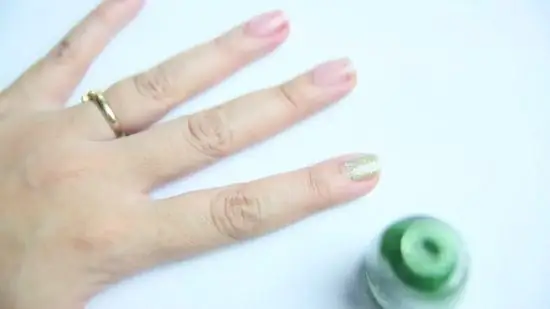
Step 3. Paint your nails the lightest color
It's important to always apply the lightest of your three color choices as the first coat. The first reason is that a lighter color when applied over a dark color will not give satisfactory results, and secondly, a lighter base color will allow other colors to be really striking. You may need to apply more than one coat of base color to get the desired effect, depending on the type of nail polish. Once the paint is dry, you can apply a clear coat of paint to make your base color even more shiny.
- When painting your nails, try to follow the three-line rule: first apply the polish by making a vertical line down the center of the nail, then draw two more lines on each side of the center line. If you're using wide strokes, these three lines are enough to cover the entire nail.
- Remember, it is better to apply several thin coats of nail polish than one thick coat. The reason is that a thin layer dries faster, and is less likely to cause smudging than a thick layer.
Method 2 of 2: Decorating Nails with Color Combinations
Step 1. Choose the method you want to use to create the color combination
There are two main methods for creating color combinations on your nails:
-
The first method involves using tape to create a neat line on the nail. This method is very easy, but it's very important to wait for your base color to dry completely before applying the tape, otherwise the polished nail polish will be ruined.

Image -
The second method involves applying the different colors yourself using a very thin paintbrush, which you can buy at an art store (or using the nail polish brush itself). This method is less troublesome than using tape but requires a very steady hand!

Image
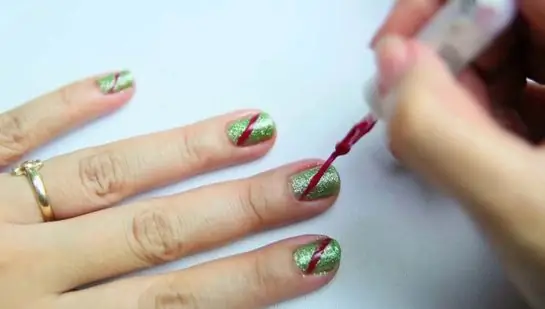
Step 2. Make your first color combination
Now it's time to create your first color combination! If you're using tape, cut out an inch or so of tape and apply the tape to the nail diagonally, so that the nail is divided into two halves. If you're using a brush, dip the brush in the second color and then carefully draw a diagonal line across the nail, doing so in your preferred direction. Make the lines as straight as possible, otherwise the color combination will look messy.
- Do the same for each nail, no matter which method you choose. Diagonal lines should be drawn in opposite directions on each nail - the direction of the lines should not be uniform. Keep in mind that these colors will later form a triangle.
- If you're using masking tape, it's a good idea to apply the following tip, which is to stick the sticky part of the tape to the back of your hand a few times before sticking it to your nails. This will reduce the stickiness of the tape so that when you remove the nail polish it doesn't come off.
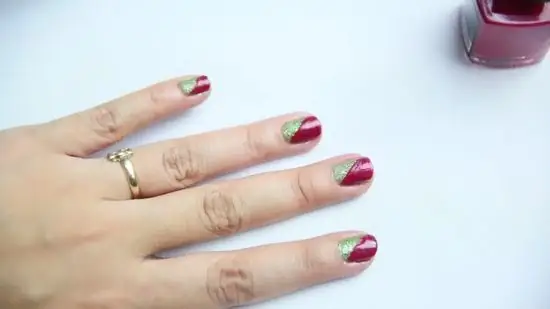
Step 3. Apply the second color
Once you have the guide lines, you can paint that part of the nail a second color. If you are using masking tape, paint the exposed part of the nail, allowing the polish to slightly cross the line. This trick will give you very neat lines. If you're using a brush, apply the color below (or above) the line you drew in the previous step, being very careful not to cross the line.
- Make sure the tape sits evenly over the nail, otherwise the nail polish can seep under the tape and ruin a neat line. After you've applied the color, let the polish sit for 30 seconds before pulling off the tape. Then let the paint dry completely.
-
Once the second color is completely dry, you can apply an outer coat of paint to make the coat really harden and make it even shinier.

Image
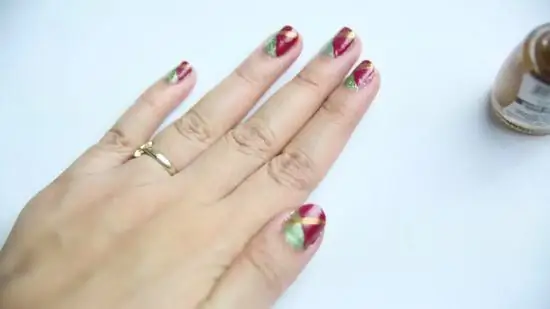
Step 4. Make a second color combination
Once your nails are completely dry, you can start working on the second color combination. If you're using tape, follow the same method as before, this time dividing different sections of the nail. If you're using a brush, dip it in a third color and draw another diagonal line, starting in the opposite direction to the first.
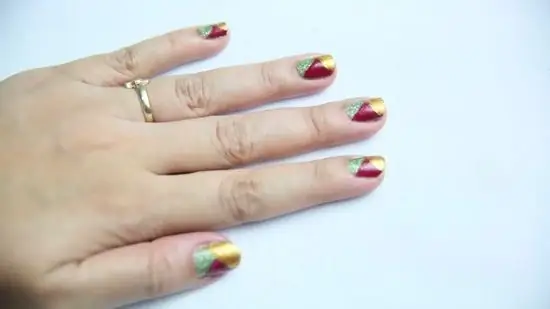
Step 5. Apply the third color
Apply the third and final color using the same method described above. If you're using masking tape, allow the nail polish to dry for 30 seconds before you pull the tape off. If you are using a brush, make sure you apply your final color combination very carefully so as not to cross the line.
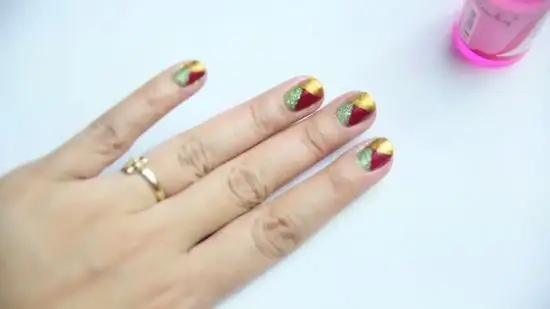
Step 6. Clean your fingers
It's hard to keep your fingers from getting nail polish while painting them, so take some time to clean them before you show off your nails.
- All you need to do is dip a cotton swab (preferably with a pointed tip) in the liquid nail polish remover and carefully wipe off any excess paint that gets on the skin around the nail.
- Try to do it slowly and as carefully as possible - you don't want to spoil all your hard work by accidentally removing the polish on your nails!
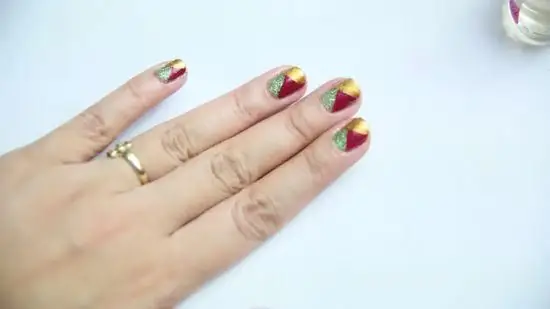
Step 7. Finish with an outer coat of paint
Once the final color is completely dry, finish your job by applying an outer coat of paint as a final coat to add strength and shine to your nails. Nails with your color combination are now ready to show off!
Step 8. Experiment with different colors and shapes
You may need a little practice to get perfect results with the color blocking technique, so while you're working on it, why not experiment with lots of different color combinations and patterns?
-
For example, instead of making triangles over your nails, try making squares! Just apply your base color, then tape (or paint a line) vertically down the center of the nail. Apply a second color on the blank side, wait for the polish to dry, then apply another piece of tape (or draw another line) horizontally over the nail. Carefully apply the third color to the exposed half of the nail, forming two squares on one side of the nail and a rectangle on the other.

Image -
Another option that is less time-consuming is to paint the tips of the nails in a different color. Apply your base color as usual, then stick a piece of tape near the end of each nail, only the top exposed. Use a darker, contrasting color to paint the tips of the nails, then remove the tape. Looks like a French manicure - but with a cool touch!

Image
Tips
- A thin brush for painting will be easier to use than a regular nail polish brush; the painting brush has a longer handle for a more comfortable grip.
- Wait at least 10 minutes for the nail polish to dry after you apply it. The more layers of paint you make, the longer you will have to wait. If you're impatient, your nail polish will tend to smudge and smudge more easily.
- Try making different color combination shapes on each finger. This will add a new dimension to the art of nail painting.


