- Author Jason Gerald [email protected].
- Public 2024-01-19 22:11.
- Last modified 2025-01-23 12:04.
Eclipse is one of the most popular development environments for Java. This program provides everything you need to create a Java project from scratch. Before you start working on a new project, you must first create a project. The process of creating a new project in Eclipse is actually quite easy. However, if you installed Eclipse to program in another language, you might get confused.
Step

Step 1. Install Eclipse IDE for Java Developers
When installing Eclipse for the first time, you are given the option to select an IDE (integrated development environment). In that option, select "Eclipse IDE for Java Developers". The program will install the files and tools needed to create a Java project.
If you installed Eclipse to program in another language, you can add support for Java from within the application. Click the "Help" menu > "Install New Software", then select "All Available Sites" from the "drop-down" menu. Enter "java" in the "Filter" field, and check the "Eclipse Java Development Tools" box. After that, click "Next". Follow the on-screen instructions to download and install the Java tools. Once the installation is complete, Eclipse will restart
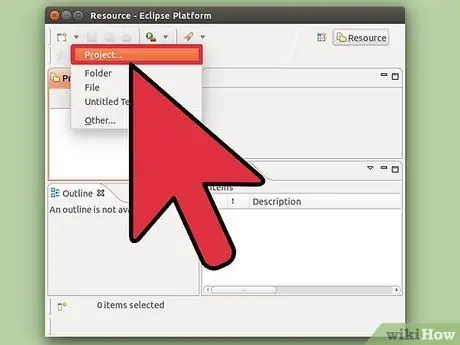
Step 2. Click "File" → "New" → "Java Project"
This will open the "New Java Project" window.
If you don't see the "Java Project" option even though you have Java Development Tools installed, click "New" > "Projects…", then open the "Java" folder and select "Java Project"
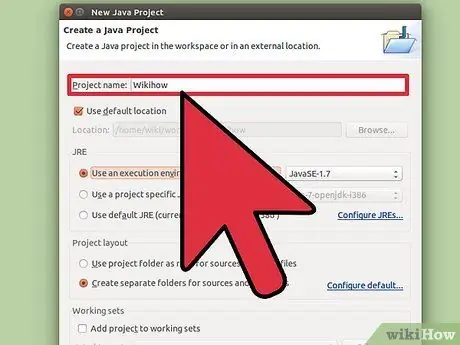
Step 3. Name the project
This name doesn't have to be the same as the program's final name, but it should help you and your colleagues identify the project.
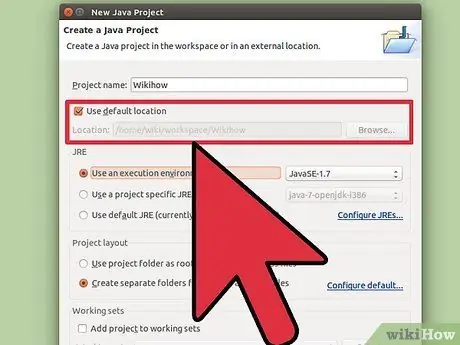
Step 4. Select the location to save the project file
By default, the files will be saved in the Eclipse directory. If you wish, you can save the file in a location of your choice.
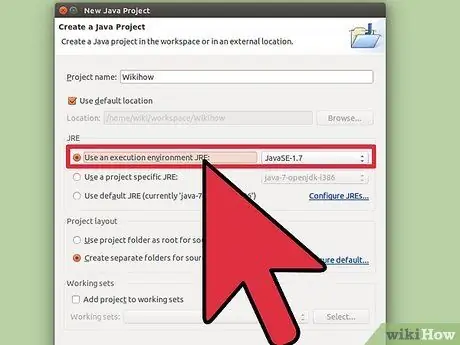
Step 5. If you are programming for a specific Java Runtime Environment (JRE) version, select the JRE version you want to use from the drop-down menu
Generally, the latest JRE version will be selected.
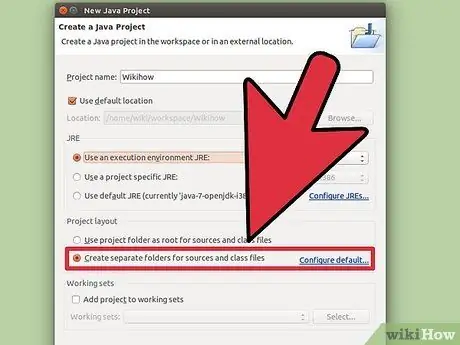
Step 6. Select the project folder layout
You can use the entire "project" folder, or create custom "sources" and "classes" folders. By default, the "Create separate folders…" option will be selected. However, you may need to adjust these options according to the needs of the project.
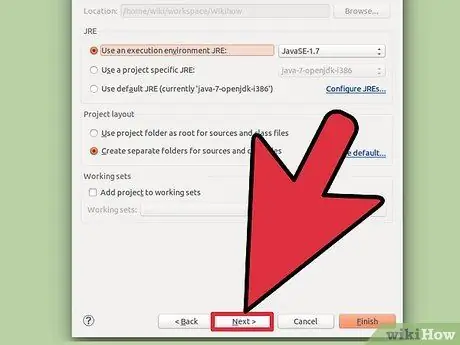
Step 7. Click "Next" to open the "Java Settings" window
In this window, you can add additional resources and libraries for the program.

Step 8. Use the Source tab to specify the build path, which the compiler will use to compile the program
You can create additional source folders, link external sources, and add and remove folders from the build path. The compiler will use the build path to determine the source to compile.
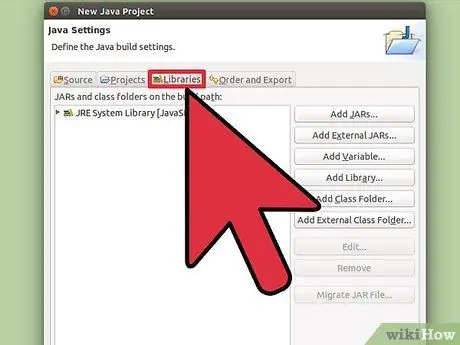
Step 9. Use the Libraries tab to add libraries to the project
This tab allows you to include a built-in JAR file or library into your project. By importing a JAR file, you can use libraries from other projects.
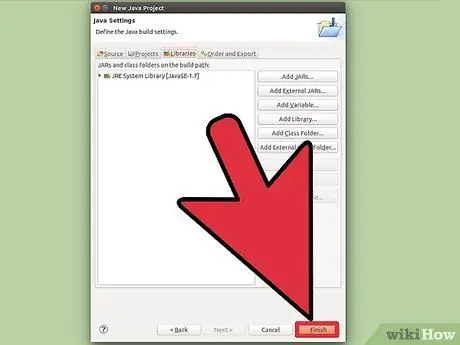
Step 10. Click "Finish" to start working on the project
After clicking "Finish", you will be directed to the work page. If you use Eclipse to program in another language, you will be prompted to switch to the Java perspective. This step is recommended to get the most out of the IDE.
- Your project will appear in the "Package Explorer" bar on the left of the screen. If you see the Eclipse Welcome tab, click the little Java button on the left side of the window.
- Read the following detailed guide to creating your first Java program.


